Alien: Isolation → Файлы

Alien: Isolation — приключенческий стелс-хоррор с видом от первого лица во вселенной «Чужих». Сюжет игры разворачивается спустя пятнадцать. Подробнее
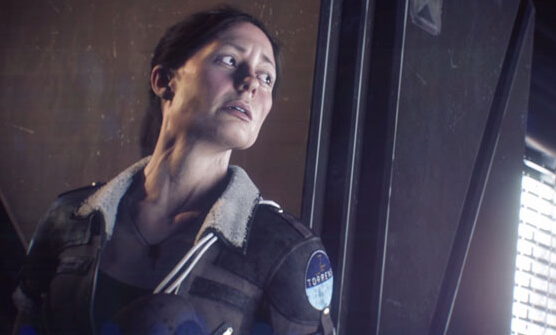
Чужой не видит Аманду Alien: Isolation

Пройдя игру на разных уровнях сложности, я устал от чужого и решил создать данный мод, чтобы иметь возможность спокойно осмотреть станцию Севастополь. Теперь вашими противниками будут только люди и андроиды.
6 не понравилось 2 понравилось


Если вы хотите облегчить прохождение Alien: Isolation, то можете воспользоваться нашим файловым архивом. Здесь собраны только проверенные и работоспособные файлы для игр, которые можно скачать бесплатно.
При скачивании файлов нужно обратить внимание на версию игры, для которой он предназначен. Трейнеры для игр, например, не всегда совместимы со всеми версиями игры, так как разработчики, выпуская обновления, могут менять архитектуру игры и принципы работы тех или иных ее механик. Обычно версия, с которой совместим файл, указывается прямо в его названии.
Alien isolation моды как установить


I thought I would make an updated guide to modding Alien Isolation to more modern 2020 standards including a ReShade that I complied. I also combined all of the fixes and Settings tweaks that can be done to the game here in this guide so that future folk won’t have to look all over for this info like I did.
The other Reshades from https://sfx.thelazy.net/games/game/691/ that are available are outdated that relied on ReShade 2.0 fx files and configuration values that have changed. So thats a no-go.
And now that ReShade 4.7 is out, I wanted to bring some life back into this gem with a dark, yet modern ReShade that pairs nicely with the other mods included.
I wish to thank other authors here on Steam for showing me how to do certain parts of this guide, and for directing me in how to set these mods up together. Notably jmoyano92 and robsmashed and AngelGraves13.
First, before we do anything let’s find our game file location. On steam right-click the Alien Isolation game in your library, and then hover over manage. You will then see the option to “Browse local files” Click this and a window will open to the game’s root location. Keep this window open as you go through the guide, as we will need to drag some files into here.
Full Level of Detail / 4K Shadow Map Resolution / Horizontal FOV / Alternate Planar Reflections
Now paste that ENGINE_SETTINGS file here and overwrite the original «ENGINE_SETTINGS» (make a backup first if you want)
IMPORTANT INFORMATION ON USING THIS MOD TO SEE CHANGES IN-GAME:
—Change Shadow Map Resolution to the highest setting (now 4096)
-Alternate planar reflections (the pretty reflective floors and surfaces): THIS IS NOT ENABLED BY DEFAULT. To enable, change from «On» setting to «Alternate» IN VIDEO OPTIONS inside the game.
-Field of View values changed to horizontal FOV: Alien: Isolation uses Vertical FOV instead of Horizontal FOV. The values have been renamed to avoid confusion and converted to horizontal values in-game. 85 IS THE RECOMMENDED VALUE.
-Anisotropic Filtering: Force 16X Anisotropic Filtering in your videocard’s control panel for high quality AF.
-How to force Improved Anisotropic Filtering:
NVIDIA Control Panel
— Open the NVIDIA Control Panel found in in Windows’ Control Panel.
— Proceed to the 3D Settings / Manage 3D Settings tab on the left side bar.
— Select Alien Isolation under ‘Program to customize’. Alternatively, manually select the executable using the ‘Add’ button.
— Change the ‘Anisotropic Filtering’ option to 16x.
— Apply the changes.
AMD Catalyst Control Center
— Open the AMD Catalyst Control Panel found in Windows’ Control Panel.
— Proceed to the Image Quality / Anisotropic Filtering tab.
— Uncheck the ‘Use application settings’ box.
— Set the option to 16x.
— Apply the changes.
Now for the Second mod:
Alias Isolation is a mod for Alien: Isolation. It adds temporal anti-aliasing into the shipped game, and fixes a few small issues with the rendering.
Follow the link above and then click on aliasIsolation-1.0.6.7z. Unzip the file.
Save the alias isolation mod files in a folder on your desktop or any other location of your choosing. Your destination for these files could be «Program Files», or «My Documents», or anything else as long as no special permissions are required to access that directory.
-Step one: Run «aliasIsolationInjectorGui.exe»
Once you press the «Launch Alien: Isolation» button, the mod launches Alien: Isolation and hooks into it.
-Step two: Video Settings with Alias Isolation mod:
·Anti-aliasing must be set to SMAA T1x.
·Chromatic Aberration must be disabled.
·Motion blur must be enabled.
We are going to launch the game through this program from now on, so after you place the files where you would like, make a shortcut to the «aliasIsolationInjectorGui.exe» file.
If you want to see the difference the Runtime toggle is «Ctrl+Delete». To re-enable it, hit «Ctrl+Insert».
Here is a tweak to the graphics of the game at the system level.
THIS STEP IS COMPLETELY OPTIONAL. ONLY USE IF YOU HAVE A DOPE GRAPHICS CARD.
Dynamic Super Resolution renders a game at a higher, more detailed resolution and shrinks the result back down to the resolution of your monitor, rendering applications at a higher quality (even 4K-quality graphics) than is normally allowed. It’s a very GPU-expensive solution, so be mindful of the performance costs that come with this trick. I haven’t used an AMD card to do this before, but I am sure there is a similar option on their control panel.
— Choose one or more DSR settings of your choice (higher is better, though more resource intensive on your graphics card/performance. I personally use 2.0 when I mess with this setting, but I mostly play with it off
Make sure to Select DSR smoothness below the DSR – Factors setting and set it to 0%. This is so that it does not interfere with the AA mod and produce polygon jaggies.
— Finally, open up Alien Isolation and choose the new rendering resolution in the “Video” section of the options menu. You will now see options above your standard resolution. You can select your native resolution or turn this option off if you find it to be too hard on performance.
This mod removes a strange art choice by the developers. There is normally an odd artifact on the screen when looking at bright lights and flares, but this effect is hard to remove on its own without removing all the other lighting effects that the player sees. Thankfully a kind modder named Julia Ripley van Biohazard fixed it for us an absolved the developers of their sins.
Here is a comparison photo from the mod page to show the effect, and its removal.
Make a copy/Backup of the original LENS_FLARE_CONFIG.BIN if you wish.
To install simply go to the window we opened at the beginning of the guide, go the DATA folder (usually C:\Program Files (x86)\Steam\steamapps\common\Alien Isolation\DATA), and overwrite the original LENS_FLARE_CONFIG.BIN file with the downloaded mod file.
Simple mod. Big Changes.
This is the point where we add a Reshade. For this guide we are going to use my own that I updateted to be compatible with ReShade 4.7
First go here https://reshade.me/ and click the download button at the bottom of the page. It will download an executable which you will then run.
It will scan for games and you should see AI.exe in the list with its red egg icon. Click the icon and then click “Use Selected Application” at the bottom of the program.
Another small window will popup asking what rendering API the program uses. Click the “Direct 3D 10/11/12.
Another window will pop up asking what effect packages to install. Make sure the SweetFX by CeeJa” box is ticked, and then hit OK.
Yet another window will come up with 5 shaders listed and ticked, make sure they are all ticked and then hit ok.
Do the same for the next window asking about which “SweetFX” files to install. Ensure all boxes are ticked and hit ok once again. The program will now bring you back to a smaller window and state that “ReShade Setup was successful!”
Now that we have the base ReShade and Sweetfx shaders installed, We need one more shader file to finish the installation.
Head to this link https://reshade.me/forum/shader-presentation/2706-shaders-by-ioxa-for-reshade-3-0and click the “Download Shaders by Ioxa for ReShade 3.0” You will be taken to a dropbox page and click the download button in the top right corner. Now click “Direct Download” and you will download the file.
The ReShade folders were created in your Alien Isolation folder, and we need to get to them now. This is the usual path to the folder: C:\Program Files (x86)\Steam\steamapps\common\Alien Isolation\reshade-shaders\Shaders.
If you are having trouble finding the game folder, follow the first part of the guide where I explain how to locate the game files on steam.
Once you have copied the the DefaultPreset.ini from my mod link, copy it into the main folder of the game install next to the AI.exe. This located in C:\Program Files (x86)\Steam\steamapps\common\Alien Isolation
If Windows asks you to overwrite the old DefaultPreset hit yes.
A Mod so good multiple gaming magazines did features on it while they collectively ♥♥♥♥ their pants in terror. Here is what the creator of the mod (somethingelse666) has to say about its intended effect.
«I wished to try my hand at slightly tweaking the Alien AI to have wider ranges in stalking, patrolling, taking breaks, because it seemed like a good way to at least simulate more unpredictability, of when and where the alien will pop up.»
Basically, beyond changing its behavior, this mod removes a proximity leash that the alien has to the player. Now the Alien can go ahead of you in the level, or often behind to trap you and ambush you in new ways. Most who have played with this mod have said Unpredictable Alien completely changes the game for the better and creates a more intense and dangerous playthrough.
But now that the big bad is even badder, we need some better equipment.
If playing with the Unpredictable Alien mod, I highly recommend using a weapon mod, as the alien is more dangerous now. These mods also balance very strong humanoid enemies so that they are no longer bullet sponges and will now take the damage expected from projectile weapons. From here you have two main options:
Install Instructions for Softcore:
Install of LifeSavers:
— Copy all the files from folder «Tool» into C:\Program Files (x86)\Steam\steamapps\common\Alien Isolation\DATA\WEAPON_INFO\AMMO (Don’t forget to make copy of your original files)
I personally use Softcore, as it balances carrying capacity for light sources. This carrying capacity upgrade works very well with my new RESHADE that is included in the guide, as the settings in the 2020ALIEN ReShade will make the environments darker.
If using lifesavers with the Unpredictable Alien mod, only copy the “Tools” folder, Leave the “ALIEN.bml” file and the “Advance Behavior Tweak Files (beta)” folder alone and don’t install it.
A simple mod that stops the droning on of Save Points. Plus this mod makes you look for them instead of following the ear ringing ping.
Лучшие моды для Alien: Isolation
Признайтесь, многие из вас любят вновь пройти Alien: Isolation – прежде всего для того, чтобы вернуться в ту удивительную ретро-футуристическую атмосферу. Однако стоит лишь вспомнить о первом опыте прохождения игры, и сразу что-то останавливает, но что, если есть какой-то способ убрать Чужого и просто исследовать игровой мир? И он есть!
Затем возникает вопрос: есть ли моддинг комьюнити у Alien: Isolation? И мы нашли несколько действительно крутых файлов на Mod DB. Никакой из них сильно не меняет игру, но делает достаточно небольших изменений, которые могли бы добавить некоторое разнообразие при втором прохождении Alien: Isolation.
Life Savers

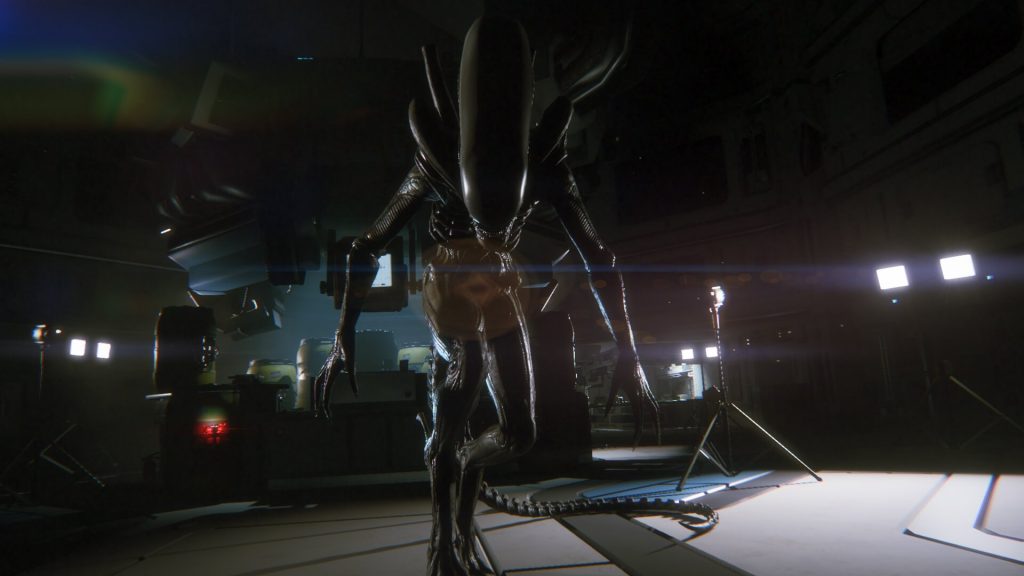
Unpredictable Alien

Если вы вдруг решили, что Чужой из оригинальной версии игры был недостаточно сложным, то данный мод меняет его ИИ, чтобы сделать врага более непредсказуемым. Он удаляет «поводок», которым Чужой привязан к Рипли, давая ему больше свободы.
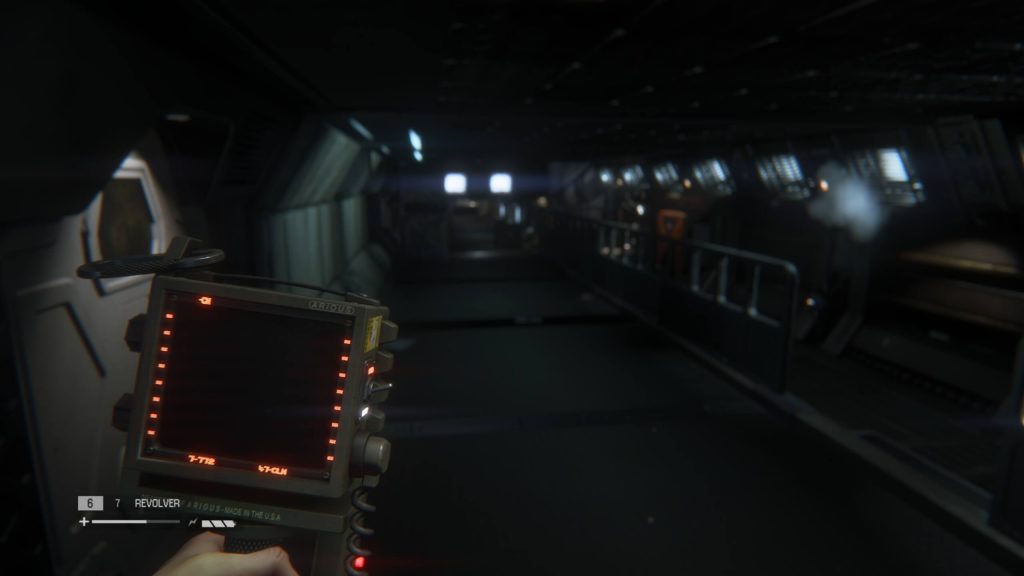
Motion Tracker Remover

Считаете, что уклониться от ксеноморфа – довольно легкая задача? Тогда попробуйте поиграть без помощи трекера Рипли. Данный мод просто останавливает его работу, а это значит, что вы никогда не узнаете, насколько далеко или близко находится враг.
Flaming Bolt Gun

Overpowered Pistol

Этот мод на пистолеты забавен, и он отлично подходит для тех, кто хочет сделать столкновения с врагами менее напряженными. Он убивает людей и андроидов одним выстрелом, и наносит настолько большой урон Чужому, что тот убегает куда подальше.
Silent Movement

Еще один мод, созданный для того, чтобы сделать игру проще, поскольку на этот раз шаги игрока будут абсолютно тихими. Это означает, что вы можете бегать по «Севастополю» и Чужие или другие враги не услышат героя, пока он не попадется им на глаза.
Если вы хотите, чтобы игра выглядела красивее, попробуйте данный мод от AngelGraves, который добавляет дополнительную «супер» опцию к нескольким настройкам графики. Помимо прочего, он улучшает диапазон и отражения LOD, а также добавляет карты теней с 4K разрешением. Это, в сочетании с суперсэмплингом, действительно улучшает визуальную составляющую Alien: Isolation.
Лучшие моды для Alien: Isolation
Мне нравится Alien: Isolation, и недавно я почувствовал желание сыграть в нее еще раз. В первую очередь ради того, чтобы окунуться в ту ретро-футуристическую атмосферу. Но потом я вспомнил стресс, сопровождавший мое первое прохождение, и передумал, но ровно до тех пор, пока у меня не появилась мысль: что если есть способ как-то модифицировать чужого и просто исследовать окружающее пространство? И вот, что я нашел!
Все это заставило меня задуматься, существуют ли другие модификации для Alien: Isolation? Я порыскал и нашел несколько файлов на Mod DB. В расположенных там модах нет тех, которые бы кардинально меняли игру, нет там и созданных игроками миссий/уровней, но присутствует достаточное количество небольших настроек, которые могут добавить немного разнообразия во второе прохождение.
Life Savers
Unpredictable Alien
Если вы считали чужого в этой ванильной игре не достаточно сложным противником, этот мод вносит коррективы в ИИ, делая его более непредсказуемым. Он удаляет «поводок», которым чужой привязан к Рипли, предоставляя ему больше свободы, чтобы до чертиков пугать вас.
Motion Tracker Remover
Вы считаете, что уклоняться от ксеноморфа слишком легко? Тогда попробуйте поиграть без помощи трекера движений Рипли. Этот мод просто отключает его, а это значит, что вы никогда не будете точно знать, насколько далеко или близко от вас находится существо.
Flaming Bolt Gun
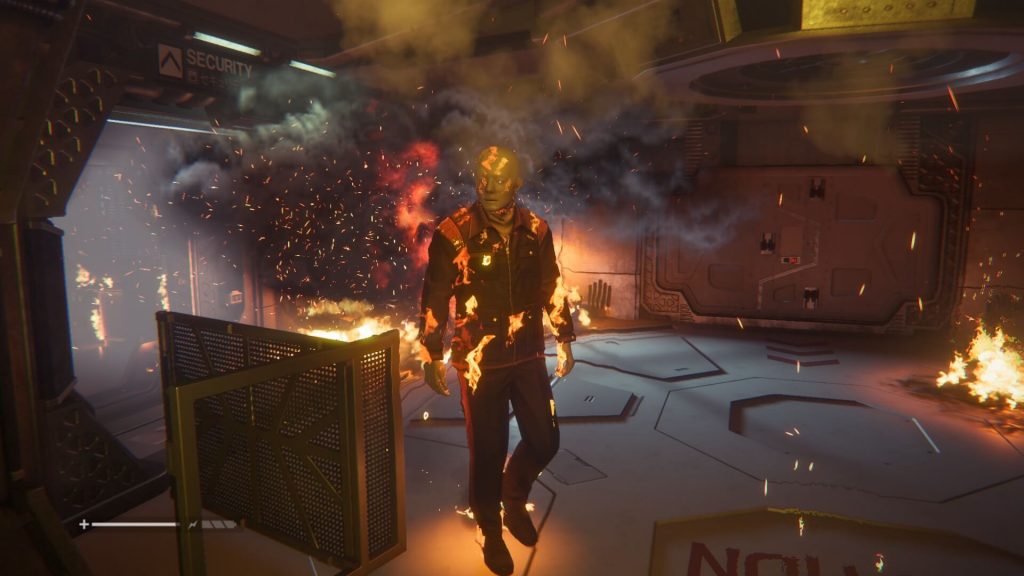
Модификация для болтгана, которая делает его мощнее и добавляет зажигательные патроны. Есть также и кислотная версия, если вам так больше нравится. Любопытно, что эти моды делают так, что при атаке кислотная кровь чужого наносит урон Рипли.
Overpowered Pistol
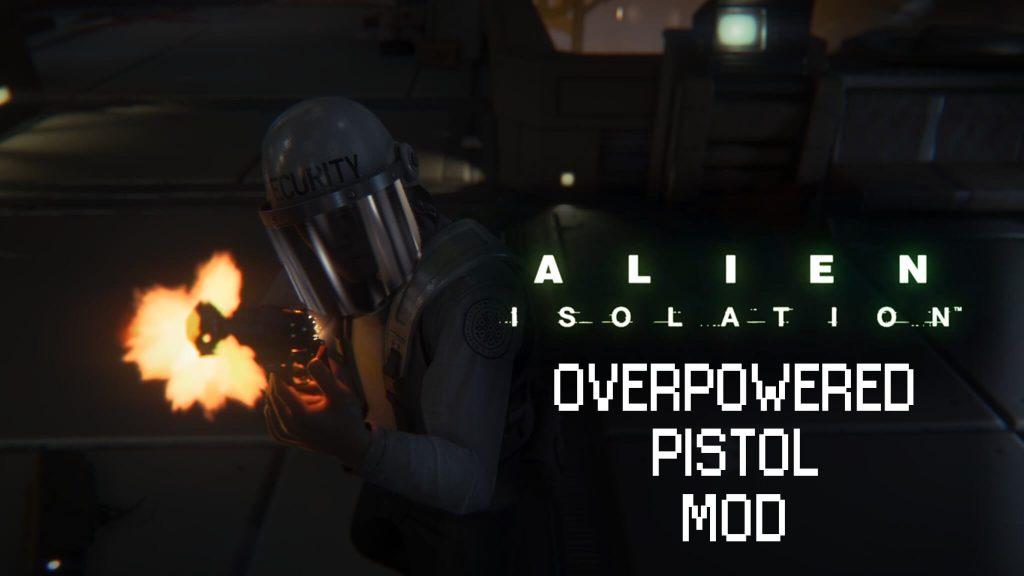
Этот мод для пистолета очень комичен, но идеально подходит для всех, кто хочет сделать встречи с врагами менее напряженными. Он позволяет убивать людей и андроидов одним выстрелом и наносить такой урон чужому, что он просто убежит, сверкая пятками.
Silent Movement
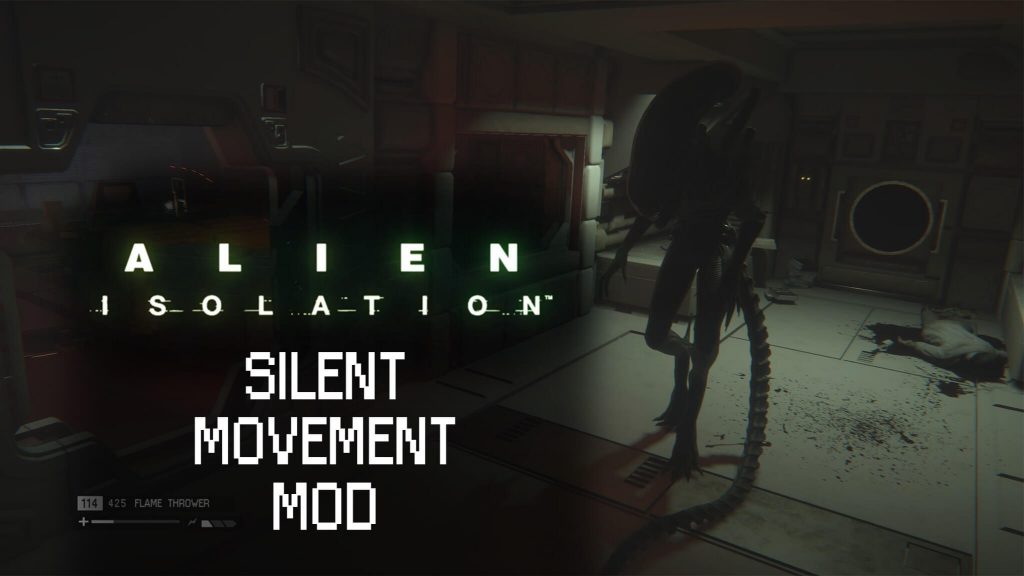
Еще один мод, который разработан для того, чтобы облегчить игру, делая ваши шаги совершенно бесшумными. Это значит, что вы можете бегать по «Севастополю», о чем ни чужой, ни другие враги не узнают, пока вы не окажетесь в их поле зрения.
Alien: Isolation – Settings Mod
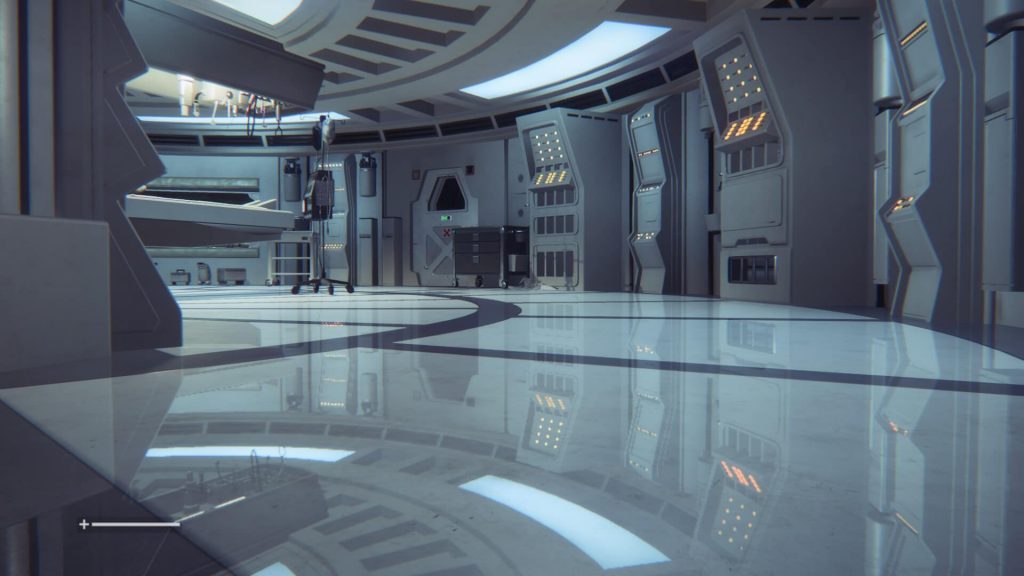
Если вы хотите сделать игру красивее, попробуйте этот мод от AngelGraves, который добавляет опцию «супер» к некоторым графическим настройкам. Помимо прочего, этот мод улучшает уровень детализации и отражений, а также добавляет карты теней с разрешением 4K. Все это в сочетании с техникой сглаживания реально улучшает внешний вид игры.
А если вы хотите сделать скриншот, не переживая, что в это время вас пронзит чужой, и получить доступ к камере с регулируемым обзором и различными настройками, держите таблицу Cheat Engine от сообщества Dead End Thrills.
Alien isolation моды как установить

This guide will take you through a variety of steps to teach you how to mod areas Alien Isolation, and extract content from the game.
Made possible by Nathan, MattFiler, [TW]E NѺMiNE and a number of helpful forums and developers!
You will most likely see regular updates to this guide as new tools become available, and of course, there’s always room for improvements!


This section was written by ENOMiNUS and Nathan.
A reminder; you can edit the XML files with your basic default notepad or word.
Personally, I´ve been using the free Notepad++, because it allows easy switching in tabs instead of windows, multiple files opened up at the same time (which helps when you´re comparing back and forth changes, such as comparing differences in gradients between harder and easier difficulties). And most importantly because there´s less compatibility issues and the formatting of the codes is kept clean, easy to read and logical.
It´s not mandatory, but I recommend a text-editing tool a bit better than the default.
So a link to that incase you don´t have it already.
Notepad++ [notepad-plus-plus.org]
Here you can see the stack_limit for revolver ammo, how much you can carry of it, you could switch ammo types around here if you wanted, by comparing to the other weapons that follow down the list in the gbl_item.xml file, you can also do that later, in the files inside the weapons_info/ammo folder, compare say pistol_normal with pistol_tazer.
As you can see, easy stuff, plain english. all the items, the flares, the pipe bombs, crafting resoucres and flashlight batteries follow the same layout.
A little later down the file you can edit the recipes.
Again, plain english, in goes the resources, out comes the product.
Now the opposite, of upping how many resources used with each crafting, is trickier, because you´d need to change the UI layout of the ingame crafting menu, because if you´d go ingame with an edited recipe, you´d still have the same slots to click, and if you´d need more slots now for crafting, then you´d be stuck, incapable of committing a resource and crafting the item.
This is something that needs investigating, of how could one edit the UI to be compatible with more crafting resources to commit.
Discovered that you can put any old item listed in the file to the output; ammo, flashlight batteries, scrap, you name it. Not weapons though, that breaks the game.
Later on inside the same gbl_item.xml file you´ll find stuff about hacking:
The rest are for increasing difficulties used for different devices and requiring probably higher levels of the SAT hack tool.
These all determine one hacking mini game, then one where you first find the frequency, and then have a time limit to match the symbols.
The selection angle deg(rees) lines are about how forgiving the tuning to the frequency is, when all you see is static until you´ve selected, the higher difficulties have smaller angles of selection, requiring more fine-tuning until you get to match the symbols. timer count down seconds is self-explanatory. Length of keycode also is simply how many symbols you need to match.
Inside the ammo folder there are files controlling damage, types of damage, ranges etc of different weapons and items like molotovs.
We´ll start at the top with the ACID_BURST_LARGE file one, which [TW]E NOMiNEE has edited.
I´m going to go through some of the lines, since all the rest of the ammo types inside the AMMO folder use the same format.
1
This line is for shotguns 7, so you could edit how many bullets, or rays if not bullets like acid splats, are flying each hit. I´ve tested this, upped the shotguns rays to 19, but I think each ray has the same damage, so you might want to drop the damage done with each ray you add, just in case.
0
For acid no fuel is used, but the flamethrower consumes 50 per sec, the rate, so you could lower or raise it depending upon what kind of experience you want. Remember to check if you have edited the other fuel lines, is_fuel set to true or false etc.
For projectile weapons, if not fuel-based weapons, self-explanatory.(Could affect the damage FX)
Each «vs» line simply specifies the damage done to different entities, npcs, the player, androids, and the alien as vsAlien. Range probably does not need explanation. Headshot seems like a damage multiplier for the head. the Damage_1, 2 and 3 lines specify what type of damage FX & behaviour you want to see, as [TW]E NOMiNEE explains in good detail in a section below. You could put the second damage to «Impact», and then «incendiary» for three, incase you wanted interesting damage to occur to players and humans + androids when sprayed by acid.
The Stun, EMP and Blind durations only work if you also put into the damage sections to specify «Stun», «Blind» or «EMP», AlienStun=»99″ makes the alien back off for a second or two, cool animation ingame, but then it comes after the player.
That´s the basics, the molotovs and pipebombs are the grenade_he/fire files. Same with flashbangs, EMPs are the burst_large ones, you´ll know since it has the _tier2 or 3 suffix after it, representing the different v1-3 blueprints you pick up.
Try making the shotgun have damage vsAlien in short range, and then only AlienStun on longer range, with damage at zero, for a nice mix, because when both are nonzero, the game prefers damage over stun & the alien will not stagger, only receive the damage & still run away or at you.
Comparison is the best way to learn, open up different ammo files and switch back and forth, seeing what changes with what weapon for instance, or How the tiers compare to each other.
So far what can be edited in the bml/xml files are in the folders VIEW_CONE_SETS, which hold interesting files for the sight of different npc characters, like androids, humans, to some degree sight and attention is also edited in the difficultysettings folder files, and also in the chr_info/attributes folder files.
Personally I haven´t edited the sight and attention that much, but felt that I should point out that they exist and allow a lot of tweaking, incase someone is interested, but the folders I mentioned, the viewconesets, the difficultysettings and the attributes folders hold some interesting information, the Behaviour folder inside the DATA folder also holds much interesting stuff, but those are more advanced and unknown to me, I´ll mention them in brief in the end of the guide.
And so you´d know that the file you are editing is using the information provided in the file named default, and then having it´s own changes from the default. If a file does not change anything from its template, then it usually avoids repeating it, because the game can read that the file in question uses the template, and so it assumes the information provided in the template as a given until specifically told what is changed from that template.
There are situations in which templates of one file have templates of their own. The difficulty settings work in such a manner.
Inside the difficultysettings folder inside the DATA folder, you have 5 files of interest. Novice to iron, easiest to hardest.
I will skip here the Alien section, as I´ll talk about that indepth in its own section. Opening up easy difficulty you´ll notice that it uses medium as its template, and medium uses hard as its template, meaning hard values are takes as default, then medium changes some things from that, and easy changes some more on top of that. if a line is ommitted in easy then it will be taken as-is from medium, and if it is ommitted from medium then it will again be taken as-is from hard.
Apart from the Alien section in the beginning, the section in the diff-files and everything else below talk about the senses. There is also a general section, but very little is edited in those.
The negative numbers in the senses part all mean that either the distances are shorter, or the reflexes slower, using the viewconesets and other sense data from attributes folder as templates again, the «_modifier»-suffix is self-explanatory, modifying existing values, which exist elsewhere.
Hearing distance, flashlight sense, again, how fast to react to the flashlight.
The general section also has some self-explanatory information, damage_dealt_scalar, lower number is less damage the npc deals to enemies, received is the other way around. Comparing hard with medium, lower attack pace number seems to mean faster attack pace, higher number slower attack pace. Suspicious item loop scalar seems to mean how long the npc in question will be distracted, for example how distracted they will be by flares and noisemakers, but I´m not 100% sure about that. Lower number on harder difficulties with the suspicious item loop scalar.
In the end of the difficulty settings files it talks about viewconesets, again modifying them, easier difficulties have negative numbers.
I´ll leave some of the final sections to my experimental Alien AI discussion, but I´ll go into detail about the Aggrovation settings.
The means how fast does every tap «gone backwards» from every ticks.On same tap numbers,higher value makes tapping more easier,every tap of yours is rather steady,as for lower value,you will need to tap very quickly or your tap could be invalid.
The says itself,if you are not in an open area,or there’s a wall/cover beside/behind you,this controls the interval of how the droid trigger the attack of slamming the player to the wall.
The indicates that how far will the NPC go to «not idle».
The is an interesting one,it controls whether if the NPC will start to take cover if the distance between the player and the NPC is within this range;when the is set to very high,they could be stuck in the cover,when set to very low,they won’t even take any cover,since their capsules is near non-existent.
The 8 is how far could your enemy hears you if you’re hiding in a locker,under a desk..etc
Also,different damage effect from the weapon could make the NPC react differently,like the facehugger will have a acid explosion if it’s hit by a weapon with the damage FX «impact»,so if you add this attribute to a flamethrower,then the facehugger will explode too.
Here’s the reaction to the effect:
1.Acid:
NPC:Much like an impact. Player:Only have acid on your screen. Object:None.
2.Incendiary:
NPC:They will on fire and scream. Player:None. Object:On fire.
3.Impact:
NPC:just like being shot by a pistol/Hit by a jack. Player:Same. Facehugger:Explode
4.Melee:
NPC:A much heavier impact. Player:Like being hit by the Alien.
3.Stun:
Driod:Stun. Heavy_Droid:None. Player:Blind. NPC:Only stop their movment for a sec.
4.EMP:
Droid:Disabled. Heavy_Droid:None. Player:None. NPC:None. Object:Minor impact.
5.Blind:
Droid:None. Heavy_Droid:None. Player:None. NPC:Blind.
can only be triggered by melee attacks,with health regeneration enabled,there’s a chance that the enemy will be knock out(somewhat like the game «thief»),and attack the player once they wake up,also,this attribute can’t be enabled on some character such as the Facehugger,since the Facehugger is script to death with a melee attack,force enable it could cause a CTD(Crash to desktop).
Lowering the volume of footsteps(a bit):
I’m concerned mainly with ALIEN.BML inside the chr_info/attributes folder, the difficultysettings folder files and the ALIENCONFIGS folder also located in the DATA folder.
The alienconfigs folder has the basic default info about leash ranges, if you do not know what a leash range is for the alien, then more playtime would clear that up, or you can see how others describe the alien AI, like in this handy guide, referring to habitat areas and beacons, but it´s referring to the same thing, the minimum/maximum radius the alien can stalk around the player.
Vent attract time´s about when the alien crawls above the player (within a certain range, either determined by the min/max stalk radius values or the BackstageAreaSweep distance I´ll talk about below), these don´t appear as 100% limitations, the choice of wording, using attract time, seems apt, even though you might have high min+max attract times to the vent, if the alien has a reason, a more attractive option available, it will drop down faster.
The alien has a whole life backstage, when you don´t notice it around. It can take breaks, pauses, and it travels to some distance (min max determined there), and takes a timeout. While it´s on this break, you will not find the alien, it will disappear from your radar as it will remain still, and it will be idle, it might cycle through some decisions, like should it continue its break, or return to hunting.
Obviously you could speed things along by making noise to draw it out, but otherwise the alien will travel within those limits.
The distance seems important, not just time, because the alien is still actually crawling, moving around, and that distance to travel over takes time. Here´s an article where the devs talk about the alien being a wireframe skeleton, crawling around the vents, taking breaks, being always present even when away from the spotlight.
The files in the ALIENCONFIGS folder seem like templates for different situations in the game, some regulate intensity, as the devs want some places and times to be either more relaxed or intense, and others control some kind of different templates for different distances for the alien being on hold for story purposes, the BACKSTAGEHOLD files are for controlling how far away it is on certain fixed breaks, because again, once it is taken out of its break, it will have to crawl to the player, and that distance can be important.
Then on top of those templates, the DIFFICULTYSETTINGS put further modifiers, so that the default template for intense situations are on harder difficulties even more intense etc.
Nixon’s Richard suggested removing the gradient of the intensity files, to have the alien either always fixed to its relaxed intensity behavior or being very intense. This could be achieved by taking the desired values from one of the intensity files and changing the default file to reflect those values, then merely deleting the lines inside the other intensity files which conflict with the new default values you wish to apply in all circumstances, making all the mild, moderate, moderately_intense & intense files into clones so that they would look like this:
And they would then use the default file lines exclusively, which you edited to reflect the desired level of intensity. A link for such a mod is provided in the last section.
In a similar vein, Seeing that the different backstagehold files are when the alien is on a fixed break, not a dynamic one, but a scripted one for the story purposes, you can see that they have the breaks set as such:
Therefore, If you´d want to remove story-forced breaks for the alien (this could potentially break some gameplay mechanics, not to mention the story!), it should be possible to allow the alien to literally show up anytime by changing the «-1» into a positive number. Conversely, if you would wish to remove the alien from the game, then editing every role_timeout_min/max line you find inside the alienconfigs folder to read the same «-1» should do the trick* (or edit one template and make sure none of the others which use that template has the same line, in similar fashion as above with the fixed intensity. Also remember to remove from difficultysettings files the role_timeout_min/max lines so that they don´t conflict).
*The «-1» might not work. My superficial testing yielded contradictory results, so one might have to go the old-fashioned way of just replacing insanely high numbers into these parameters.
To reiterate, The alienconfigs folder has a default file, which controls the default leash ranges, vent times, break times, some other wander and sweep area sizes. Then it has templates for levels of intensity, for when the game wants to slightly relax the Alien activity, or pull it closer to the player and force it out into the open to stalk more, those are the mild, moderate, moderately_intense & intense files. It also has files talking about how far away the alien should be when it is on hold, for story purposes, also on alert status. Sometimes it is on hold at a relaxed distance, the BACKSTAGEHOLD_MILD.BML file, and sometimes it is on hold very close by.
On top of this, the Difficullysettings folder files modify across all intensities either for more relaxed or more intense, based on the difficulty, so that when the game switches to use the intense template, if you are playing on Nightmare difficulty, the leash ranges & vent times will be even shorter from the normal intense moments.
Probably self-explanatory, they somehow control the time the alien takes to make its sweeps while hunting, but I´m not sure how exactly they control the time, as the difficulty settings modify them in strange ways. More intense and harder difficulties have the increase sweep duration as a smaller number, but none seem to modify the decrease duration.
These probably have to do with the size of the area the Alien sweeps and stalks, but don´t quote me on that. Again more intense and harder difficulties put these at smaller values, that the alien seems to do its patrolling sweeps in a smaller area closer to the player.
The various «menace» lines look like some kind of threat assessment, like how suspicious the Alien is, or aware of present dangers, or maybe they relate to a heightened state of aggressiveness the alien can achieve, like I said, I don´t really know what these rest interesting looking lines do. (One line says «meance», looks like a typo, but it is reproduced consistently in all the damn files, so I´m afraid to correct it, if the devs actually coded the typo in, another apparent typo is the mofisier bit in the hard difficulty setting bml.)
Talking about ranges to search for different «jobs» sound promising, there are «idle» jobs, «escalation» jobs. I think they refer to idling, breaks, and looking for trouble, in essence.
Aggrovation settings we already talked about.
Hiding looks like locker or otherwise hiding hunting behaviour, when the player is crouched under an object obscured or inside a locker, the radius the alien starts to look in, the radius in excluding to look in the same place, assuming it will exclude looking again there, hearing range.
Now here are my test lines, I have copied some of the new lines from the defaults template and a few others, then I´ll try to explain what I hope to mess around with.
The Survivor/Working Joe/Alien behaviour trees can be found within the /DATA/BINARY_BEHAVIOUR/_DIRECTORY_CONTENTS.BML file. Unfortunately this file is not compatible with the AlienBML tool that we used in previous sections to extract and repack the game’s BML files. However, there is a workaround that you can use to allow the tool to read this file.
Download this version of the _DIRECTORY_CONTENTS.BML file (it’s in XML format) and save it somewhere you will remember. AlienBML will be able to convert this XML to BML with no issues! When you’ve modded the XML and created your BML (just drag your modded XML onto the AlienBML tool), all you need to do is paste your new BML into the BINARY_BEHAVIOR folder and rename it to _DIRECTORY_CONTENTS.BML (keeping a backup of the original).
Alternatively, you can use the AlienBML.exe supplied with the fixed _DIRECTORY_CONTENTS.BML download. Place the AlienBML.exe and _DIRECTORY_CONTENTS.XML from that download in the DATA/BINARY_BEHAVIOUR folder, modify the XML and then run AlienBML.exe. This program will convert your XML to BML and save it as the correct name so you can instantly test your changes in-game.
Inside this working XML you will see the output of The Creative Assembly’s AI editing tool, which is a plugin that I believe is called «LegendPlugin» for a piece of software known as «Brainiac Designer [brainiac.codeplex.com] «.
Unfortunately, there is no way to use Brainiac Designer to edit the _DIRECTORY_CONTENTS.BML file because The Creative Assembly’s «LegendPlugin» plugin isn’t publicly available, and without that plugin Brainiac won’t work with Alien Isolation’s XMLs because it won’t understand the way that they were created. We’re going to have to do all edits manually within the XML file, no GUI tool for us!
So where to start? Obviously this file is incredibly complex with a lot of different things in it since it comes from a visual editor and isn’t necessarily meant for plain text editing. Luckily for us though, it’s pretty neatly laid out and shouldn’t be too hard to understand. The hardest thing to understand is exactly what every AI state does, but that shouldn’t be too difficult since they are all named appropriately. For example, «COULD_RESPOND_TO_HIDING_PLAYER«, «PLAYER_HIDING«, «ConditionHasAWeapon«, «ConditionCurrentWeaponNeedsReloading«, etc.
Good luck! It’s great fun to mess about with this file to see what effects it has on the way the AI behaves.
To export sound files, simply download the Alien: Isolation Audio Extractor [github.com] and place it in your Alien: Isolation directory (alongside AI.exe). Run the extractor and press enter to begin the process. Sounds will be output to /DATA/SOUNDS_ORGANISED/ and /DATA/SOUNDS_UNORGANISED/. «Organised» sounds are named, and «unorganised» sounds are un-named, as the soundbank manifest doesn’t list a name for them.
Audio modding is possible in this game as it uses Wwise. I’ve done some myself and it doesn’t work too bad. I’ll write up this section when I’ve got more to share.
To extract the game’s animations (in Havok format) you can use Cra0kalo’s PAK converter. Just find your ANIMATIONS.PAK file in the /DATA/GLOBAL/ folder and drag it onto the Unpack_ANIMATIONS.bat.
After a lot of work, I managed to enable debug checkpoints within Isolation. This allows you to teleport around the map, skip to different sections of gameplay, or enable some developer scripts like spawning NPCs.
Check out the video below to see the debug checkpoints in action:
Inside the MATERIAL_DATA folder there is a BML file and an XML file of the same name including information about decals, effects, some basic physics engine values and other tidbits however I’m not sure if modifying these will produce any effect in-game. Worth looking at though!