Amethyst Geode Finder
Published: Jun 2, 2021 (MC 1.16)

Drop level.dat anywhere.
How To Use
Requirements
For technical reasons, you need to know the seed of your world to use Amethyst Geode Finder, unless, of course, you want to find a seed for a new world. If you’re playing SSP, the app is able to fetch the seed from your savegame. Alternatively, you can use the /seed command ingame. In SMP, you can use the same command if you have sufficient rights. Otherwise, however, you’re dependent on the server owner, who started the world and has access to the savegame and config files.
Technical
This app uses some relatively new web technologies. As a result, some features may be disabled for older browsers. I recommend using the latest version of a major browser such as Chrome, Firefox, Edge or Safari.
Usage
Seed Selection
The first thing you should do is select a seed and version. You can either type it in manually, or you can load it from your savegame. The latter can be done by clicking on «Load from Save. « and selecting your level.dat, or by drag&dropping the level.dat file into your browser window. Level.dat is a small file located in the folder of every Minecraft savegame. You can find the savegames in the saves folder of your Minecraft installation. On Windows you can use %appdata%\.minecraft\saves to get to that folder.
Levels allow you to store and reuse seeds on this website, without having to load your savegame every time. When loading a seed from a level, the seed will automatically be stored as a level.
You should also know that a seed is always a number (up to around 20 digits). If you type in anything else (like letters), it will be converted to a number. The app does this the same way Minecraft does, so it’s safe to use letters (and other characters) as well.
Navigation
Once you entered your seed and version you can start using the map. To scroll, use your arrow keys while your mouse cursor points at the map, or move your mouse while holding down the left mouse button. You can use the slider below the map or your mousewheel for zooming. The lower inputs allow you to go to a specific point (e.g., your base) of the map and set a marker there. You can always remove and add the marker by double clicking on the map. The «Save Map» button allows you to save the currently shown map as png image file.
Touchscreen
When using a touch-enabled device, an extra option for enabling/disabling touchscreen control will appear below the map. With that option enabled, you can drag the map with your finger to navigate, you can pinch to zoom in and out, and you can tap and hold to set a marker on the map. By double tapping on the map, you can quickly enable/disable the functionality as well.
Я думаю, вы уже знаете, что обычными способами узнать сид мира на сервере нельзя, команда /seed не работает, а администраторы не говорят вам сид, что же делать? Этот мод поможет вам.
Мод собирает информацию о мире, а точнее о положении разных структур и биомов, а после имея достаточное количество информации он высчитывает\вычисляет сид. Это круто, и вроде это даже работает.
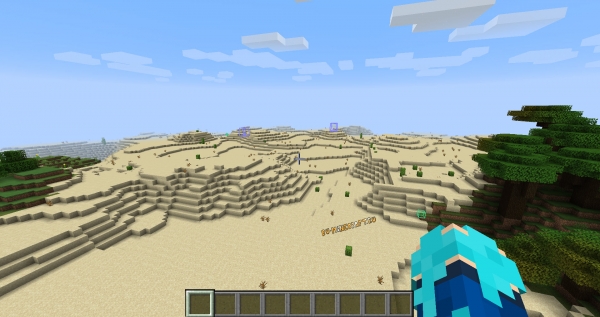
Итак, все, что нужно сделать, это установить мод и бегать по миру, а точнее показать моду структуры этого мира, для удобства он подсвечивает структуры как мод Xray (что само по себе можно использовать). В описании автора указано, что как только мод найдет достаточное количество структур, он начнет процесс вычисления сида, я долго летал по миру и нашел большое количество структур, но процесс поиска так и не запустился.
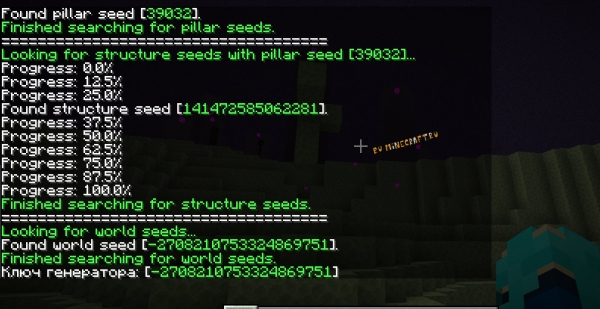
В своем видео автор в конце отправляется в край, после мод сразу начинает процесс вычисления сида мира, хотя в описании об этом не сказано. Я повторил его действия, а именно я нашел (в одиночке командой /locate ) несколько ключевых струкутр, а после отправился в край, мод сразу же начал вычисление сида и определил его корректно. Потому, возможно вам потребуется не просто найти структуры, но и отправиться в край.
Процесс работы мода:

После входа в мир, мод показывает хеш сида, это не сам сид, а его зашифрованная версия.
Мод подсвечивает и запоминает структуры.
После того как я «показал» моду структуры и отправился в край он начал вычислять и правильно нашел сид.
Команды мода:
☆Minecraft Biome Finder Program!☆

Currently works for Java Edition and PE/Bedrock Edition!
☆This version of my program is much MUCH faster than the previous version!☆
Have you ever needed certain Biomes for a world to build/survive in? Well, check this out! I put together this cool program that will search through many random seeds by itself and return the seeds with the Biomes you want in them! It will also include coordinates to the Biomes as well!
I hope this program will help you all! Use it to find good biomes for your survival world, for building creations, or for finding cool seeds to make blogs about! Be sure to click the pictures below to see the whole picture!
To run this program, you will need to download it on a computer and have Java on your computer as well. Here’s the download link for the Biome program!
Minecraft Biome Finder program
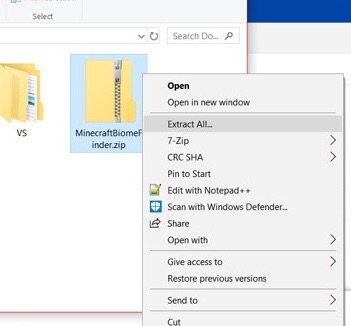
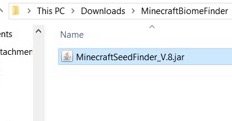
YOU MUST DO THIS STEP! Once you downloaded the MinecraftBiomeFinder.zip file, right click on it and hit Extract All.
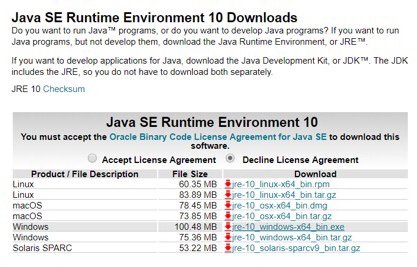
If the program doesn’t run or when you double click the program and it tries to open in Wordpad or something, then you might not have Java installed on your computer. To install Java, click the link below.
Java download to run program
Once you’re on that website, click the download for your computer. For me, I’m using Windows so I click the first window link and run it. It take a bit to install java but once you finished, you can run my program so double click MinecraftSeedFinder_v.8.jar to give it a try.
How to run program!
Once you click on the MinecraftSeedFinder.exe, a small new window will appear. It will ask you for which minecraft edition you want seeds for. Type either Java, MCPE, or Bedrock into the red bar at bottom and click the enter key!

Next, it will ask you if you want to search for Biome combos or not. Combos are when two biomes are super close or touching. As of right now, combo searching is pretty slow so if you do decide to do combo searching, let the program search for seeds overnight.
If you don’t choose combo searching, the program will search for seeds that simply just has the Biomes instead of if the biomes are touching.

Now it will ask how far out would you like it to search? I often search about 1000 to 1500 blocks. However, if you’re searching for LOTS of biomes, you may want to set the distance much further out such as 2000 blocks.

Heres the fancy part!
You now can pick and choose which biomes you want to search for! Not every Biome is included but maybe I’ll add more to the list in the future.
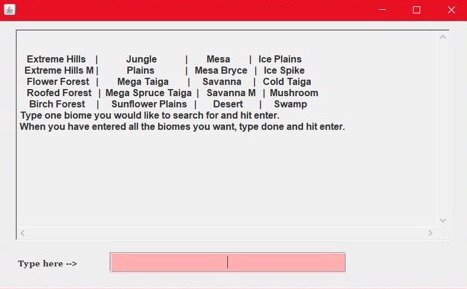
As you pick the Biomes, they will get surrounded with this >
How to easily find every biome in Minecraft
Minecraft is home to a variety of different biomes to explore, and players can use a couple of different techniques to find specific ones more easily.
With over 66 biomes types that can exist in Minecraft’s Overworld, it can be difficult to pick a specific one to build in, or to even find one for that matter. Luckily, there are a two main methods that Minecraft players can use in order to find a specific biome that they are looking for. Those being an online biome finder tool and console commands.
It can be tricky to find a certain biome sometimes, a precious jungle biome or an igloo spawning biome may be seem impossible to find at times. With just a quick tweak in searching strategy, finding a specific biome can be a whole lot easier of a process.
This article will be breaking down how Minecraft players can find specific biomes for their game world.
How to easily find every biome in Minecraft
Specific biomes can be difficult to find sometimes in Minecraft, maybe it might be that mushroom island or mesa that seem far too elusive. Instead of spending hours running around in a seed, trying to find a certain biome that a player wants,
Minecraft players can employ a few different technique instead. Luckily, at least one of these methods can be used for both the Java and Bedrock Editions of Minecraft.
Using Console Commands to find a specific biome
The simplest and most straightforward to find a specific biome on Java Edition, is by using console commands in-game. Of course, this does require players to be playing in a world that has cheats enabled. There is an alternative method that does not require cheats instead, for players who would prefer not to resort to this method.
Players on Java Edition need to type «/locatebiome» in-game and a window will pop up with different options for Minecraft players to pick from. Chose the selected biome of interest and hit enter. This will inform player where the nearest biome of that type is located. Then players can simply or walk or teleport there.
Using an online biome finder
Not everyone is comfortable using cheats or console commands in-game to just find a biome, and that’s okay. In addition, many players don’t even play on Java Edition. Instead, all Minecraft players can use an online biome finder tool, such as chunkbase.
All Minecraft players will need to do is type in the seed of the world that they are interested in finding a biome in. From there, an entire map of the game world will be generated and players can scroll through until they find the coordinates for the biome they are looking for.
Players can then hop right back into their game world and track their way to their desired destination using the coordinates they just received.
This method works for both the Java and Bedrock Editions of Minecraft, and will serve as the best bet for finding a specific biome for most players.
End City Finder
Last Update: Jul 8, 2020 (MC 1.16)
Drop level.dat anywhere.
How To Use
Colors
Limitations
The locations on Bedrock Edition are not 100% accurate.
Requirements
For technical reasons, you need to know the seed of your world to use End City Finder, unless, of course, you want to find a seed for a new world. If you’re playing SSP, the app is able to fetch the seed from your savegame. Alternatively, you can use the /seed command ingame. In SMP, you can use the same command if you have sufficient rights. Otherwise, however, you’re dependent on the server owner, who started the world and has access to the savegame and config files.
Technical
This app uses some relatively new web technologies. As a result, some features may be disabled for older browsers. I recommend using the latest version of a major browser such as Chrome, Firefox, Edge or Safari.
Usage
Seed Selection
The first thing you should do is select a seed and version. You can either type it in manually, or you can load it from your savegame. The latter can be done by clicking on «Load from Save. « and selecting your level.dat, or by drag&dropping the level.dat file into your browser window. Level.dat is a small file located in the folder of every Minecraft savegame. You can find the savegames in the saves folder of your Minecraft installation. On Windows you can use %appdata%\.minecraft\saves to get to that folder.
Levels allow you to store and reuse seeds on this website, without having to load your savegame every time. When loading a seed from a level, the seed will automatically be stored as a level.
You should also know that a seed is always a number (up to around 20 digits). If you type in anything else (like letters), it will be converted to a number. The app does this the same way Minecraft does, so it’s safe to use letters (and other characters) as well.
Navigation
Once you entered your seed and version you can start using the map. To scroll, use your arrow keys while your mouse cursor points at the map, or move your mouse while holding down the left mouse button. You can use the slider below the map or your mousewheel for zooming. The lower inputs allow you to go to a specific point (e.g., your base) of the map and set a marker there. You can always remove and add the marker by double clicking on the map. The «Save Map» button allows you to save the currently shown map as png image file.
Touchscreen
When using a touch-enabled device, an extra option for enabling/disabling touchscreen control will appear below the map. With that option enabled, you can drag the map with your finger to navigate, you can pinch to zoom in and out, and you can tap and hold to set a marker on the map. By double tapping on the map, you can quickly enable/disable the functionality as well.