Руководство по Зомби-режиму в Call of Duty: Black Ops Cold War

Зомби-режим — неотъемлемая часть серии Call of Duty. В экшене про Холодную войну Call of Duty: Black Ops Cold War игроков ждет сюжетная линия, действие которой происходит в 80-х годах. Поклонники режима сразу узнают центральное здание с самой первой зомби-карты, но спустя несколько десятилетий мы посещаем это место вновь. Полюбившиеся фанатам перки, переработанная система геймплея, новые механики снаряжения, головоломки и целый ряд персонажей, которых можно встретить. Разберемся в основах режима.
Сюжет
Темный эфир (Dark Aesther) — это новое измерение, которое было открыто в конце последней карты зомби-режима Black Ops 4. Здесь обитает древняя раса злых существ, называемых Апотиконами (Apothicons), и все, что попадает в Темный Эфир, искажается.
В конце Black Ops 4, все герои предыдущих сюжетных линий о зомби пожертвовали собой, чтобы погрузить все многочисленные вселенные зомби в Темный эфир, тем самым изгнав апотиканцев и создав новую, особую реальность. Согласно сообщению в блоге Treyarch, они были правы наполовину.

В Call of Duty: Black Ops Cold War режим называется Die Maschine. По сюжету, мы охотимся за мощной технологией времен Второй мировой войны, известной как Projekt Endstation, которая угрожает начать гонку вооружений. Игроки сражаются за международную спецгруппу «Реквием», созданную ЦРУ, во главе которой стоит Григорий Уивер. Противостоит «Реквиему» советская группа «Омега», организация, которая стремится использовать Projekt Endstation.
Одним из контактов «Реквиема» является женщина по имени Сэм, которая почти наверняка является Самантой Максис. Это означает, что история Темного Эфира является прямым продолжением. Мы знаем это, потому что колыбельная Саманты Максис играет, когда Сэм входит в телефонную будку во время вступительного ролика Die Maschine. Также было замечено, что число, которое она вводит, обозначает Maxis.
Карта Die Maschine
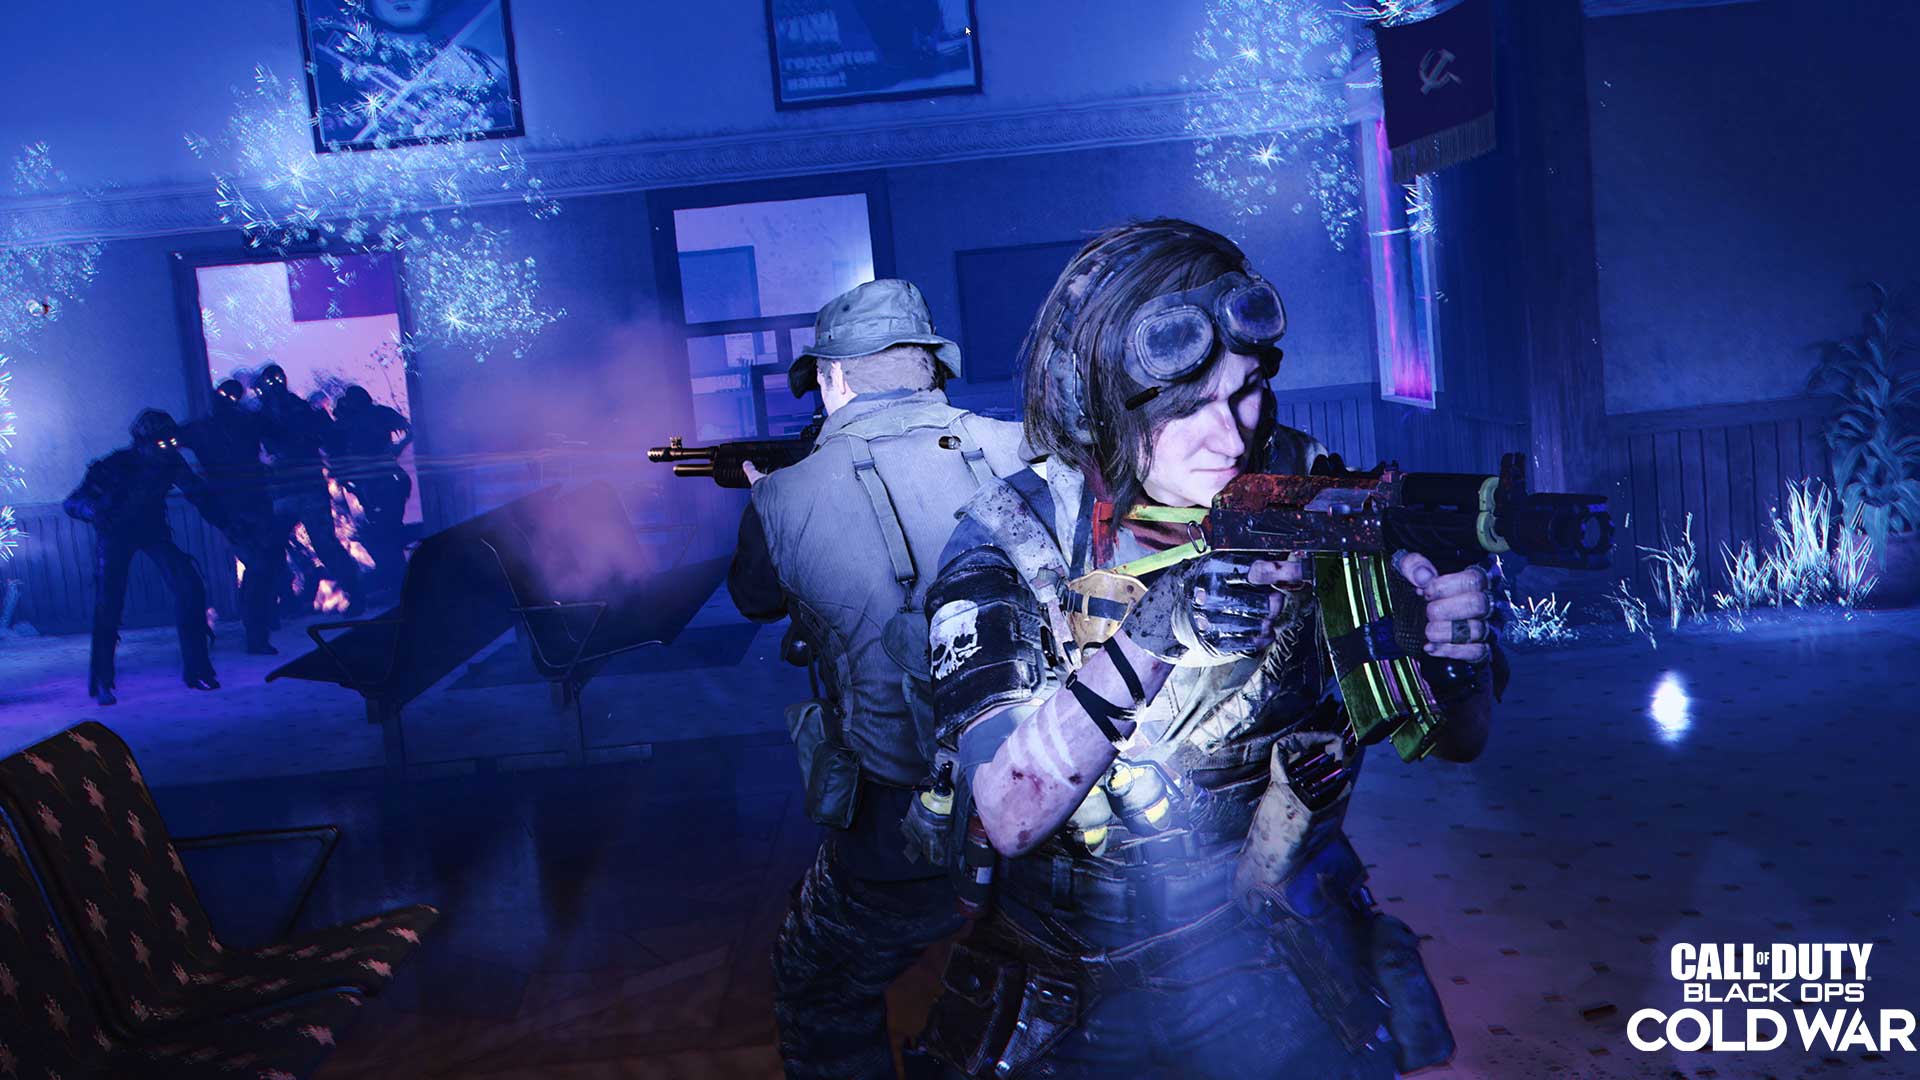
Первая карта называется Die Maschine, но, что интересно, это явно переработанная версия самой первой карты зомби, Nacht Der Untoten. Игроки появляются при ярком дневном свете за пределами бункера, сражаясь вокруг места крушения в лесу, прежде чем войти в бункер и исследовать некоторые подземные уровни.

Позже карта поменяется с дневной на темную, альтернативную реальность, которая должна представить измерение Темного эфира. В небе парят неоновые медузы, а от окружения исходят шлейфы светящейся пыли.
Герои
Похоже, что на этот раз у нас не будет свирепой команды харизматичных воинов-истребителей зомби. Вместо этого вы будете играть за операторов из сетевой игры и даже за некоторых знакомых персонажей из одиночной кампании, включая Рассела Адлера (Russell Adler), Лоуренса Симса (Lawrence Sims) и даже сержанта Фрэнка Вудса (Sgt. Frank Woods).
Зомби
Геймплей про зомби времен холодной войны основан на этой классической формуле, и многие из любимых перков и механик, таких как таинственная коробка и автомат Pack-a-Punch, тоже возвращаются.
Перки
Elemental Pop — это новый перк в серии Black Ops, дающий каждой пуле небольшой шанс активировать случайный базовый модификатор боеприпасов. Treyarch будет выпускать больше перков специально для режима зомби после запуска. Они появятся в машинах перков, как всегда в зомби-режиме CoD, но эти машины получили визуальный редизайн. Не волнуйтесь, у них по-прежнему будут джинглы для каждого перка.

Интересно то, что впервые перки получат возможность улучшения, дающую большие преимущества некоторым из наименее популярных. Для улучшения ваших перков потребуются необработанные кристаллы эфириума (Raw Aetherium Crystals), ресурс, который можно найти только при успешной эксфильтрации или достижении новых этапов в игре. Вы также можете использовать неограниченное количество перков, и все перки можно улучшать три раза.
Кросс-ген, кросс-игра и кросс-прогрессия
Экипировка

Оборудование
Конец раунда

В конце раунда появились финальные волны зомби, пройдя которые можно получить дополнительные награды. Количество спавнов зомби может доходить до 11 для этих последних раундов, так что будьте готовы.
Редкость оружия

Загадочные ящики
Гайд по зомби-режиму «Нашествие» в Call of Duty: Black Ops — Cold War
Рецензия на Call of Duty: Black Ops — Cold War
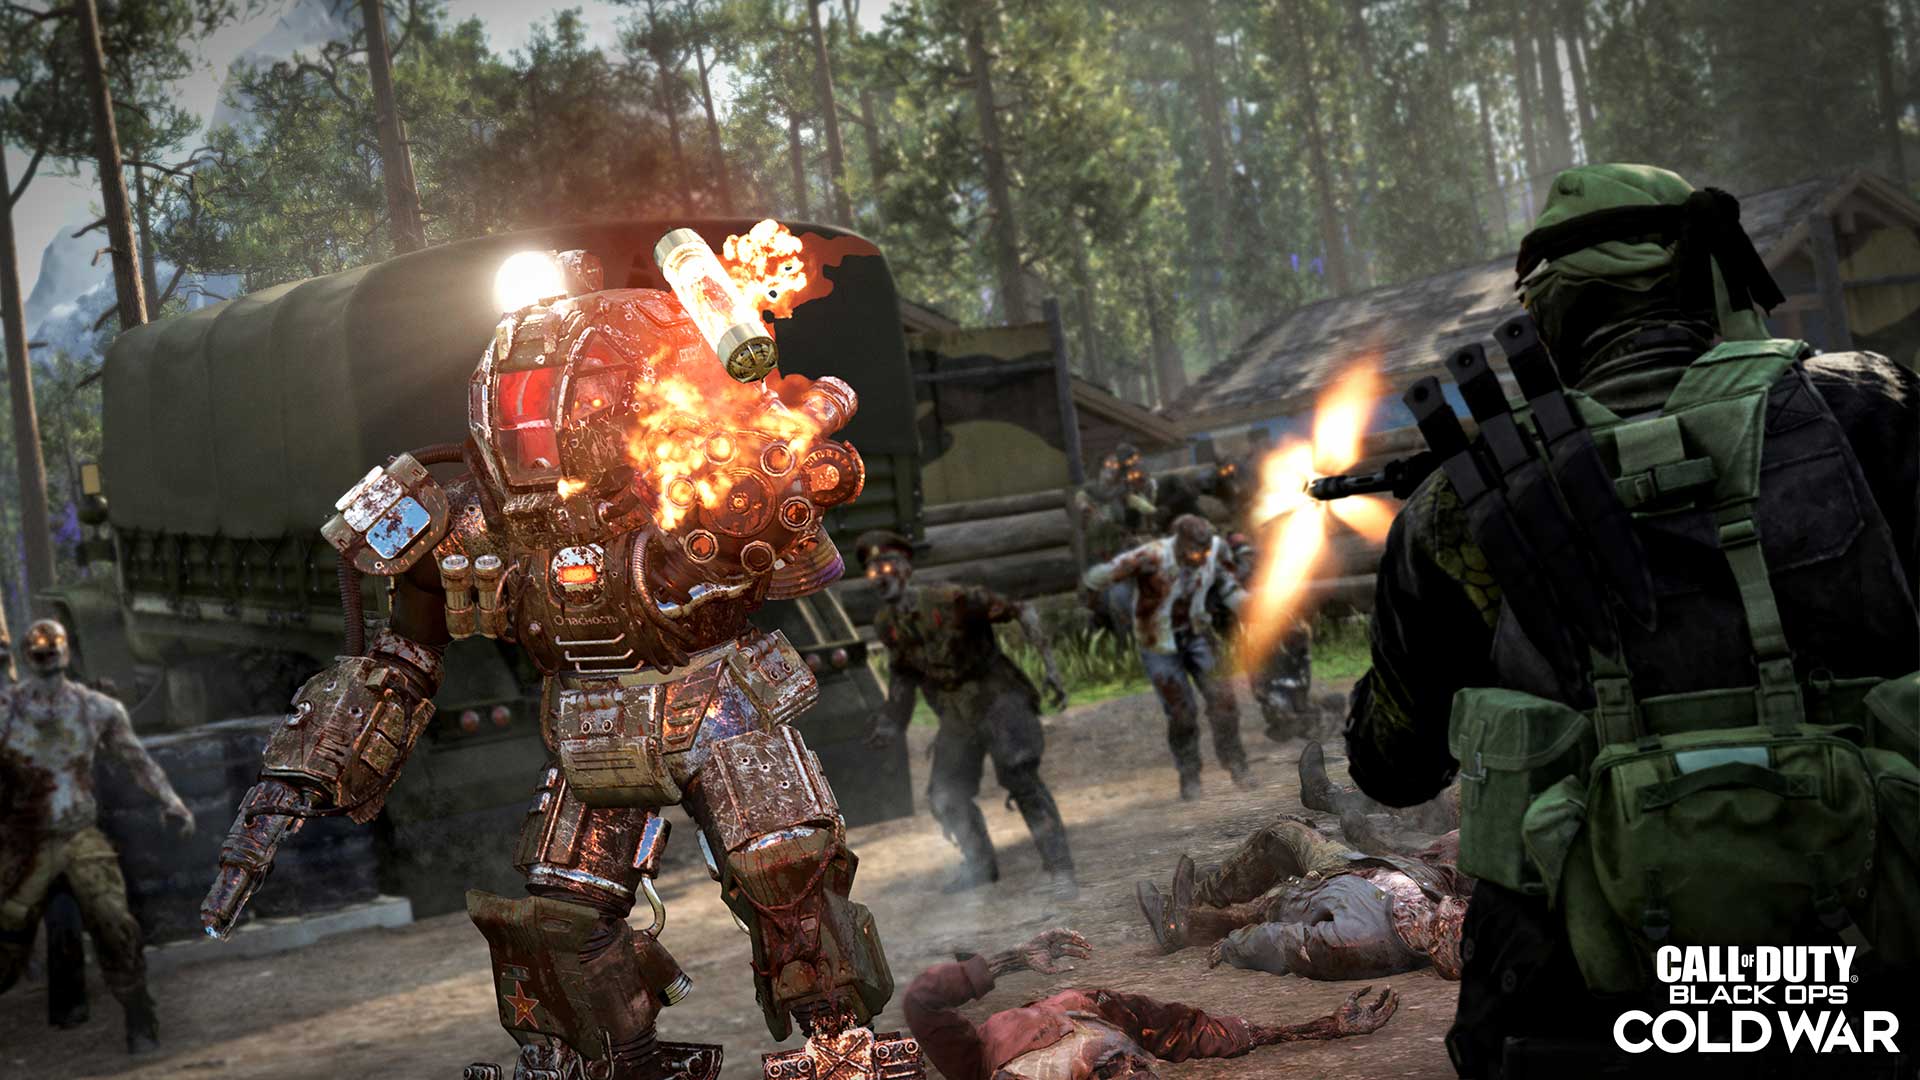
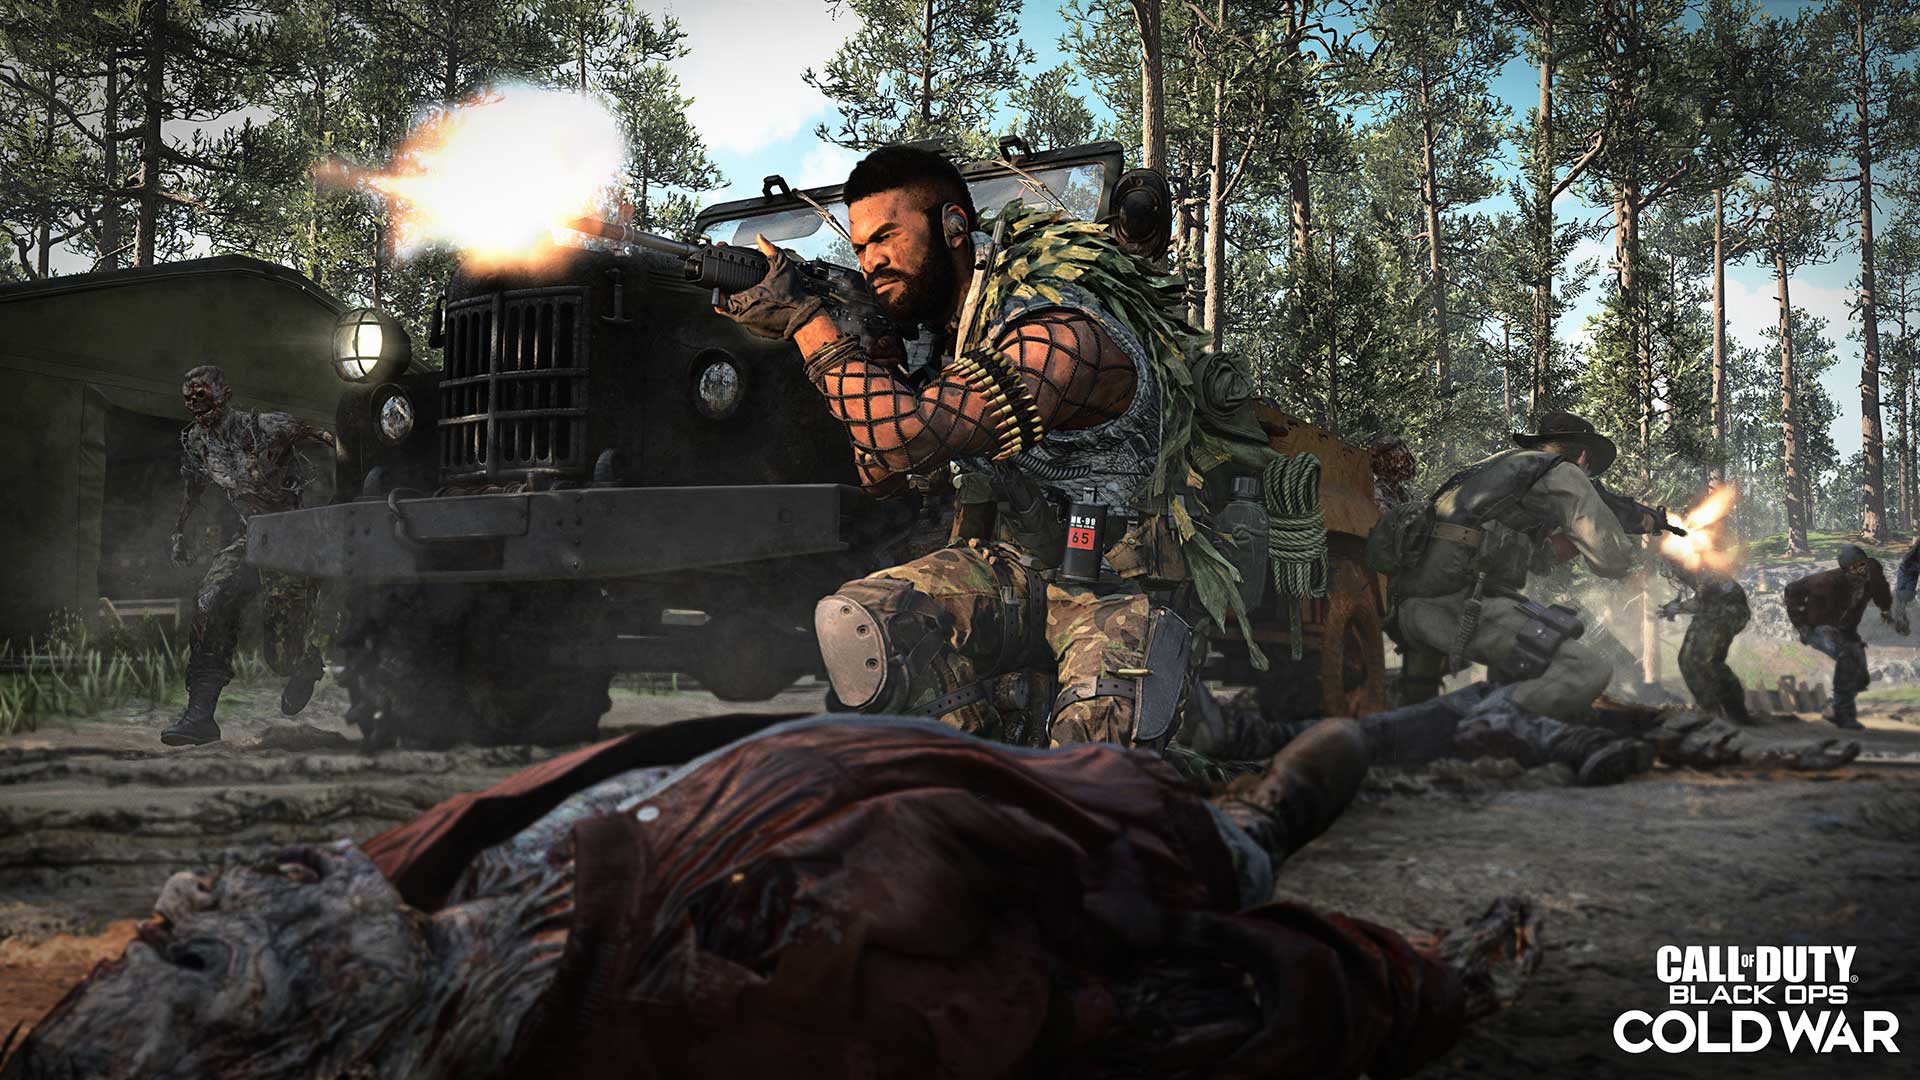
Как и у всех мультиплеерных режимов современных Call of Duty, у «Нашествия» есть сюжет. Ничего серьезного, но тем не менее. События режима происходят на территории СССР, а именно — неподалеку от Уральских гор. Здесь находится новый элемент Темного эфира, и оперативникам организации «Реквием» предстоит его отыскать. И заодно — уничтожить как можно больше восставших мертвецов и других монстров.
Вот с какими задачами игроки могут столкнуться в режиме «Нашествие».
«Защита»
«Сопровождение»
«Отправка»
А это уже аналог «захвата флага». Похожая механика есть и в Left 4 Dead: помните, как во второй части, в кампании, что заканчивается торговым центром, нужно было таскать канистры с бензином к гоночной машине? Вот в «Отправке» необходимо делать тоже самое, только таскать следует не канисты, а контейнеры с кристаллами эфирия. Ну, и бежать с ними, конечно, нужно не к машине, а к безопасному месту.
«Уничтожение»
При «Уничтожении» на карте появляются элитные, особо опасные враги — их местоположение отмечается с помощью трекера. Оперативникам при этом важно решить: избегать эти монстров достаточно долго, чтобы уничтожить приближающуюся волну врагов, или нанести отыскать их и уничтожить, тем самым избавившись от оставшихся рядовых зомби и перейдя в следующей волне.
«Удержание»
При «Удержании» цель оперативников — уничтожить нестабильный эфирные кристалл. И чтобы сделать это, им нужно отправиться в Темный эфир, где действуют привычные правила стандартных зомби-режимов. Игрокам, пока не истечет таймер, необходимо обороняться от волн зомби в помещении, где можно заколачивать окна.
Call of Duty ® : Black Ops Cold War Zombies Meta Update – New Skill Upgrades
Those new Refined and Flawless Aetherium Crystals are going to be put to good use with these incredible new upgrades to your Skills, available at the start of Season Two.
Call of Duty ® : Black Ops Cold War Zombies Meta Update – New Skill Upgrades
Those new Refined and Flawless Aetherium Crystals are going to be put to good use with these incredible new upgrades to your Skills, available at the start of Season Two.
Operation Threshold, the overarching campaign behind the new Outbreak experience in Zombies, marks a pivotal moment in Requiem’s research and understanding of the Dark Aether. Notably, the CIA-backed group can now collect and harness the power of stronger Aetherium Crystals, an energy source with near-unlimited potential that has yet to be fully tapped.
Before Season Two, Requiem agents were able to upgrade their Skills for Weapon Classes, Field Upgrades, Perks, and Weapon Mods with Raw Aetherium Crystals across three Tiers of power. Now, by earning Refined and Flawless Aetherium Crystals in the field, agents can overcharge their Skills into Tier IV and Tier V.
This is what you need to know about these new resources, as well as every single Tier IV and V upgrade across all Skills that change the Zombies meta as we know it…
Earning Refined and Flawless Aetherium Crystals
First, what does it take to earn these more advanced Aetherium Crystals?
As Requiem agents are aware, completing the 10 th round of a traditional Zombies experience rewards one Raw Aetherium Crystal, with one more given on top of that with a successful exfiltration. In Outbreak, they can earn one of these crystals after completing one experiment, plus one more with a successful exfiltration.
Because Refined and Flawless Aetherium Crystals are rarer in nature, they are rewarded upon completion of larger milestones. These include completing higher numbers of objectives in Outbreak, or reaching higher rounds in traditional round-based Zombies matches.
These new resources are meant to reward the most dedicated agents of Requiem – and to those elite agents comes the promise of awesome power with the following upgrades to their Skills:
Every single Weapon Class, including the Launcher and Special classes that receive their own Skill upgrades as of Season Two, can become more powerful with the help of the new Aetherium Crystals. Remember, these upgrades not only affect your starting weapon, but also any weapon picked up in-game, whether it’s a Wall Buy, a Trials Reward, or out of the Mystery Box.
These Tier IV and V upgrades are also for Submachine Guns and Shotguns.
These Tier IV and V upgrades are also for Tactical Rifles.
These Tier IV and V upgrades are also for Light Machine Guns.
Both Specials and Launchers are new to the Weapon Classes Skills. Note that these Tier IV and V upgrades are also for Launchers
These are the simplest upgrades out of the four main Skill categories, as they all mostly boost damage output across all weapon types.
All but one weapon category’s Tier IV upgrade is like its Tier I upgrade, and its Tier V upgrade like its Tier II upgrade. For example, upon unlocking Tier IV for Assault Rifles, their longshot damage is increased from 10% to 25%. This impact on the meta is simple on the surface: whichever weapon class you gravitate toward, it will see a damage boost in some form with these new crystals.
The only exception is the Melee category. Its Tier IV upgrade is directly related to its Tier II one, but when imbued with Flawless Aetherium Crystals at Tier V, it allows agents to heal small amounts of damage with melee attacks. This can be potentially game-changing.
Imagine getting swiped by a zombie for a chunk of damage, only to swing back and regain some of that lost health immediately. In panic situations, this upgrade might just save your life, and outside of them, regaining a little bit of health every now and then certainly doesn’t hurt.
Including the new Frenzied Guard Field Upgrade, these are how your Refined and Flawless Aetherium Crystals will be put to use:
Full Tier V description: Normal enemies are frozen for 5 seconds and insta-killed when damaged.
Full Tier V description: Mine detonates 3 times in rapid succession, stunning Special enemies.
Full Tier V description: Beams persist at their initial locations and continue to heal players for 10 seconds.
Full Tier V description: Ring duration, burn effect, and insta-kill chance all increase the longer the player is inside.
The all-new Frenzied Guard gets a major duration boost at Tier IV, but more importantly adds an additional slow effect to all normal enemies at Tier V. This allows tanks to make an impact far past their immediate area, letting squadmates outrun hordes more easily.
Frost Blast and Energy Mine get similar upgrades at Tier IV with one additional blast or mine. At Tier V, each branches off to get its own powerful upgrade.
For Frost Blast, this equates to a short-range Insta-Kill powerup, as frozen zombies will shatter immediately after any hit.
For the Energy Mine, it becomes a better tool against Special enemies with its three successive stuns, giving agents the opportunity to stop them from pulling off a powerful attack with a well-placed mine.
The Aether Shroud’s movement and additional charge benefits can translate to agents getting further away from tough situations more often. Or, for those who use this in more of a support role, these upgrades give agents more opportunities to run up to and revive faraway squadmates more frequently.
Healing Aura fans become even more powerful healers thanks to its Tier IV and V upgrades. At Tier IV, revived allies now keep all of their Perks on their decay meter. Meanwhile, those constant beams work overtime at Tier V, persisting at their initial locations and continuing to heal players for 10 seconds.
Finally, the Ring of Fire gets even deadlier with a small chance of insta-killing normal enemies through its burning effect, which can add additional support against unmanageable undead crowds. The Tier V upgrade meanwhile offers even more rewards for staying within the ring, but be sure to have an exit strategy when it finally runs dry.
All seven Perks have a bold new taste that grants agents additional powers at Tier IV and V. The secret ingredient? Refined and Flawless Aetherium Crystals. The exact upgrades are as follows:
Full Tier IV description: Respawn near the end of the Round instead of the beginning of the next. Respawn timers are reduced by 50%.
Full Tier V description: Reloading creates an electric damage discharge that damages and stuns nearby normal enemies. The more empty the magazine, the stronger the damage.
Full Tier V description: Each consecutive hit on the same enemy deals 2% more damage to a maximum of 20% damage.
Tombstone Soda gets two major fundamental changes across its additional Tiers, starting with getting agents back into the fight quicker than before. Not having Perks decay when downed is an absolute boon as well, making it just a matter of buying another Tombstone Soda instead of a few lost Perks whenever you’re down for the count.
Jugger-Nog’s new Tiers not only make agents better tanks at Tier IV with reduced armor damage, it also essentially gives them a second life at Tier V. Being brought down to 1 HP rather than 0 can be enough of a cushion to push out of a zombie horde, or serve as a turn of fortune after a devastating blow from an Elite enemy.
Speed Cola becomes a speedrunner’s dream at Tier IV by making barricade repairs and Mystery Box rolls faster, and gains some serious benefits at Tier V. Outrunning the horde but can’t reload or thin their numbers with hip-fire? Now you can thanks to this awesome upgrade.
Quick Revive gives agents the ability to quickly get out of a bad situation after reviving an ally at Tier IV, granting a 5-second speed boost to both players. As for Tier V, it instantly revives you if you can kill an enemy while downed. This, on top of Self-Revive Kits and Jugger-Nog, can give agents more chances at survival than ever before.
Stamin-Up adds another speedy benefit to Zombies at Tier IV: using equipment while sprinting, great for those looking to hit moving Tomahawk shots or toss Cymbal Monkeys while escaping big hordes. Tier V makes agents even quicker thanks to the removal of sprint slowdown, making them move at maximum speed whenever they decide to pick up the pace.
Elemental Pop gets a major buff to elemental damage at Tier IV, and receives a bit of an “Electric Cherry” twist at Tier V thanks to that new ability. Agents may want to wait until a magazine is fully expended to deal the most damage to nearby enemies while reloading… or find weapons with smaller magazine sizes to hit this damage maximum more often.
Deadshot Daquiri becomes more potent with two different damage buffs: a 10% critical damage increase at Tier IV, and a consecutive hit bonus at Tier V. The former upgrade is great all around, while the latter is most useful against Elite enemies that require multiple hits before they return to their grave.
Outside of the new Shatter Blast Mod, the various Weapon Mods have a similar theme throughout their Tier IV and V upgrades. Also, remember that these bonuses apply to whenever these appear through Elemental Pop, which might move them up on your “must upgrade list” if you use that Perk often.
Call of Duty ® : Black Ops Cold War Zombies Experience Intel: Outbreak
Arriving in Season Two, this large-scale Zombies experience is unlike any other in Call of Duty history. From its purpose in the greater Dark Aether story to the spoils of survival, this is your initial guide to Outbreak.
Call of Duty ® : Black Ops Cold War Zombies Experience Intel: Outbreak
Arriving in Season Two, this large-scale Zombies experience is unlike any other in Call of Duty history. From its purpose in the greater Dark Aether story to the spoils of survival, this is your initial guide to Outbreak.
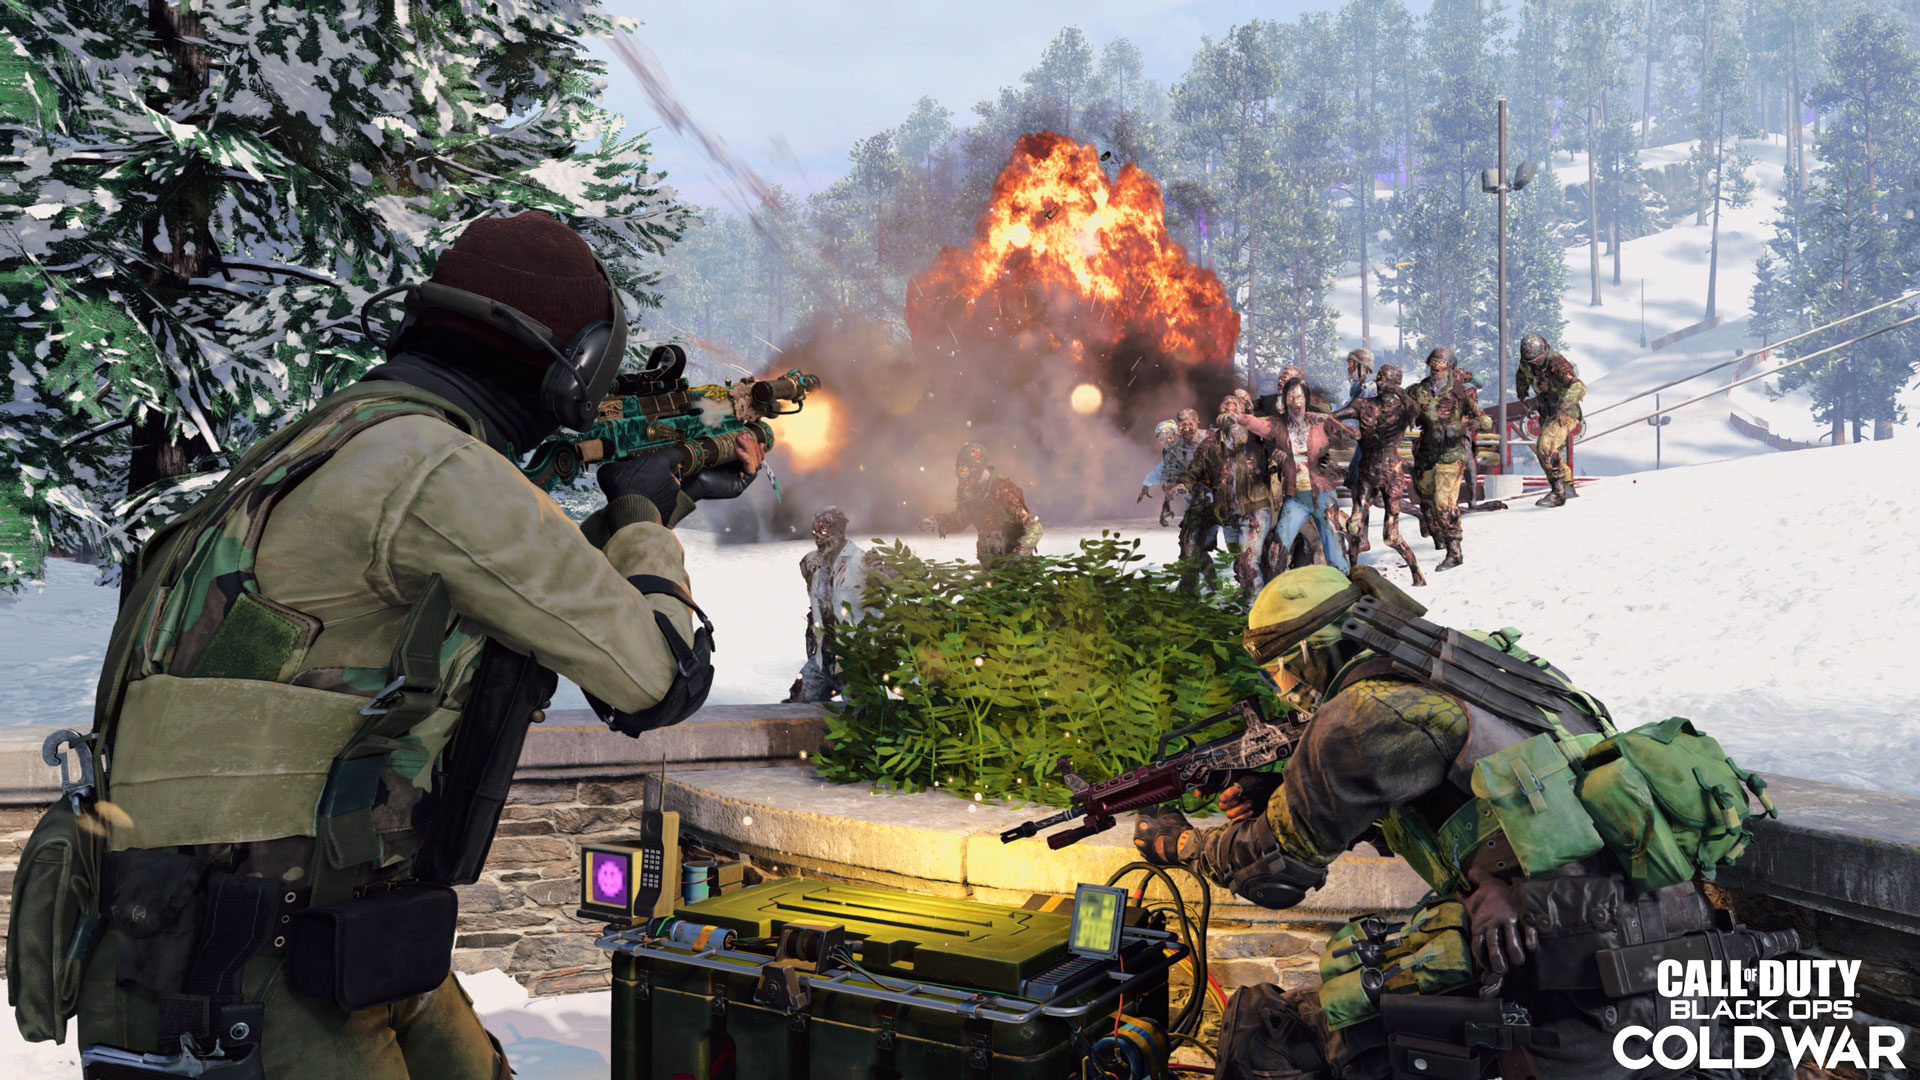
Season Two brings a brand-new way to experience Zombies on a massive scale in Black Ops Cold War: Outbreak.
This objective-based game experience will task squads of up to four Operators with aiding Requiem in their biggest undertaking yet: Operation Threshold. Set across multiple regions in the Ural Mountains of Russia, Outbreak encourages exploration and risk-taking to maximize the spoils of these zombie-infested territories, with teamwork and coordination being essential to completing your missions and living to tell the tale.
Alongside the release of Outbreak comes new Aetherium Crystal types – Refined and Flawless – that will help Requiem Agents permanently upgrade their Weapon Classes, Field Upgrades, Perks, and Ammo Mods to additional tiers of incredible power.
From its purpose in the greater Dark Aether story to details on the various experiments within Requiem’s largest operation yet, this is our initial intel on Outbreak. Firstly, check out the Outbreak Trailer:
Введите дату вашего рождения
Operation Threshold – Requiem’s Gambit in Outbreak
Across “Die Maschine” and “Firebase Z,” Requiem learned just how far ahead Omega Group is in their arms race to harvest Aetherium – potentially an even deadlier secret war compared to the public conflict between the East and West.
After several desperate attempts to catch up to their adversaries, the CIA-backed international research group and task force have finally discovered a major breakthrough: the largest Outbreak zone on the planet.
Following this discovery, Requiem launched Operation Threshold, a multi-faceted campaign involving all of Requiem’s research departments. Already, Requiem’s Science and Military Research departments have identified three massive regions in the Outbreak zone to explore and investigate.
Even with this breakthrough, however, Omega Group is still one step ahead of Requiem, as they’ve begun investigating these regions long before Requiem arrived. Both sides not only believe the secrets waiting in the Ural Mountains to hold the key to fully understanding the Dark Aether’s power… it may just be the key to winning the Cold War.
Your Mission in Outbreak
Now you, the elite Operators, are here to aid Requiem in their most important operation yet.
Along with up to three other Operators, your objective is to explore designated regions in the Outbreak zone around the Ural Mountains and assist Requiem’s other divisions in completing their objectives as their most elite strike team. After each experiment is done, you must either successfully exfiltrate the area or, if you choose to accept the risk of deadlier encounters, enter rifts through the Dark Aether to another region to assist with more objectives.
Surrounding these regions is a new aspect of the Dark Aether to contend with, first spotted at “Firebase Z”: the Phase. This supernatural force renders familiar areas deadly and can put previously out-of-bound zones in play.
A typical Outbreak mission begins with a Requiem strike team entering one of these regions via helicopter, armed with a custom starting weapon and Field Upgrade. A waypoint in the overworld, which also appears on the main map and mini-map, marks the location of Requiem’s primary research objective with a star.
Unlike any other Zombies experience thus far, there are no set paths to and from the objective. Agents can take as much time as they wish to explore the area, searching for rewards either in loot chests, encountering various random events, or activating a Trial Computer. For a small cost of 500 Essence, Requiem agents can also take jump pads found in the region that launch them high into the air, allowing them to reach objectives safely and, if they are skilled enough, parachute to collect essence containers during the descent that can cover the cost of their flight fee, and then some.
No matter how a squad gets to the main experiment site, their survival hinges on successfully completing this primary objective. Fail an objective, and your mission is over.
The main investigation can be one of the following:

As part of Requiem’s research on the Dark Aether, they are curious about the genetic code on the infected. With numerous tests failing due to teams being killed or… incomplete samples from the agents who submitted them, your task is to claim a fully intact sample, place it in a device to study, and defend the machine while it uploads data.
Depending on the location of this device, numerous strategies for keeping the device online can be effective, like using vehicles in outdoor locations or mid-range weapons for busier locales. No matter where the device is, the usually scattered hordes of the undead will undoubtedly funnel in toward the scanning machine, making close-quarters weapons and placeable equipment or Support items solid choices for defending it.
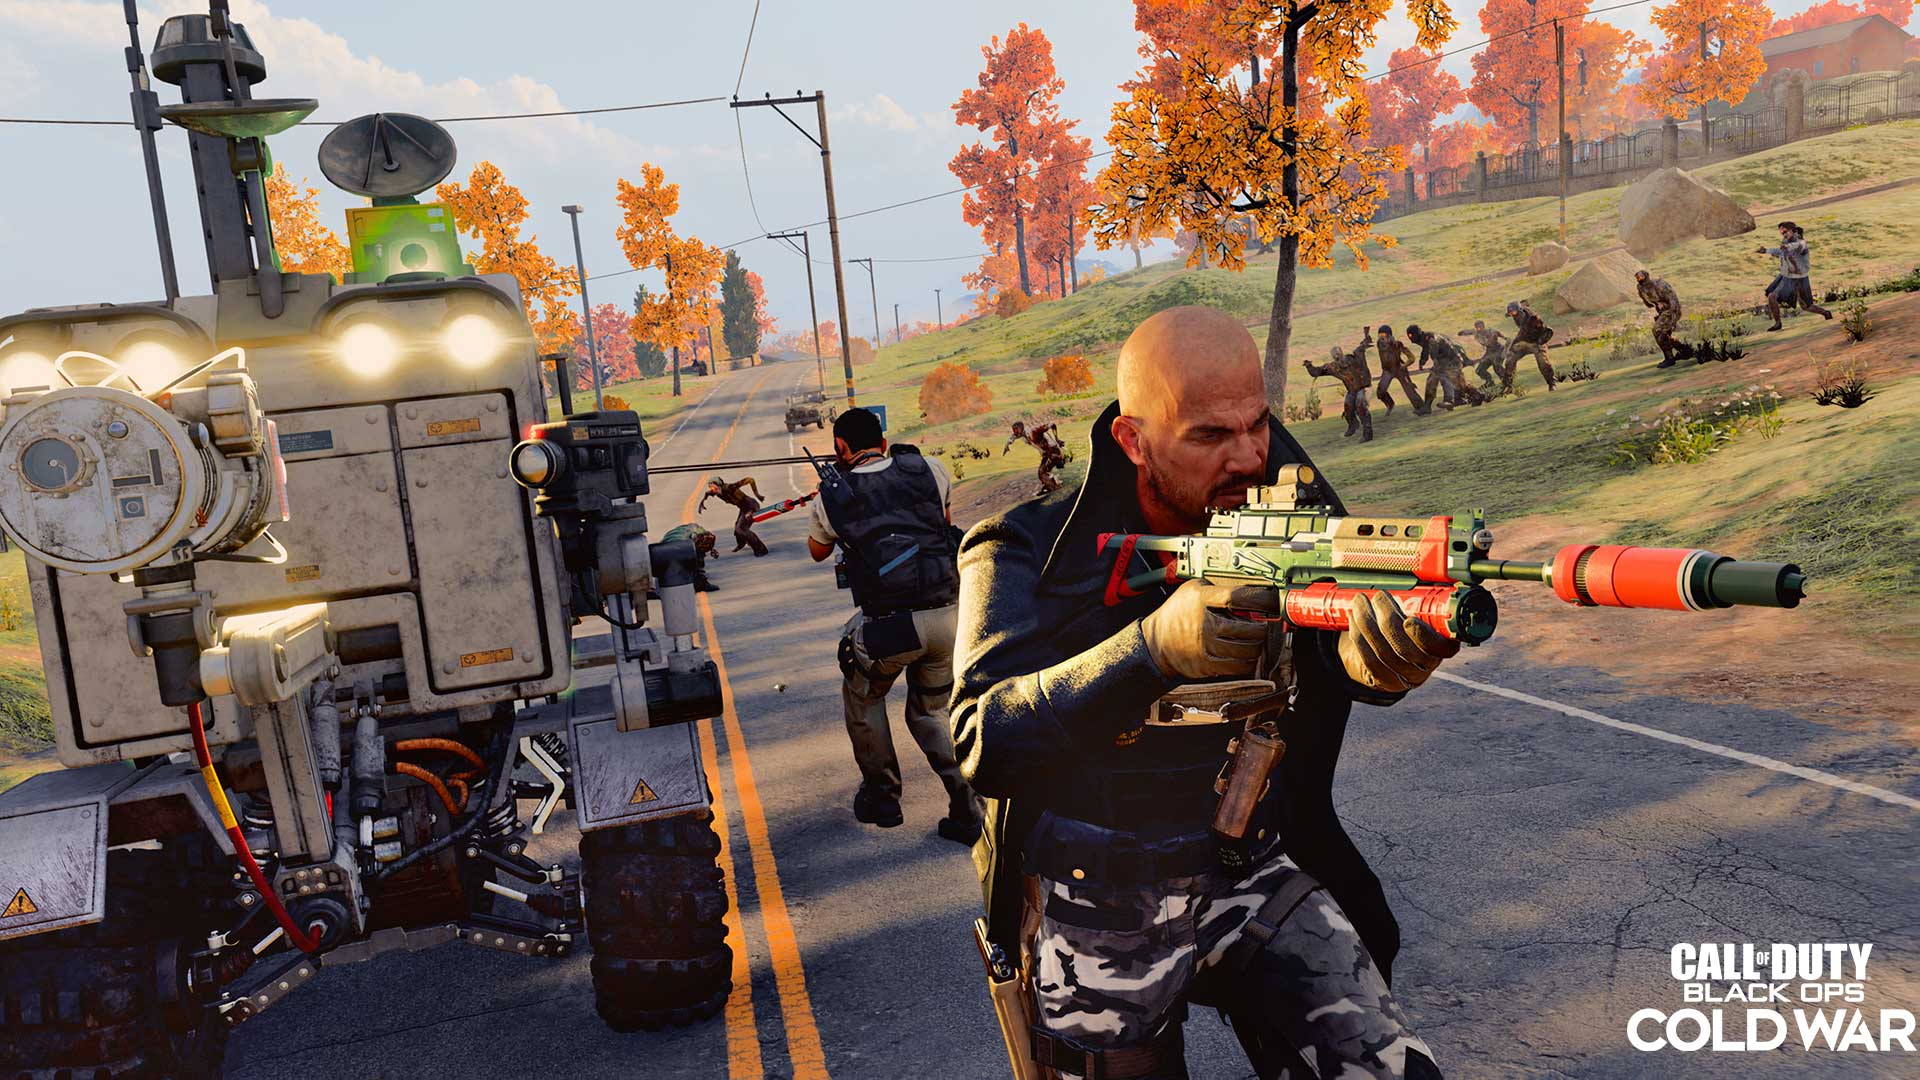
Requiem recently developed a fleet of highly advanced, yet highly vulnerable, rovers to help them detect dimensional portals into the Dark Aether.
Your mission is to ensure this rover (with its captured specimen) finds this dimensional portal somewhere in the Outbreak zone and gets through it in one piece. For this experiment, it’s wise to remember back to your security detail training: keep the principal (the rover) at center, move as one unit, and shift to deal with threats as they come.

Somewhere in the Outbreak zone, there are two Aether harvesting units that have been gathering raw Aetherium from the atmosphere and growing Aetherium Crystals inside its containment canisters. These Aetherium Canisters need to be extracted to a safe location quickly. Fortunately, a nearby set of rockets can carry them away from harm.
For this experiment, agents will need to carry these canisters to the rockets manually for extraction. Due to their size, they will be unable to use any of their weapons or equipment, and will be rendered slower than usual. However, while carrying the Aetherium Canister, your normal Field Upgrade is replaced with a very powerful one, which can emit a small burst of Aether energy that knocks down nearby zombies – helpful in a pinch if other Operators cannot pick them off.
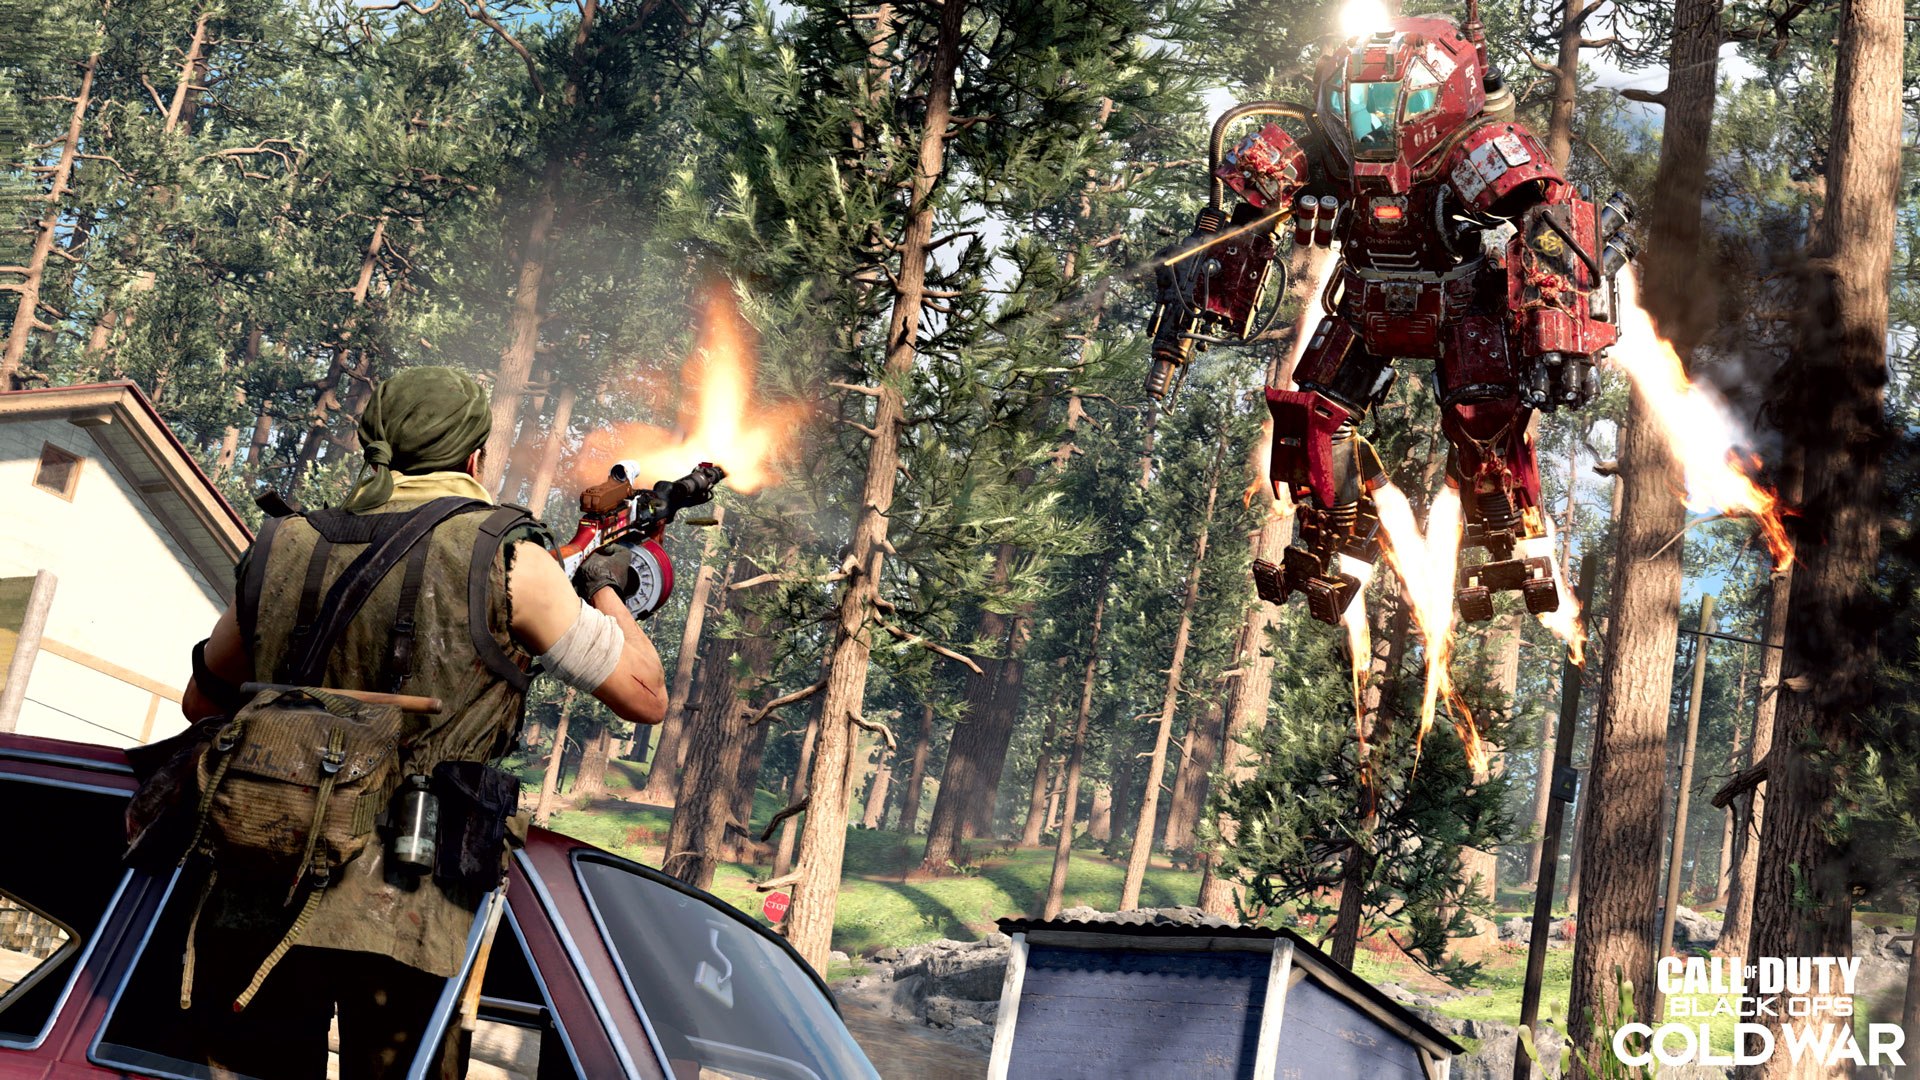
Using a GPS satellite tracker, Requiem can pinpoint the exact location of HVTs (high value targets) across dimensions. For this experiment, this tracker is used to find elite enemies, who will phase into existence after their position is compromised.
Here, agents will have to make a strategic decision: dodge the HVT long enough to clear the ensuing wave of enemies, or deal enough damage to the HVT to force it to move to the next wave of the fight, which will wipe out the remaining wave.
A massive, unstable Aether Crystal is emitting alarming amounts of Dark Aether energy, to a point where some researchers reported hearing voices as they approached it. Due to its chaotic nature, destruction is the only option on the table, although attempting to do so will send agents into the Dark Aether itself, where they must hold out against any undead threats until the explosives are triggered.
This experiment will be the most familiar to veteran Requiem agents, as zombies will flow into the confined space where windows can be boarded up for temporary protection. Use your training to survive for as long as the timer states, and use power-ups and boarding up windows to maximize your chances of holding out.
As the Outbreak continues to grow, expect to find more types of investigations to complete throughout the Ural Mountains.
The Beacon: To Exfil or Not to Exfil?
After successfully completing an experiment, all agents must move to a mysterious beacon marked somewhere within the region. Just like getting to the objective itself, there is no linear path to the beacon, but the roaming hordes may make some routes more viable than others.
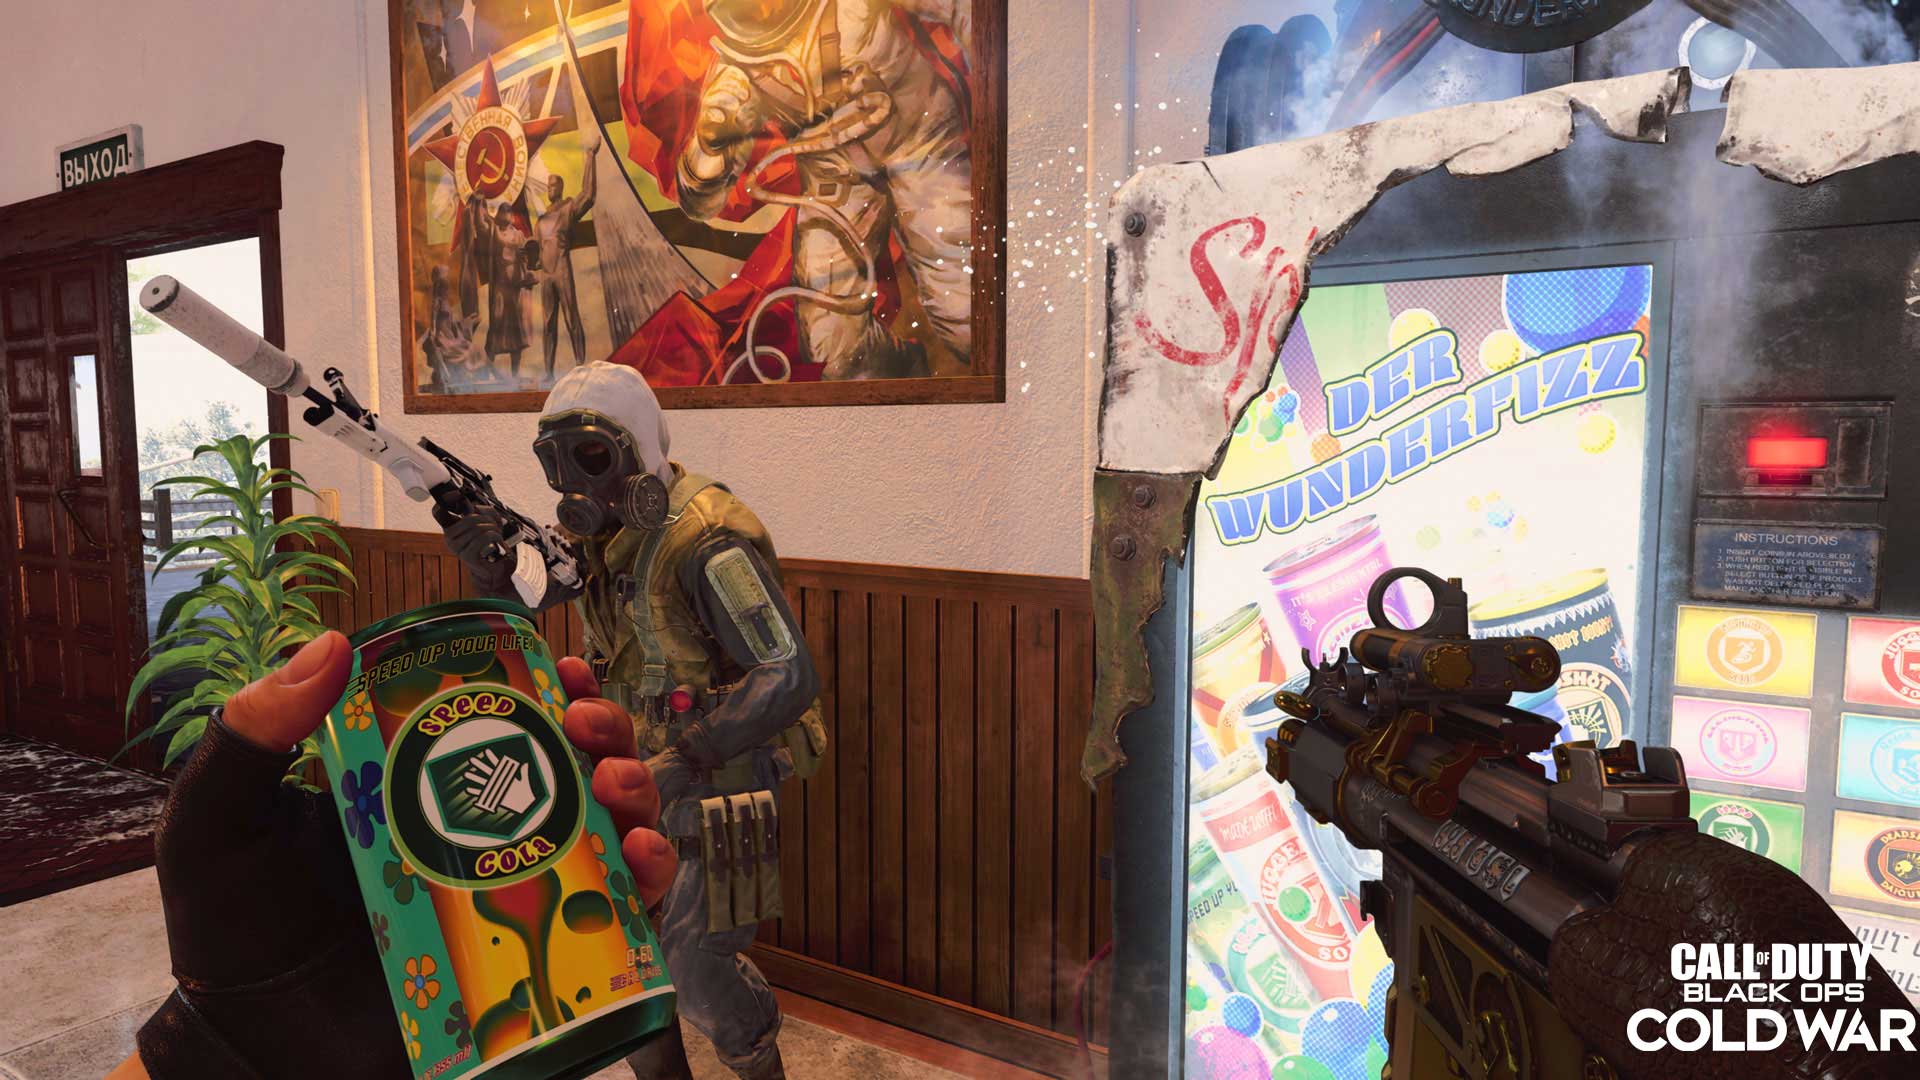
Once the beacon is activated, several useful machines will appear. These include a Crafting Table for creating equipment and Support items, an Arsenal for Armor and upgrading weapons, as well as Der Wunderfizz, which dispenses a variety of Perks, and of course, a Pack-a-Punch machine.
Agents are encouraged to use their resources at these stations before making an essential choice: call in an Exfil from the Outbreak zone, or take a trip through a dimensional portal to a new region somewhere else in the Ural Mountains.
Taking the first choice – Exfil – works like it does in round-based Black Ops Cold War Zombies experiences: get to the Exfil zone, eliminate any hostiles to clear the helicopter for landing, and hop aboard to leave the area. Doing this successfully will offer additional rewards on top of what was collected in the Outbreak zone.
However, if you take the portal, your squad will begin a new, more challenging mission, travelling to the next Outbreak region to survive against even more dangerous odds. Each trip through the portal amplifies your potential rewards, but also increases the lethality of the awaiting undead horde.
No matter which decision your squad makes, however, rewards are saved for every objective completed.
The Spoils of Survival: A Whole New Meta
Completing main objectives and successfully exfiltrating both offer large XP rewards along with three types of Aetherium Crystals:
· Raw Aetherium Crystals – Requiem agents know this resource well. These are used to upgrade Skills for Weapon Classes, Field Upgrades, Perks, and Ammo Mods through the first three Tiers of power.
· Refined Aetherium Crystals [NEW] – A more matured crystal structure. A greater energy source used to upgrade Skills to Tier IV.
· Flawless Aetherium Crystals [NEW] – This is the highest maturity an Aetherium Crystal can reach. This incredibly powerful resource is used to upgrade Skills to Tier V.
Earning the newer Aetherium Crystals won’t come easy, as gathering more mature crystals requires more extensive research during a single Outbreak infiltration. Refined and Flawless Aetherium Crystals can also appear as rewards in traditional, round-based Zombies experiences following the start of Season Two.
To learn more about every Tier IV and V upgrade coming to Zombies as part of Season Two, check out our guide on it later this week.
Consider this guide as initial intel for Requiem agents looking to drop into Outbreak. Of course, there is plenty of more research to be done in the Ural Mountains, so it’s up to you and your squad to explore the regions and report back to Requiem with your findings.