Darksiders Warmastered Edition «Update 2.1.0.3, 2.2.0.4 GOG»
— Исправления для AMD проблем с производительностью
— Исправление для пользователей, которые не ANSII персонажа имена, что были проблемы, чтобы получить конфиг сохранен / загружен
— Исправление для пользователей без предварительно существующей клавиатурой config не может загрузить / сохранить клавиатура конфиг
— Примечание : если у вас работает клавиатура конфиг загрузить / сохранить, то скопируйте настройки клавиатуры на новое место.
— Старый файл папке %localappdata%\управление в Darksiders\.dcon, его.
Новое местоположение и Имя файла в папке %appdata%\кайкен\darksiders1\keymapping.бин. Пожалуйста, просто скопируйте файл и переименуйте его.
— Соотношение сторон теперь работает в оконном режиме, должны работать с полным экраном и 16:9 мониторов (просьба дать обратную связь)
— Параметры ПЗ (автоматический и управляемый пользователем) работают сейчас во всех случаях
— Частота кадров крышка снята с
330 фпс
— Колесо мыши теперь должен работать как вход (по умолчанию для целей коммутации)
— Fix for AMD performance problems
— Fix for users with Non-ANSII character based usernames that had problems to get config saved / loaded
— Fix for users without pre-existing keyboard config could not load / save keyboard config
— Note : If you had working keyboard config load / save, then please copy your keyboard configuration to the new place.
— The old file was %localappdata%\Darksiders\controls.dcon.
New location and filename is %appdata%\kaiko\darksiders1\keymapping.bin. Please just copy the file and rename it.
— Aspect ratio works now in windowed mode, should work with full screen and non 16:9 Monitors (please give feedback)
— FOV settings (auto and user controlled) work now in all cases
— Framerate cap lifted from
330 fps
— Mouse wheel should now work as input (its default for switching targets)
Please log in or register
To enjoy the benefits of Nexus Mods, please log in or register a new account
Hot mods
This ReShade Preset remasters the game’s color-palette, adds color correction and better lighting.

Add a debug console to the game that has various engine commands

A ReShade Preset that offers the game a more Cinematic/HDR look and performance friendly.
SHARE YOUR MOD AND WIN AN RTX 3070 Ti WITH ROG
More mods
Add a debug console to the game that has various engine commands
Add a debug console to the game that has various engine commands
This ReShade Preset remasters the game’s color-palette, adds color correction and better lighting.
This ReShade Preset remasters the game’s color-palette, adds color correction and better lighting.
A ReShade Preset that offers the game a more Cinematic/HDR look and performance friendly.
A ReShade Preset that offers the game a more Cinematic/HDR look and performance friendly.
Media
News & Updates
Do scalpers keep beating you to that new graphics card? Perhaps you’re looking to upgrade that tired old keyboard and mouse? We might have just the thing for you! We’ve teamed up with Republic of Gamers UK to give you the chance to win an RTX 3070 Ti, one of two ROG accessory bundles or a £50 Steam gift card.
Nexus Mods was officially founded on 1 August 2001, so this month is extra special for us. We’re celebrating our 20th anniversary! This event is a great way to celebrat.
Mass Effect Legendary Edition dropped in May and since then almost 400 mods, saves and presets have already been shared with the community. While Bioware has not provided any official modding tools, the community found a way! Legendary Explorer (LEX) is a developer tool kit for ME:LE created and maintained entirely by fans of the series. It features around 30 powerful tools to make creating mods for Legendary Edition significantly easier. We’ve been talking with Mgamerz and Audemus about the ex.
The Forgotten City is a mystery adventure game of exploration and deduction, and a re-imagining of the critically acclaimed mod that won a nationa.
Nexus Mods first started offering Premium Membership as an option to users all the way back in 2007. Since then, it has been an invaluable source of income for the site that has allowed us to continue to host our services, hire staff, create NMM and Vortex, expand to over 1,300 more games and give back to mod authors via our Donation Points system, among many other things. Without it, the site simply would not exist.
Since we first started offering Premium Membership, our billi.
Siege Survival: Gloria Victis released on Steam last month and the good people at Koch Media have partnered with us to give away 35 copies of the game to the Nexus Mods community!
Siege Survival is a new resource management survival game set in the medieval world of Gloria Victis. You play as a small group of civilians trapped in the only remaining stronghold of your city which is under a brutal siege by an invading army.
The gameplay loop is split between a day and n.
It’s that time of year again! The Morrowind May Modathon 2021 starts today celebrating 19 years of modding for The Elder Scrolls III. Upload a mod for Morrowind during the month for your chance to win prizes and unlock some special achievements.
As usual, here are the full details from darkelfguy:
Celebrating Morrowind’s 19th anniversary, today I’m announcing the seventh annual Morrowind May Modathon Month Modding Competition, one of the biggest annual modding competit.
Today we are talking to randyknapp, the author of many UI and quality of life mods for both Valheim and Subnautica, as well as the popular, ARPG inspired Valheim mod: Epic Loot.
BigBizkit: Thank you for joining us today. First of all could you tell us a little bit about yourself?
randyknapp: Thanks for having me! I’m Randy, I’m 33, I live in Seattle with my wife and kids. I’m a professional video game developer with 10 years of industry experience.
The third edition of the Morrowind modding competition «MODJAM» is upon us and it’s back with a revenge
Come April 3rd (yes, this weekend!!), modders have 48 hours to make a mod based on a theme announced minutes before the jam begins. Simple enough, right?
Modders can work alone or in te.
With Nexus Mods getting bigger and better every year, we’re looking to bolster our ranks once again by recruiting a Junior Community Manager to work with our existing team to help us better serve our community.
This position is based in our offices in Exeter in the UK an.
Your notifications are getting a facelift! Starting on 22nd March 2021 all users will be upgraded to the shiny new system featuring easy access to their preferences, an improved design and more control directly in the notifications panel. We need to permanently remove all existing notifications with this change, so please use this time to check the ones you currently have if you care about them. There are a few things you need to know before the switch-over happens, so read on for more informati.
And with that said, keep on reading to see all the correct answers and to learn who the lucky winners are.
We all love games, that’s one of the things everyone in this community has in common, so when our friends over at GOG.com asked us if we’d like to give away some game keys to you guys as part of their «We Love Games» celebration, we could hardly say no!
We have 5 copies of Lichtspeer, Sword of the Necromancer, Bonkies, Gods Will Fall and Project Wingman to give out to the 25 randomly chosen winners.
There are a few rules you should be aware of b.
I think I speak for pretty much everyone when I say we’ve got high hopes this year will be much better for everyone around the globe than 2020 was. With that said, it might come as a bit of a surprise to some of you, but did you know that we’re actually going to celebrate the 20 year anniversary of Nexus Mods come August 2021? That’s right, Nexus Mods (and its predecessors going by other names) has now been around for almost two decades! Just to give you an idea of what that means: back then whe.
We have recently enabled a new download location for Premium Members that can potentially increase download speeds for any users who might have slower speeds than expected with their Premium Membership. If you’re a Premium Member and you think you should be getting faster speeds then please try the «CDN» download location, which now defaults to this new provider.
If you’ve had the (mis)fortune of taking the time to read my year i.
In this feature, we’re chatting with Aragas (aka Aragasas), one of our top Bannerlord mod authors. While you might not have heard of him, if you’ve played Mount & Blade II with mods there’s a good chance you’ve used at least one of the mods he and the other members of the Bannerlord Unofficial Tools & Resources (BUTR) team have worked on.
Thank you for taking the time to talk with us Aragas. To start off, can you tell us a bit about yourself?
Happy new year everyone.
It has been a couple of years since I last updated you all on the more internal goings on at Nexus Mods so I’ve decided to drum up enough enthusiasm to write another of my long-winded, banal «blog posts» on the matter. I wasn’t able to get around to doing one last year and I am aware that some of you actually like to punish yourselves, but if you’re like me and just like to skim read, here’s the TL;DR:
Statistically we’re doing better than ever. E.
Thank you for joining us today, it’s truly appreciated. We like to start these interviews off with a bit of a personal introduction, so could you please tell us a bit about yourself?
I’m 28 years old from the United States and currently work in manufacturing dealing with parts and.
Darksiders: Warmastered Edition — жизнеспособное чудище Франкенштейна
В рубрике «Прямым текстом» автор выражает исключительно собственное мнение, которое может не совпадать с мнением редакции. Он волен это делать как угодно и в любом удобном для себя формате. Здесь можно всё.
Вестники конца света
Но это «чудище Франкенштейна», сшитое из тут и там вырванных лоскутков, оказалось на диво жизнеспособным. Бои приятно отзывались в пальцах, геймплей был достаточно разнообразным и вовсе не сводился к одним только стычкам, да и сеттинг оказался любопытный.
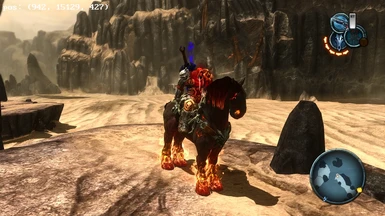
Все ж сыграть за натурального всадника Апокалипсиса было очень даже приятно, тем более что ему противостоят одновременно и ангелы, и демоны, да еще и на вполне привычных городских улицах. И довольно часто получалось, что войска ада и рая заняты друг другом, а мы — третья сторона, которая внезапно врывалась и навешивала и тем и другим.
И по мере прохождения Darksiders все меньше и меньше хотелось придираться к тому или иному элементу, уже где-то виденному. Да, видели, и что? Зато тут он пришелся очень к месту, вот бы другие умели так удачно вплетать интересные идеи в свой проект!
Потом была вторая часть — уже с относительно открытым миром и даже ближе к жанру ролевого экшена, чем к чистокровным слэшерам. И на ней серия заглохла.
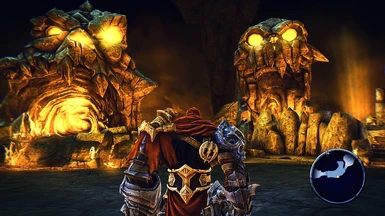
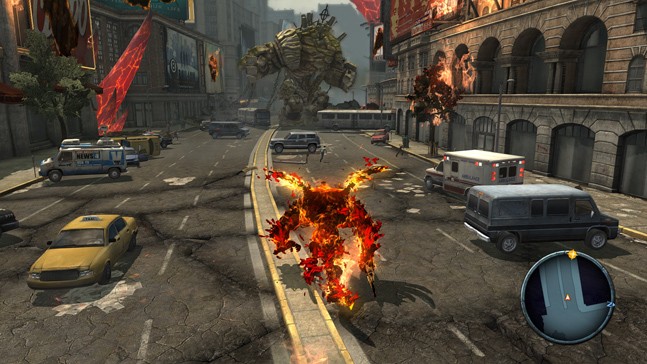
Но, увы, издателя — компании THQ — не стало аккурат после выхода Darksiders II. И хотя их проекты раскупили, третью часть Darksiders никто не анонсировал. Но зато выпустили переиздания: сначала Deathfinitive Edition для второй части, а буквально недавно — Warmastered Edition для первой. В ней мало что изменилось относительно оригинала. Даже графика, хоть и стала четче, все равно не впечатляет — в HD стало заметно, что локации слишком безлики. Мало объектов, нет мелких, цепляющих взгляд деталей.

Но феномен «главное — начать, а там затянет» опять работает! Это тот самый случай, когда елочные игрушки ничуть не фальшивые и радуют как прежде. Чем дольше играешь, тем меньше хочется жаловаться. Разработчики все же могли нащупать тот уровень тактильности, который заставляет прорубаться сквозь одну группу монстров за другой и получать от этого процесса море удовольствия.
Так что если вы в свое время пропустили оригинал — что ж, стоит наверстать. Хороших слэшеров сейчас не так-то много выпускают. К тому же если продажи пойдут — возможно, это убедит издателей в том, что надо делать третью часть. А мы ее, честно-честно, очень ждем.
Darksiders warmastered edition моды


Darksiders Warmastered Edition


Hi all, and welcome to another one of my guides!
I’ll be covering every single collectible in the game, and have included a map marked with the location of the item. Also I have included a Legend for every image so you won’t get have to scroll back to the top to check which one you need to get.
This is a re-upload of the original Darksiders guide I did for the other, last generation, version of the game. If there is any discrepancies between the games, please comment down below and I will endevor to update this guide.
http://steamcommunity.com/sharedfiles/filedetails/?id=492210896You can follow me, and see the rest of my guides here:
http://steamcommunity.com/id/StarSide/myworkshopfiles/?section=guides
Ok, so Darksiders has it’s fair share of collectibles; some easy to find, others gratuitously difficult.
All the important character building items you will find I have marked on the map, save for things you can buy at the vender, and Boss rewards.
So, without wasting time; here is the rundown of what things you should be looking out for:
In order to max out your health, you need to collect an additional 9 lifestones. There are 16 lifestone shards in the game. Every four that you collect will give you a lifestone. An additional complete lifestone is awarded each time you defeat one of the first five bosses. Obtaining all lifestones will unlock the Full Power trophy. A video guide showing the locations of all lifestone shards can be found here.
In order to max out your wrath, you need to collect an additional 8 wrath cores. There are 20 wrath shards in the game. Every four shards that you collect will give you a wrath core. An additional three wrath cores can be obtained by buying it off Vulgrim, trading in the overlord artifact and opening a chest at Twilight Cathedral. Obtaining all wrath cores will unlock the Wrath of War trophy. A video guide showing the locations of all wrath shards and cores can be found here.
There are 27 artifacts in the game; 20 soldier, 6 champion, and 1 overlord. You can check how many of each type you have obtained by hitting and navigating to the final tab. Trading all artifacts with Vulgrim is required in order to obtain two lifestone shards and one wrath core.
There are 10 pieces of the abyssal armour. Apart from the one awarded after clearing the curse in the Drowned Pass, they are all found in the environment. A cool thing about the armour is that you can choose to carry it over into a fresh new game regardless of the difficulty. Collecting the full set of armour will unlock the Legendary Form trophy. A video guide showing the locations of all armour pieces can be found here.
Note: Serpent holes ar e not available until after defeating Tiamat in Twilight Cathedral. In order to use a serpent hole as a shortcut to another area, you must have found Vulgrim in that area.
Twilight Cathedral
Lifestone Shard
Requirements: Mask of Shadows & Shadowflight
Activate the Mask of Shadows just prior to the exit portal to reveal a glide point and a new path. Follow the path around until you reach another glide point. Use this to reach the chest and collect your shard.
Anvil’s Ford
Wrath Shard
Requirements: Abyssal Chain
At roughly midway through the serpent hole, you’ll see some grapple points on the left. Use them to swing over to the secluded platform and grab this shard from the chest.
The Dry Road
Wrath Shard
Requirements: None
Once you enter the serpent hole turn around and follow the path to a chest which contains this shard.
Vulgri m is the merchant of the game and appears once in each area apart from the prologue. Once you have located him, his location will permanently be marked by his symbol on the map of that area.
Wrath Shard
Requirements: 2500 souls
The first or second shard you are likely to obtain. When you are comfortable spending 2500 souls, talk to Vulgrim. When you have enough, I’d advise buying this immediately.
Wrath Core
Requirements: 10000 souls
Same goes for Wrath cores. This can be left for a while; from a gameplay stand point Wrath isn’t that useful in my experience. Regardless you’ll need to pick it up eventually.
Wrath Core
Requirements: Overlord artifact
Once you have acquired the overlord artifact, talk to Vulgrim and press to trade it in. You will be rewarded with a wrath core. For details on acquiring the artifact, refer to the Ashlands section of the guide.
Lifestone Shard
Requirements: All soldier artifacts
When talking with Vulgrim you can press to trade any artifacts that you have collected for souls. Once you have given him all soldier artifacts, he will give you a lifestone shard.
Lifestone Shard
Requirements: All champion artifacts
When talking with Vulgrim you can press to trade any artifacts that you have collected for souls. Once you have given him all champion artifacts, he will give you a lifestone shard.
1. Artifact: Soldier
Requirements: None
In the western area of the map is a set of steps. Heading down these steps will eventually take you to a small pond. This artifact is found at the bottom of the water.
2. Lifestone Shard
Requirements: None
After entering the main section of the library, drop down to the patch of water. Swim through the tunnel and to the other side to find a chest which contains this shard.
3. Artifact: Soldier
Requirements: Shadowflight
Once you drop down into the main section of the library, climb the broken shelves opposite. This artifact is found on the other side of the broken bridge. From the edge of the current side, glide across and you should just about make it.
Tip: the first soldier artifact can be gotten without shadowflight, if you’ve purchased the air dash upgrade. just double jump to the beam sticking out of the platform and air dash to it.
Thanks to Doc Sloth for the update.
4. Wrath Shard
Requirements: Abyssal Chain
Just above the broken bridge, you’ll see a grapple point on a pole. Use it to swing over the gap, walk round the corner and open the chest containing this shard.
1. Abyssal Armour Piece
Requirements: None
Near the beginning of the area is a bomb attached to some growth that is blocking the way up. Lob a car or use your crossblade, if you have it, to destroy the growth which will also knock a pillar down. Climb up the pillar and open the chest to receive your first piece of the abyssal armour.
2. Wrath Shard
Requirements: None
From Vulgrim’s position, turn around to find some growth. Climb the growth and open the chest on the ledge for the shard.
3. Abyssal Armour Piece
Requirements: Shadowflight
From Vulgrim’s position, peer over the edge and you will see a narrow path spiralling around where you freed Samael. In order to land on the path, you will first need to perform a single jump and then start gliding when you are roughly half way across. The chest at the top of this path contains the armour piece.
4. Artifact: Soldier
Requirements: Chronomancer
On your way to The Dry Road you’ll need to get past a fast closing gate. Activate the chronomancer point to slow down time, then the gate lever and quickly run underneath the gate. Follow the path and steps round until you reach a climbable wall. Climb as far as you can and then jump away from the wall to land in a pipe. Turn around and the artifact will be right in front of you.
5. Artifact: Champion
Requirements: Abyssal Chain & Shadowflight
Before using the fan, it would be a good idea to activate the panel in the hallway before the fan, so that you can easily knock out another collectible after this artifact without backtracking too much. Onto the actual artifact.
While riding the rotating fan, look for a gap in the lower walls. Just after the blade you’re standing on passes this gap, jump or glide through it and press when the prompt pops up to grapple up to the ledge. Use the glide point to reach the much higher ledge and you’ll see this artifact floating in the air.
6. Wrath Shard
Requirements: Abyssal Chain, Shadowflight & Voidwalker
In the hallway before the room with the fan is a ledge which is too high for you to jump up. It’s also where this shard is. On the ceiling is a voidwalker panel, activate it now and head into the fan room. While riding the rotating fan, look for a gap in the lower walls. Just after the blade you’re standing on passes this gap, jump or glide through it and press when the prompt pops up to grapple up to the ledge. Walk forward slightly and look up to see another panel. Activate it and use the glide point to fly through it and onto the previous inaccessible ledge. Turn around and you’ll see the chest which holds this shard.
1. Lifestone Shard
Requirements: None
Destroy the seven cross tombstones and a chest will appear near the entrance. Open the chest to collect this shard.
2. Artifact: Soldier
Requirements: None
Nearby the chest that appears after destroying the tombstones are three stone blocks. Drag the middle one to reveal a set of steps. The artifact is in the room at the bottom of these steps along with several enemies.
3. Artifact: Soldier
Requirements: None
In the eastern area of the map, just past the Vulgrim location, is a set of steps. Descend the steps and find the artifact at the back of the room.
4. Wrath Shard
Requirements: Shadowflight
Just prior to the cursed demon is a hole in a wall. Jump down and follow it through to reach a destroyed building which also contains an armageddon shard. Use the glide point to reach the next floor and and open the chest in the corner for the shard.
5. Lifestone Shard
Requirements: Crossblade & Tremor Gauntlet
Just prior to the cursed demon is a hole in a wall. Jump down and follow it through to reach a destroyed building which also contains an armageddon shard. Use the glide point to reach the next floor and then use your crossblade to tag the fire & dormant bomb to allow you to climb this growth. After climbing the growth, you’ll see a blue rock formation nearby. Smash it to find a chest which contains this shard.
6. Artifact: Champion
Requirements: Tremor Gauntlet
When travelling to The Broken Stair, you will pass through a tunnel with bats, two glide points and a blue rock formation. Jump down to the rock and smash it to reveal the artifact.
1. Artifact: Soldier
Requirements: None
Near the entrance of the area is a collapse on the right wall. Walk through the gap and you’ll see the artifact at the edge of the debris.
2. Lifestone Shard
Requirements:: None
Descend the steps with the swinging Vulgrim signs and take a right to find a pool of water. Swim through to the other side and open the chest for this shard.
3. Lifestone Shard
Requirements: None
While using the two glide points to reach the highway, you should see a glowing chest in the distance behind some cars. You’ll find the shard inside.
1. Artifact: Soldier
Requirements: None
After pushing the statue off the ledge, the already damaged ground below will fall through. Jump down the hole and explore this new area. When you find yourself at the top of some growth, jump away from the wall to hopefully grab the artifact which is floating in the air.
3. Artifact: Champion
Requirements: Shadowflight
In a small room with lava and two glide points is an artifact floating in the air. Use the glide point to hover up into the air and collect it.
4. Artifact: Soldier
Requirements: Shadowflight
One of the three sword puzzles contains a rotating bridge. Make your way to the center and glide down to the lower right ledge where the artifact is resting.
5. Wrath Shard
Requirements: None
After inserting the second of the three swords, the door on this level will unlock. Inside this room is a chest on the right which contains this shard, however, as you approach it the chest will sink through the floor and some enemies will spawn. Defeat the enemies and the chest will return.
6. Wrath Core
Requirements: Crossblade
After inserting the final of the three swords, the platform will rise. Using the block that you pushed earlier, climb up to the ledge where the Goremaw is hanging. Throw your crossblade at it to stun it and quickly run through to the next room. Jump down to the lower level and open the horned chest to collect this core.
7. Abyssal Armour Piece
Requirements: Crossblade
After inserting the final of the three swords, the platform will rise. Using the block that you pushed earlier, climb up to the ledge where the Goremaw is hanging. Throw your crossblade at it to stun it and quickly run through to the next room. At the far end of the ledge is a chest which contains this armour piece.
Lifestone [BOSS]
Requirements: Defeat Tiamat
After beating the boss of the level, Tiamat, you will be awarded a lifestone.
1. Artifact Soldier
Requirements: None
As soon as you enter, walk forward and jump into the lake. Turn around and swim up to the small patch of land where this artifact can be found.
2. Abyssal Armour Piece
Requirements: None
As soon as you enter, walk forward and dive into the lake. Swim through the cave on the left to find a chest that contains this armour piece.
3. Artifact: Soldier
Requirements: None
On the lowest level of the underwater ruins is a set of steps that you can climb, or rather swim up. You’ll find the artifact on this new floor.
4. Lifestone Shard
Requirements: Crossblade
Near the underwater ruins is a tunnel. Swim through and dispatch the enemies in the cave. If you peer off the edge you will see a structure just underneath the water. Throw your crossblade at the blue crystal and it will rise. Use the platform to reach the chest on the other side and collect this shard.
5. Lifestone Shard
Requirements: Abyssal Chain
From Vulgrim’s location turn around and you’ll see a grapple point. Use it to swing over to the ledge and collect the shard from the chest.
6. Wrath Shard
Requirements: Tremor Gauntlet
As soon as you enter, walk forward and dive into the lake. Swim through the cave on the right and follow the path round until you reach the blue rock formations. Smash the first one to reveal a chest which contains this shard.
7. Abyssal Armour Piece
Requirements: Complete the shadow challenges
After talking to the cursed demon, he will reward you with an armour piece.
1. Wrath Shard
Requirements: Tremor Gauntlet
After exiting the tunnel from Drowned Pass, you’ll see a blue rock formation wedged between a grate on the right. Smash it and continue down the path. On the left is a small section with a chest that contains this shard.
2. Wrath Shard
Requirements: None
After killing all of the enemies, climb the growth at the end of your side. On this higher level there is what appears to be a small patch of growth. Grab onto it and shimmy round to the ledge below where a chest that holds this shard is found.
3. Wrath Shard
Requirements: Abyssal Chain
Not far from the area where you defeated the last of the Angels is a small island by some waterfalls. Use the grapple point to swing over and collect the shard from the chest.
1. Artifact: Soldier
Requirements: None
After destroying the red rock formation in the room with the gas pipes you will come to a room with a massive hole in the middle. Dive to the bottom to find the artifact.
2. Abyssal Armour Piece
Requirements: None
Early on in the level when an orange gate temporarily blocks your progress, a Gholen will eventually crash through a wall. After defeating all the enemies, open the chest from where the Gholen crashed through for this armour piece.
3. Wrath Shard
Requirements: None
When you are swimming through the underwater tunnels, one section will be blocked with a fan. Swim through to the other end of the lower tunnel until you reach a small room with the fan controls. There is a chest in this room that contains the shard.
4. Artifact: Champion
Requirements: None
After destroying the red rock formation on platform A, you will eventually be in a room with some cylinders. There is an artifact in this room but you cannot reach it until you raise the water in the next room. Once you have raised the level of the water return to this room to find the centre of the area flooded. Swim to the bottom, through the tunnel and then upwards to collect the artifact.
5. Artifact: Soldier
Requirements: None
Shortly after acquiring the tremor gauntlet, you will be in a large room where you must punch a block across three platforms to reach a higher level. To the right of the final platform is a hole in the wall. The artifact is inside.
6. Lifestone Shard
Requirements: None
This is found on platform A. At the back of the two trains is a chest which contains this shard.
7. Wrath Shard
Requirements: None
In the canyon you will need to raise the level twice to progress. Once you have done this, return to where you smashed the last piece of blue rock and turn round. There is a chest on the other side. Glide over to collect the shard from the chest.
8. Lifestone
Requirements: Defeat the Griever
After defeating the boss of this level, the Griever, you will be awarded with a lifestone.
1. Lifestone Shard
Requirements: None
When you enter the area keep an eye out on the left for a few layers of broken pavement. Follow the path around to find a chest containing this shard behind a broken wall. You can also try jumping up.
2. Artifact: Soldier
Requirements: None
Near where you are attacked by the angels is a building in ruins. You’ll find the artifact on a ledge behind this building.
1. Wrath Shard
Requirements: Abyssal Chain
Just prior to reaching the giant worm you will need to pass a room with three Goremaw’s hanging above a wire. Instead of crossing over to the other tunnel, glide over to and climb the growth on the right. Look above and you’ll see a red grapple point. Grapple up to it, jump across to the ledge and follow the path around to the chest that contains this shard.
2. Lifestone Shard
Requirements: Tremor Gauntlet
Just prior to reaching the giant worm you will need to pass a room with three Goremaw’s hanging above a wire. After emerging from the exit tunnel turn around and you should see a piece of the blue rock formation poking out. Walk up to and smash the rock to reveal a chest which contains this shard.
3. Artifact: Soldier
Requirements: Shadowflight
Just a bit north from the first tower is a cliff. Walk round and use the glide point to get up there. There will be some growth nearby. Climb it to find the artifact.
4. Abyssal Armor Piece
Requirements: Abyssal Chain
Just a bit north from the first tower is a cliff. Walk round and use the glide point to get up there. Walk to the end of the cliff and use the two grapple points to make it across the gap. As you are walking up this cliff, look on the right for another grapple point, however, you will not be able to reach it from here. Jump or glide towards it and press to grapple onto it and jump onto the walkway. Walk around to find a chest which contains this armour piece.
5. Wrath Shard
Requirements: Tremor Gauntlet
In the north eastern section of the map, not far from the glide point, there is a blue rock formation. Smash it and climb the ledge ahead to reach the chest which contains this shard.
6. Artifact: Soldier
Requirements: None
After stopping the central drill, drop down the hole that it made to land in a lake. Dive straight down and you’ll see the artifact just in front of you.
7. Lifestone Shard
Requirements: Shadowflight
Not long after jumping through the hole that the drill made, you will enter a room with several Goremaws. Just ahead of these there is a glide point. Use it to reach the platform and open the chest containing this shard.
8. Artifact: Soldier
Requirements: None
After defeating the giant worm you’ll need to pass through a set of tunnels separated by a body of water to reach the Stygian. The artifact is found near the bottom of the pool.
9. Artifact: Overlord
Requirements: Abyssal Chain
You may have spotted this artifact after dropping down the hole the central drill created, but found it agonisingly out of reach. In order to reach it you’ll first need to climb to the top of the central drill. Once up here you’ll see a grapple point inbetween the two drills. Swing across to the next drill and activate the control to shut it down. Jump down the hole the drill made and follow the path round to reach the artifact.
Lifestone
Requirements: Defeat the Stygian
After defeating the boss of the level, the Stygian, you will be awarded a lifestone.
1. Wrath Shard
Requirements: None
After you cross the bridge it will collapse behind you. On the left as you are walking down the alley are some wooden fences. Smash the first one to reveal the chest that contains this shard.
2. Wrath Shard
Requirements: Crossblade/Mercy
This is found in the room with the Goremaw and movable block. Move the block underneath the Goremaw so that he grabs it. Then with your crossblade or gun, hit him so that he drops the block. Before he recovers, grab onto the right side of the block. Once the block is raised again, jump onto the rafters and open the chest on the ledge.
3. Artifact: Soldier
Requirements: Shadowflight
After defeating the Shadow Warriors and Broodlings in the alley, climb up the broken fire escape. The artifact is straight ahead, on top of the small building. Glide over to collect it.
4. Abyssal Armour Piece
Requirements: Abyssal Chain
In order to obtain the second beholders key, you will need to use the chronomancer and grapple points to get past two Goremaws. In the small room with the chronomancer point, look up and you’ll see a grapple point. Grapple up there to find a chest which contains this armour piece.
5. Artifact: Champion
Requirements: Abyssal Chain
After defeating the second Loom Warden head into the next room where you previously defeated several enemies. Go through the door on the left and grapple up to the ledge. As you walk round the corner, you’ll see the artifact at the edge.
Lifestone
Requirements: Defeat Silitha
Awarded after defeating the boss of the level, Silitha.
6. Artifact: Soldier
Requirements: Crossblade & Abyssal Chain
During the cutscene after you defeat Silitha, you will both crash through a few floors. Once you regain control of War, activate the platform with your crossblade and grapple onto it as it raises. Jump off at the next floor and grab the nearby artifact.
1. Wrath Shard
Requirements: Voidwalker
This is found in the opening area of the second tower, the area with no permanent floor in the center. Before exiting the room, look to the gap on the left and you’ll see a voidwalker panel. Use your voidwalker power on it and then jump through the last activated panel to reach the area. There is a chest here which contains this shard.
2. Lifestone Shard
Requirements: Voidwalker
After using the beholders key in the room with the weights, use the glide point and walk up the stairs until you come across the first voidwalker panel. Activate it and then slowly walk back down the stairs whilst looking upwards until you see another panel. Activate this one and jump into the previous panel to teleport up to the ledge. Climb up another small ledge to find a chest which contains this shard.
3. Artifact: Soldier
Requirements: Shadowflight & Voidwalker
This is found in the opening area of the third tower. There are two voidwalker panels here. Activate the panel on the ceiling first and then the one on the wall. Jump through the portal on the wall, glide to ensure that you land on the ledge and collect this artifact.
4. Abyssal Armour Piece
Requirements: Abyssal Chain & Voidwalker
After descending the cylinder of stairs, you will have to use the rotating platform and portals to get across to the other side. Once you have made it across, you will see a portal and a bomb in this room. Activate the portal now. When the activated portal on the rotating platform is directly opposite you, quickly grab the bomb with your abyssal chain and throw it through the portal you just activated. It should land on or near the crystal and destroy it. When the platform has rotated back to where the crystal was (you’ll see a panel), jump through to find a chest which contains this armour piece.
5. Artifact: Soldier
Requirements: None
This is found in the area where you need to switch the water using the voidwalker panels. The artifact is in the section where the water currently is. Swim down to collect it.
6. Artifact: Champion
Requirements: Shadowflight & Voidwalker
This artifact is found in the area where you fought the Rot Maulers and buddies, but you won’t be able to obtain it until you redirect the beam through this room. Use the glide point to make it to the ledge and use a voidwalker shot on the panels on the right to climb even higher. Look across to the platform to find another panel on top. Use a charged shot on this panel and jump through the previous panel to shoot up and collect the artifact.
Lifestone
Requirements: Defeat Straga
After defeating the boss of this level, Straga, you will be awarded with a lifestone.
1. Wrath Shard
Requirements: None
Whilst walking up the steps, look to the left and you’ll eventually see a waterfall. Drop down into this area and walk around to find the chest which contains this shard.
2. Abyssal Armour Piece
Requirements: Shadow Mask
After crossing the bridge, walk through the lake instead of heading up the steps. In the north eastern area is a waterfall that you can walk through. You’ll see an outline of a chest at the back. Activate your shadow mask to completely reveal the chest and collect the final armour piece.
Caution: The link above is a guide which was made for the original game, not the updated version.
I’d like to thank Several members from Achievements/Trophys.net for providing a overall detailed discription of the location of the items. Also several enemy defintions have been used in the name of parity.
Each of the images was cut, edited, and added by myself.
However, all images and artwork is the property of Vigil Games and THQ (RIP).
If this guide helped you out, and you would like to say thanks,throw something my way.
Of course this is not necessary however; It just gives me a little more insentive to write and edit more in the future!