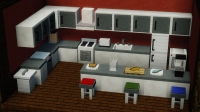
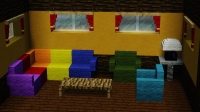
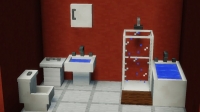
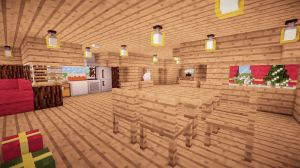
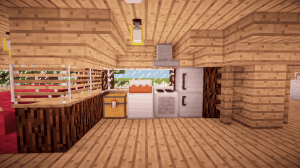
Мод добавляет не просто декоративные блоки и предметы, многие из них имеют функции, например вы можете седеть на стульях, креслах и диванах, посудомоечная машина может чинить ваши инструменты, телевизор показывает несколько программ, радио и магнитофон проигрывают музыку. В шкафах можно хранить вещи, на туалете можно справить нужду и даже пукнуть, зеркало работает реалистично и показывает отражение, на батуте можно прыгать, камин горит и пускает дым, елочные гирлянды мигают разными цветами.


Обзор от автора, английский, но перевод и не нужен:
Modern TV 1.12
The modern TV is a piece of furniture added in the Modern Update. The TV system was revamped with the modern TV. Instead of old channels, you can now load and watch GIFs.
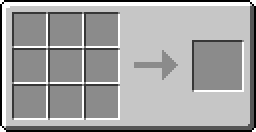
Crafting recipe
To craft the modern TV, you need five iron ingots, three glass panes and one redstone dust.
Place three iron ingots in the top row and one in the bottom right and bottom left, the glass panes in the middle row and the redstone dust in the bottom middle.


Usage
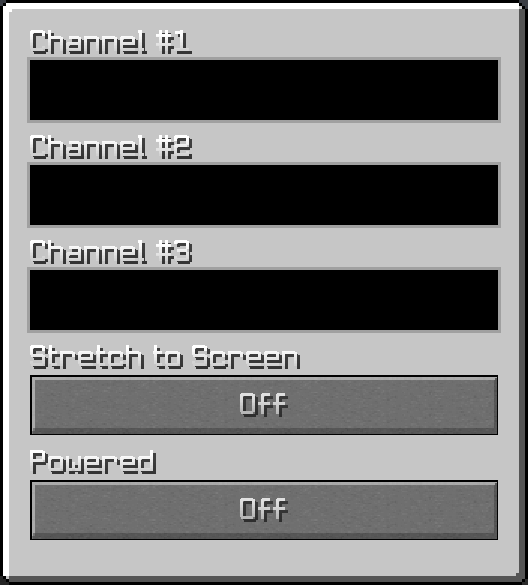
The modern TV allows you to load a GIF from the Internet. To do that, you just have to copy and paste a GIF URL.
You will need a TV Remote to use the TV.
To switch on the TV, shift right-click with the remote in your hand. Right click with the remote to switch between the three channels.
To switch off the TV, shift right-click with the Remote.
To work, the GIF has to match these requirements :
Minecraft Forums
How can I insert more animated GIFs to the TV on the furniture mod?

Hey guys! Is there a way to insert my own (Small) animated GIFs on the TV to watch? I’m getting a little bored with the basic 3. Any help appreciated 


If my comment helped you or you just like me, hit the green arrow down there! 
So how can I do it? Sounds pretty complicated.
I just said you can’t.
If my comment helped you or you just like me, hit the green arrow down there!
When I said how can I do it i meant how to do it on the site you linked for me.
The code was just to show how it is coded in the mod. If you don’t understand it, nevermind. The only thing you can actually do is talk to the mod creator and hope, there is no other way.
If my comment helped you or you just like me, hit the green arrow down there!
Okay. so that means I can insert the gifs if I understand the code?
In theory, you could reprogram that section for private use, yes.
If my comment helped you or you just like me, hit the green arrow down there!
In theory, you could reprogram that section for private use, yes.

Okay. so that means I can insert the gifs if I understand the code?
A. You’ll need to recode that to support user-defined animations, but to do so you’d likely have to ask the original author if you can do so. If you can, it may be more wise to submit a pull request so that the changes you make are added to the original mod without the author having to do anything, that way you’ll both not have to ask for permission to edit the mod, but also it’ll be available for other users too.
B. Minecraft doesn’t use GIFs. Unless the block uses a custom texture and animation system which actually uses GIFs (you’ll have to ask MrCrayFish himself or just look through the code), Minecraft uses it’s own animation format that is «similar» to GIFs. You make a texture with panes for each frame of animation vertically, then you make a special file which Minecraft then looks at to work out how that animation should play (order of frames, animation speed, etc).
Author of the Clarity, Serenity, Sapphire & Halcyon shader packs for Minecraft: Java Edition.

2. Go to assets\cfm\textures\blocks
6. Create an animation.
You can make your own animation. Then it has to be 128 px wide and the
height must be 128*(the number of pics). Now you just put the pictures that should be the animation in a row and save the file into a folder that you make in the resourcepacks folder. You can name this folder Custom TV or something like that. In this folder you make a few other
folders: assets > cfm > textures > blocks. In this case it must have the name Hey.png or Nyan.png. If your animation doesn’t work properly you can change the Animation Speed in the Hey.png.mcmeta or Nyan.png.mcmeta, depends on what you named it.
You can just edit an existing animation. Therefore you select Nyan.png or Hey.png and copy it into a folder that you make in the resourcepacks folder You can name this folder Custom TV or something like that. In this folder you make a few other folder assets\cfm\textures\blocks. There you insert the Hey.png and the Hey.png.mcmeta. Then you open the Hey.png with a graphic editor (as I said you can take paint) and edit it.
7. A very important thing is that you make a pack.mcmeta file in the
Custom TV Folder. Just make a txt file and open it with the notepad. In
this you type:
8. Well done. You made you own resource pack with a custom TV animation.
If you got any questions left just ask
Again a quick overview:
Change Animation speed: Open Hey.png.mcmeta and change Frametime:1 to any other number
I hope that helped. It worked for me so if it doesn’t work you probably have done something wrong
I read that you wanted to put more animations into that. Well at that I can’t help you either, sorry.
2. Go to assets\cfm\textures\blocks
6. Create an animation.
You can make your own animation. Then it has to be 128 px wide and the
height must be 128*(the number of pics). Now you just put the pictures that should be the animation in a row and save the file into a folder that you make in the resourcepacks folder. You can name this folder Custom TV or something like that. In this folder you make a few other
folders: assets > cfm > textures > blocks. In this case it must have the name Hey.png or Nyan.png. If your animation doesn’t work properly you can change the Animation Speed in the Hey.png.mcmeta or Nyan.png.mcmeta, depends on what you named it.
You can just edit an existing animation. Therefore you select Nyan.png or Hey.png and copy it into a folder that you make in the resourcepacks folder You can name this folder Custom TV or something like that. In this folder you make a few other folder assets\cfm\textures\blocks. There you insert the Hey.png and the Hey.png.mcmeta. Then you open the Hey.png with a graphic editor (as I said you can take paint) and edit it.
7. A very important thing is that you make a pack.mcmeta file in the
Custom TV Folder. Just make a txt file and open it with the notepad. In
this you type:
8. Well done. You made you own resource pack with a custom TV animation.
✔️ Как найти РАБОЧИЕ ГИФКИ для ТВ! (Мод мебели MrCrayfish)
Для просмотра онлайн кликните на видео ⤵

КАК НАСТРОИТЬ ТЕЛЕВИЗОР В МАЙНКРАФТПодробнее
Обзор модов № 17 MrCrayfish’s Furniture [1.12.2]Подробнее
Я НАСТРОИЛ ТЕЛЕВИЗОР В ИГРЕ MinecraftПодробнее
Я НАСТРОИЛ ТЕЛЕВИЗОР В ИГРЕ MinecraftПодробнее
КАК СКРАФТИТЬ РАБОЧИЙ ТЕЛЕВИЗОР В МАЙНКРАФТЕ? МОД НА ТЕЛЕВИЗОРЫ ПОКАЗЫВАЮЩИЕ МУЛЬТИКИПодробнее
я смог настроить телевизор.Мод на мебель в маинкрафт 1.12.2Подробнее
Как же настроить телевизор в моде : » MrCrayfish’s Furniture mod»Подробнее
Обзор мода MrCrayfish’s Furniture на мебель, стулья, телевизоры, холодильники #2Подробнее
✔️ Мебельный мод MrCrayfish: пульт от телевизора (современное обновление)Подробнее
Мод на мебель MrCrayfish’s Furniture для майнкрафта [1.15.2 ] [1.14.4] [1.12.2] и т.д.Подробнее
Я НАСТРОИЛ ТЕЛЕВИЗОР В ИГРЕ MinecraftПодробнее
Новая мебель | Обзор мода MrCrayfish’s furniture | Minecraft 1.12.2Подробнее
Мод устройства Minecraft MrCrayFish!Подробнее
✔️ MrCrayfish’s Furniture Mod: Flatscreen TV (The Modern Update)Подробнее
Гиф аниме для телевизора в майнкрафте!Подробнее
Обзор мода | Много декорации! MrCrayfish’s FurnitureПодробнее
Мод впечатляет своим функционалом, а так же удобным и и достаточно простым интерфейсом, к сожалению пока в нем не очень хорошо реализована функция быстрой и просто установки уже готовых кастомных меню. (аля ресурспаков), да и самих готовых вариантов не так много, но в будущем, вероятно это появится.
Небольшой гайд по моду
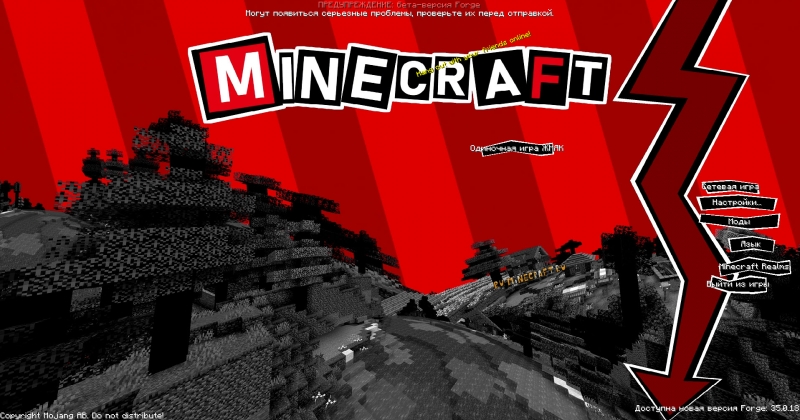
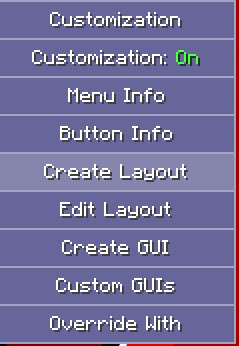
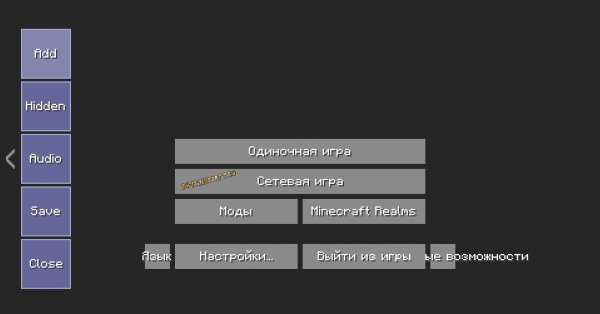
После запуска игры вы увидите справа сверху 2 кнопки, вам необходимо включить кастомизацию и нажать на Create layout (создать слой)
Вы увидите пустую заготовку которую можно изменять.
Так, например кликнув ПКМ по кнопкам можно изменить надписи (Edit Label), можно добавить текстуру для кнопки выбрав файл(ButtonTexture), изменить текст при наведении мыши (Hoverlabel), добавить звук при наведении мыши (HoverSound), установить звук при клике (ClickSound), сделать автоматический клик и задержку появления (DelayAppearance).
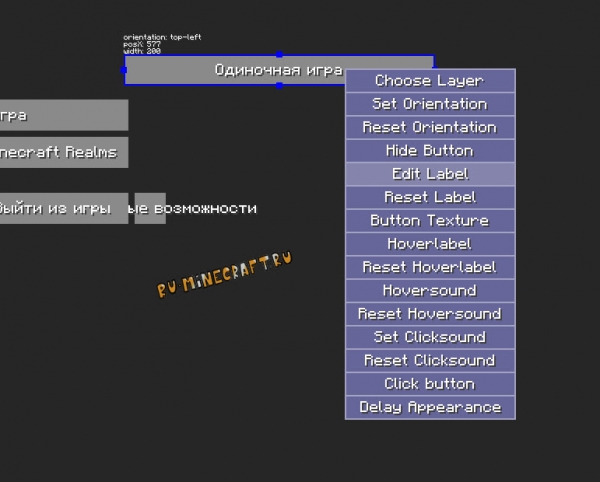
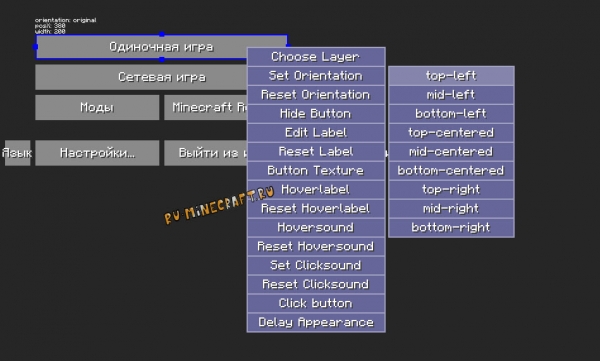
Для того что бы изменить размер и положение кнопки, сначала нужно задать Operation кнопкой SetOperation, это сместит кнопку в определенное положение, но мышкой вы сможете поместить ее куда угодно, а так же изменить ее размер. Помните, что у кнопок есть стандартные текстуры, изменив размер кнопки стандартные текстуры не подойдут и будут выглядеть глючно.
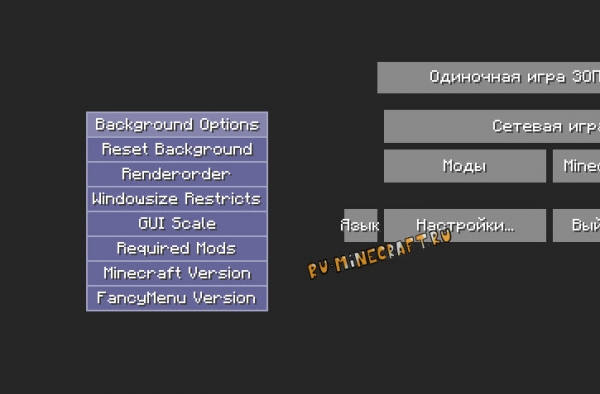
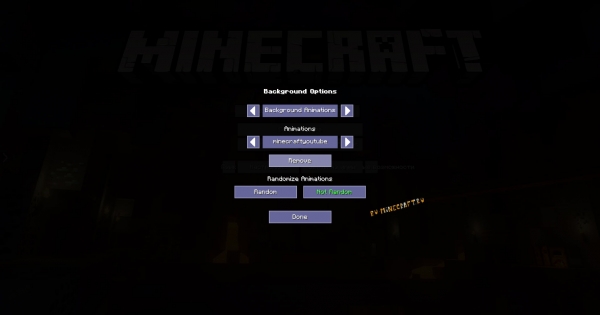
Если нажать пкм по фону, вы сможете настроить фон (Bacground Options), вы можете выбрать картинку, она может быть статичной или панорамной, а так же выбрать анимацию. Для анимации не используется видео или Gif, для анимации используются картинки кадров (раскадровка видео например), а так же файл properties.txt в котором указывается разные параметры, название, зациклить воспроизведение, скорость (частота кадров, FPS), размер. Потыкать пример можете на примере готовых анимаций ниже.
Слева есть выпадающее меню которое позволит вам добавить что то новое, собственные кнопки, картинки, анимации, текст, аудио итд итп.
Вы сможете добавлять собственные объекты, что позволит относительно просто создать очень крутое меню.
В основном меню мода есть возможность создать GUI, по сути это дополнительные «страницы» вашего меню, вы сможете настраивать их подобно обычному меню, добавить кнопки которые будут открывать и закрывать эту страницу. Все это позволит сделать кастомные подменю, например с информацией о сборке, гайдом, проблемами итд итп.
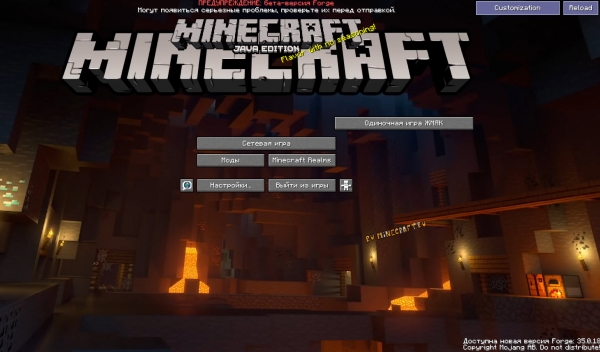
Визуально это выглядит вот так:
Готовые варианты меню:
Новые готовые варианты могут появиться в посте автора на реддите
Желательно устанавливать на чистый мод, иначе одно меню может наложиться на другое, вы можете удалить содержимое \.minecraft\config\fancymenu и запустить игру с модом, дефолтные настройки восстановятся.
Это не готовое меню, это просто анимация которую можно установить на фон, либо посмотреть как она устроена.
Запустите игру с модом и выключение.
Скачав файл, откройте его, папку minecraftyoutube переместите в \.minecraft\config\fancymenu\animations\minecraftyoutube
Запустив игру с модом, справа увидите кнопку Customisation, нажмите на нее и первым делом включите кастомизацию с красного Off на On
Далее нажмите Create Layout
В пустом месте фона нажмите ПКМ, выберите Background Options
Красное меню с дождем
Желательно устанавливать на чистый мод, иначе одно меню может наложиться на другое, вы можете удалить содержимое \.minecraft\config\fancymenu и запустить игру с модом, дефолтные настройки восстановятся.
Автор выложил полностью готовое меню которое нужно просто скопировать с заменой файлов в нужное место, но это заменит ваше меню, будьте аккуратны.
Запустите игру с модом и выключите ее.
Запустите игру, возможно потребуется включить кастомизацию нажав на кнопку Cusomization и выбрав Cusomization On

Желательно устанавливать на чистый мод, иначе одно меню может наложиться на другое, вы можете удалить содержимое \.minecraft\config\fancymenu и запустить игру с модом, дефолтные настройки восстановятся.