Space engineers куда кидать моды


There’s new tags on Steam Workshop: «World» and «Mod»
1) Go to Steam Workshop, select mods (right part of screen), subscribe to mods you want
2) Start Space Engineers
3) Select New Game or Load game
4) Go to Edit Settings
5) Click «Mods» button
6) Double-click mods you want to have active for current world
7) Start the game!
You can sort mods in Mods screen.
When multiple mods changes one thing (e.g. skybox), the mod which is loaded last (bottom most in list) will have priority.
Local vs. Workshop mods:
When you start developing a new mod, you create a mod folder locally on your system.
When you’re satisfied with your mod, you can publish it to Steam Workshop.
Now you have two mods, one local and one on Steam Workshop.
You can update local mod and then publish it to Steam Workshop again, this should overwrite the previous version.
Multiplayer:
Offline games can use local mods and workshop mods with any visibility
Multi-player can use only workshop mods with public visibility (default)
If the client who is joining the game fails to download a mod (e.g. because it’s private or local), bad things will happen.
What can be modded:
— skybox
— cube blocks, components, ingots, ore, asteroid materials
— character models, animations
— custom character animations (waving, facepalm. )
— transparent materials (useful for thruster glow)
— cargo ship (only partially)
What can’t be modded yet:
— scenarios and prefabs
— missile launcher projectiles
— audio
— ammo magazines
— GUI
Directory structure:
Mods directory: C:\Users\
Download SkyboxMilkyWay here: http://mirror.keenswh.com/Temp/SkyboxMilkyWay.zip
There can be other directories, like «Models»
Creating new mod:
Create new directory in C:\Users\
Put modified content into this directory (see section Content Modification)
Create thumb.jpg (preview image)
Run the game
Go to Edit world settings (select new game or load game in main menu)
Click mods button
Click your mod and press Publish
(it’s good to test your mod first before publishing)
1) Create directory C:\Users\
2) Create directory C:\Users\
3) Create directory C:\Users\
4) Copy «Sphere.mwm» into «SphereBlock\Models»
5) Create «SphereBlock\thumb.jpg»
6) Create empty file «SphereBlock\Data\CubeBlocks_Sphere.sbc»
7) Paste block definition into file:
Models must be in directory «Models» otherwise game would not load it.
Definitions must be in directory «Data», otherwise game would not load it.
I’ve uploaded mod to workshop: http://steamcommunity.com/sharedfiles/filedetails/?id=294468758
ADVANCED TOPICS:
Content modification:
See directory «Content/Data» inside game dir, there’s all game data definitions.
Including cube blocks, character models, blueprints, environmental settings (skybox and sun settings) and many other things.
Many of these definitions require additional files, like textures and models.
These paths must be specified relative to mod directory or content directory.
E.g. file «Textures\BackgroundCube\Final\MilkyWay» from SkyboxMilkyWay mod
will be search there:
C:\Users\
note: «.dds» extension is automatically added for textures
In mod, you can reference only files from current mod and original content, one mod cannot use files from different mod!
Game won’t load textures and models from mod, unless there’s some definition file in mod referencing it.
E.g. when mod contains only this file «Textures\BackgroundCube\Final\BackgroundCube.dds» (same file name as original skybox)
Game won’t load it. You have to add Environment.sbc and put the path here.
Content handling in game:
Game loads original content first.
The first mod added to the game will automatically overwrite files it needs to replace in the original game files.
If a second mod is added, and it also makes changes to the same game files the first mod changed, no changes will be made, as the first mod loaded into the game has priority.
E.g.
In original content, there’s cube block definition with TypeId «Drill» and SubtypeId «LargeBlockDrill».
When mod defines cube block with TypeId «Drill» and SubtypeId «LargeBlockDrill», it will overwrite original block
When mod defines cube block with TypeId «Drill» and SubtypeId «LargeCrazyDrill», it will add new type of drill
When mod wants to disable this drill, it should add this definition:
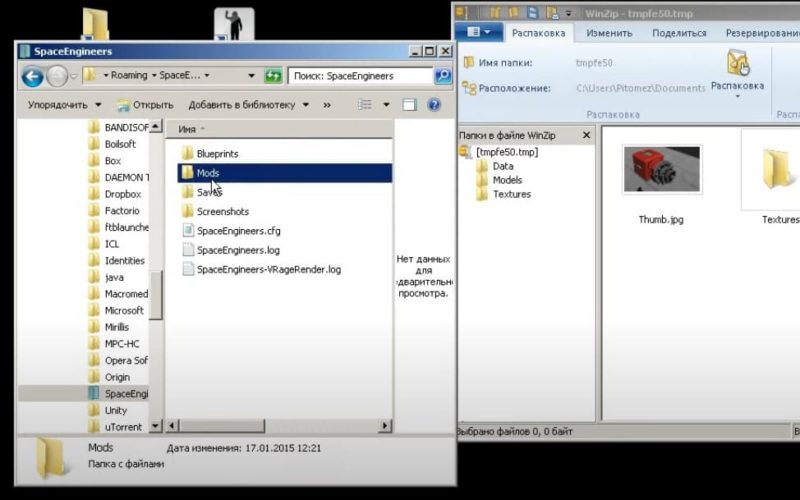
To get in to the mods and see the files, go to C:\Users\User\AppData\Roaming\SpaceEngineers\Mods and rename the mod.sgm to mod.zip and than unzip the file. After this operation, you will be able to see the inside of mod and the mod will be visible in game mod screen with a folder icon.
KEEN SWH Game block:
— This mode has a test block that can be built inside the game and works both on large and small ships
http://steamcommunity.com/sharedfiles/filedetails/?id=295867526&searchtext=
KEEN SWH Character reskin:
— This mode includes two reskin designs of astronauts, Engineer and Pirate
— This mode is a pack, which means you can set more astronaut desings in to a mode and create themed astronaut designs to create more specific faction designs or a story line in your worlds
http://steamcommunity.com/sharedfiles/filedetails/?id=296192689&searchtext=
KEEN SWH Salute gesture animation:
— This mode includes one gesture animation
— Mod file also includes xml and fbx file for better understandig the mod creation
— For better understanding of gesture animation modding, see the Gesture animation modding section in this guide
http://steamcommunity.com/sharedfiles/filedetails/?id=297208992&searchtext=
KEEN SWH Medium thruster:
— Only for large ship
— This mode shows possibilities of thruster modding
— Now you can make your own trhusters, set color, effects and power
— For better understanding of gesture animation modding, see the Thrusters modding section in this guide
http://steamcommunity.com/sharedfiles/filedetails/?id=297207615&searchtext=
To find out more about how to create a game asset, or edit the existing one, visit pages liested below:
Download KEEN SWH Salute gesture animation from the link below, for better understanding of how to mod an animation
To get in to the mods and see the files, go to C:\Users\User\AppData\Roaming\SpaceEngineers\Mods and rename the mod.sgm to mod.zip and than unzip the file. After this operation, you will be able to see the inside of mod and the mod will be visible in game mod screen with a folder icon.
1. Make animation in animation software like 3ds Max, Maya, Motion Builder, Blender, XSI Softimage, etc. You must use our FBX file Astronaut(for example idle.fbx)
2. Export animation to FBX, in our case it’s call salute.fbx and put this fbx to Tools folder:
C:\Program Files (x86)\Steam\SteamApps\common\SpaceEngineers\Tools
3. When you run only MwmBuilder.exe, it’s creating only salute.mwm. When you want create also xml file, you must run MwmBuilder.exe with parameter /e(to do so, go to Total Commander, select MwmBuilder.exe, CTRL+ENTER and down write /e, hit ENTER), now MwmBuilder create xml for you, it will looks like this:
4. Run MwmBuilder.exe /e one more time and you get also material in xml, like this:
7. Run MwmBuilder.exe one more time, now without /e.
8. Now our salute.mwm is ready to use
9. Copy this mwm to SpaceEngineers\Content\Models\Characters\Animations\ or folder of your choose.
10. Go to SpaceEngineers\Content\Data\ where you find Animations.sbc
11. Now we must add our animation
12. Copy animation definition for example:
Custom Thrusters Modding Guide
To get in to the mods and see the files, go to C:\Users\User\AppData\Roaming\SpaceEngineers\Mods and rename the mod.sgm to mod.zip and than unzip the file. After this operation, you will be able to see the inside of mod and the mod will be visible in game mod screen with a folder icon.
1. Construct a model in any modelling software with an FBX export option (Maya, Max etc)
2. Ensure the model has correct dummies in place. Dummies must be placed where you’d like the exhaust flame to appear, You can have as many exhaust flames as you want, but only the first one will do damage (for now). Dummies must be named ‘’thrusters_flame_1’’
3. Export the model (and dummies) as an FBX, and place it in this file:
C:\Program Files (x86)\Steam\SteamApps\common\SpaceEngineers\Tools
4. Next you’re going to need to make a Collision model, for information on how to do so, go to this page here: http://www.spaceengineersgame.com/moddable-collision-models.html
6. Once you have created the actual model file, it’s time to add it into the game, and this is where the real moddability is.
7. Navigate to your CubeBlocks.sbc, you will find this here: C:\Program Files (x86)\Steam\SteamApps\common\SpaceEngineers\Content\Data. And open it with any text editor, we recommend notepad++.
a. In Cubeblocks, you have the ability to add and change any parameter that the thruster will use. Use CTL-F to find the large thruster in the base game in cubeblocks:
Thrust
LargeBlockLargeThrust
DisplayName_Block_LargeThrust
Textures\GUI\Icons\Cubes\thrust_large.dds
Large
TriangleMesh
Models\Cubes\Large\ThrustLarge.mwm
LargeThrust
Z
Y
Light
40
1200000
6.72
0.000002
0.6
1.15
0.2745098
0.4090196
0.6505882
0.75
0.2745098
0.4090196
0.6505882
0.75
EngineThrustMiddle
EngineThrustMiddle
GlareLsThrustLarge
700
0.779
3
Continue with Thruster modding part 2/2
This can see extremely daunting at first, but the definition is actually rather simple:
— The TypeID must be set to Thrust, otherwise the game will not recognize it as a thruster.
— The SubtypeID can be anything you want, but it must be unique.
— The Display name is what will be displayed in game in the G-screen when you hover over it, and what will be displayed when the block is looked at with a tool.
— The Icon path is where the icon for your block should be placed.
— The Cubesize determines what block type you can place the block on, ‘Large’ means it can be placed on large ships and stations, and ‘Small’ means small ships. This part of the definition MUST be in this format, with a capital letter at the start, else the game will not recognize it.
— Block Topology must be set to TriangleMesh, anything else will not be recognized by the game.
— The Size dictates how large the block will be in game in XYZ, the number refers to the amount of blocks. EG: Large Containers are 3x3x3, Refineries are 2x2x4.
— The components refers to the amount of construction components needed to build the block in survival.
— The mount points refer to where on the model objects can be placed, and at what points the model can be connected to other models. EG: An interior light can only be placed on surfaces where its geometry touches other geometry, it cannot be mounted with its geometry floating, even though the block fills up a 1x1x1 block space in the grid.
— The build progress models are the construction models, seen in game in order when you weld something, or in reverse when you grind it, this requires more models to be made and placed in the corresponding directories.
— BlockPairName must be unique and refer to something to do with the model, it will be used later on.
— Center is where the block will be rotated around.
— The mirroring options should be left as they are in all other blocks.
— EdgeType is the type of edging that will be used on the block (only works on armor blocks)
— Build-Time is the amount of time it takes to weld the block from 0-100% in survival on 1x setting.
— Now we come to the parts of the definition that are unique to thrusters:
— Force Magnitude – The amount of force the thruster can give when at 100% power, Use other thrusters for reference on how powerful you want your thruster to be.
— MaxPowerConsumption Is the amount of power that will be consumed when the thruster is firing at 100%, as before, use other thrusters and blocks for reference, A huge thruster with massive force magnitude would probably use a lot more power than the default thrusters, unless it’s some super-efficient design.
— MinPowerConsumption is the amount of power the thruster will use when idle.
— FlameDamageLegnthScale is the length of the flame when at full power than can do thruster damage.
— FlameLegnthScale is the length of flame when at full power, and may not be the same as the damage setting, as the end of the flame may not have the required power to damage armor, for example.
— FlameIdleColor and FlameFullColor are exactly what you’d expect, the color of the flame at full, and idle operating ranges. This number between 1 and 0 for XYZ and W, represents the RGBA values of the color. The RGB is calculated by 100/255*X, with X being the value you want. The A value is the alpha, with 0 being 100% transparent, and 1 being completely opaque.
— FlamePointMaterial, FlameLegnthmaterial and FlameGlareMaterial are all texture files which dictate the material used for the flame, these can be edited by changing these files, which can be found in the game directory. Although we suggest you just use the default ones, and change the color and scale.
— Flame Visibility distance is the distance in game what you can see the thruster flame, use this when considering performance issues.
Now that the model file is in place, and your CubeBlocks has been changed, it’s time to load up the game and see if your model is working.
If for some reason your block doesn’t work, then you’ve made a mistake somewhere along the line, which is entirely possible as it’s extremely hard to get everything right first time. You can look at the log file and see which part of the loading process went wrong.
Space engineers, подборка модов, которая оживит космос
Хоть игры про далекий космос и уступили свою популярность кооперативным симуляторам выживания, space engineers все еще живет и здравствует. Связано это с тем, что сообщество постоянно дорабатывает и освежает игру при помощи модов.
В этой подборке были собраны моды, которые как «оживят» геймплей, так и добавят больше красок в темные космические пустыни.
Как установить
Установка достаточна стандартная, но отличается, в зависимости от версии игры:
Если у игрока стим версия:
Для пиратской версии:
К сожалению, игра не имеет внутреннего управления модами, а потому, чтобы включать, либо отключать моды – необходимо будет убирать их из папок, либо отписываться в стиме. Впрочем, у игры нет действительно глобальных дополнений, и моды, чаще всего, не конфликтуют между собой.
Геймплейные моды
Эти моды преображают геймплей, добавляют новые механики, ресурсы, чертежи. Эти дополнения пригодятся игрокам, которые уже освоили все основные механики игры, и ищут в космосе что – то новое.
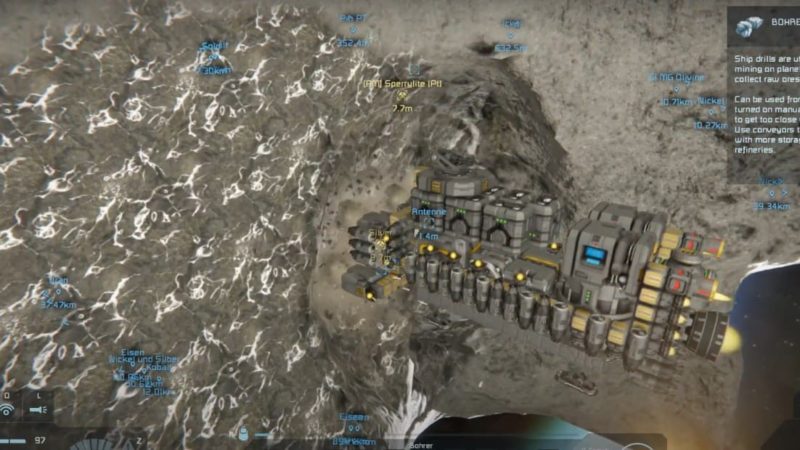
Surface occupation
Одна из главных проблем игры – пустота на новых планетах. Из – за данного недостатка многие игроки находят проект скучным, а исследование становится душным испытанием.
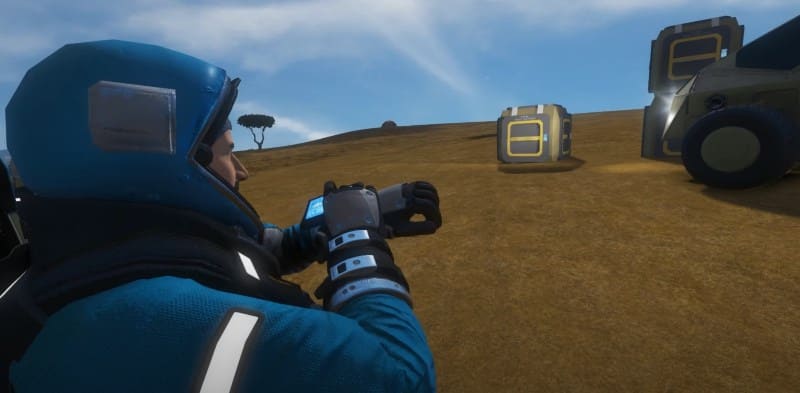
Мод исправляет эту проблему, добавляя на планеты случайно сгенерированные точки интереса, похожие на попытки колонизации новых планет. Теперь на поверхностях можно найти сторожевые вышки, системы безопасности, исследовательские центры.
Это добавляет, как разнообразия в геймплей, так и делает исследование новых планет не таким скучным – планеты больше не похожи на пустыни, а новые постройки оживляют мир. Мод подойдет любому игроку, так как улучшает геймплей, без добавления особых сложностей, и новых механик.
Smart turrets
Еще один врожденный недостаток игры – слишком широкие возможности для крафта. С одной стороны, можно построить любой корабль, но с другой – можно неправильно рассчитать расположение турелей, и корабль будет небоеспособен.
Проблему исправляет этот мод. Он усовершенствовал систему наведения турелей, чтобы они не могли навредить собственному кораблю. Кроме того, мод модернизировал процесс постройки корабля, что еще больше уменьшает риск неправильного расположения турелей.
Дополнение пригодится игроку – конструктору, который может потратить несколько часов на постройку корабля, и не хочет тратить время на переделывание такой объемной работы.
Exploration enhancement
Мод для игроков – исследователей, который оживляет все космическое пространство. Он добавляет несколько новых точек интереса, и увеличивает количество старых.
Мод вводит в игру новые фракции, такие как, например, космическая полиция, или пираты. С ними будут возможны взаимодействия, а сами точки интереса будут напрямую зависеть от стиля игры конкретного человека.
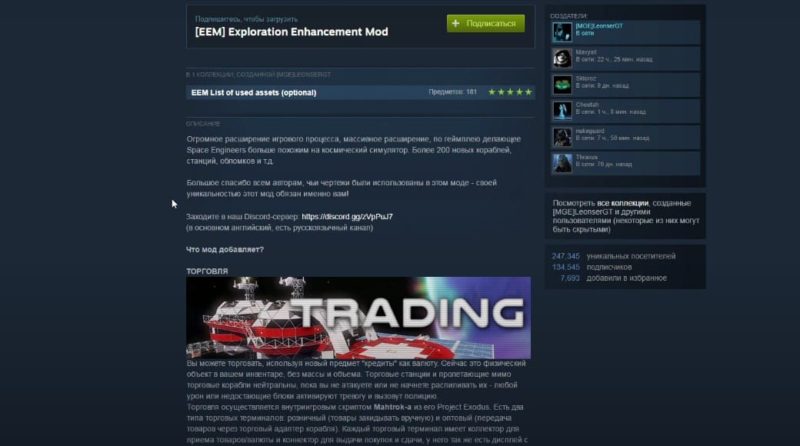
Кроме того, мод расширяет и старые механики. Например, корабли – торговцы, будут попадаться чаще, а ассортимент товаров будет шире.
Этот мод – мастхев для игрока, которому космос показался слишком пустым.
Better stone
Мод несколько расширяет систему гринда, и делает ее не такой душной. Мод упрощает добычу ресурсов, так как месторождения теперь генерируются группами. Это позволяет игроку не тратить слишком много времени на поиск редких ресурсов, а также собирать ресурсы в больших масштабах.
Кроме того, мод добавляет новые ресурсы и чертежи, что значительно расширяет систему крафта.
Дополнение пригодится игрокам – конструкторам, которые не желают лишний раз отвлекаться на поиск больших объемов стройматериалов.
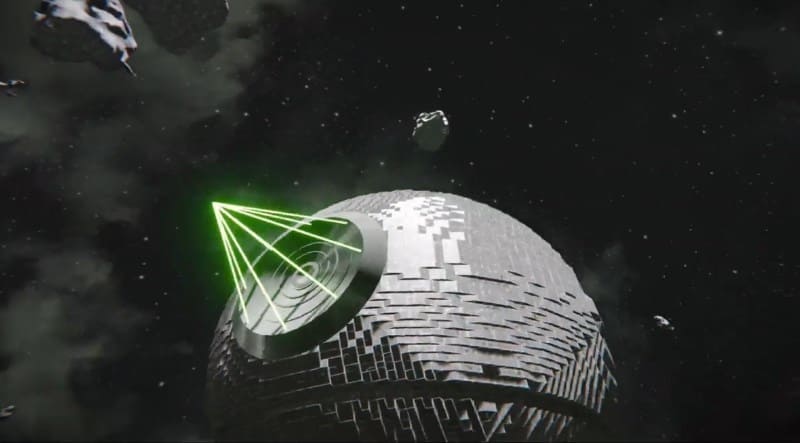
Star Wars weapons
Мод пригодится игроку – фанату сражений, которому надоел базовый функционал игры. Ну, либо фанату звездных войн.
Косметические моды
Одна из главных проблем оригинальной игры – серость внешнего вида. Когда игра вмещает в себя пространство целой вселенной – сложно проработать каждый ее уголок. Эти моды немного оживляют мир, добавляют в него красок и графики, добавляют компаньонов. С этими модами от геймплея можно получить еще и эстетическое наслаждение.
Ship ai voice
Когда путешествуешь по бескрайнему космосу – в корабле может стать слишком скучно. Эту проблему решает данный мод, добавляя в корабли голосового ассистента. Хоть мод и не совсем косметический, но он скрасит долгие перелеты.
Диалоги озвучены, но не русифицированы. Впрочем, в зависимости от игровой ситуации легко понять, что пытается доложить голосовой помощник. В остальном, озвучка проведена на высшем уровне, а искусственный интеллект точно определяет ситуации, в которых разумно начать тот, или иной диалог.
Space just got real
Графический пакет, который преображает космическое пространство. Теперь исследование космоса кажется не таким скучным и серым занятием, так как:
Само по себе дополнение хорошо оптимизировано, и может использоваться даже на недорогих сборках ПК. Мод понравится игрокам, ценящим реалистичность, и внешнюю эстетику космоса.
Animated interactions
Тоже косметический мод, но он не изменяет ничего в графическом плане. Он просто добавляет анимации к действиям игрока. Это улучшает погружение в игровой процесс, и в целом, делает игру более «живой».
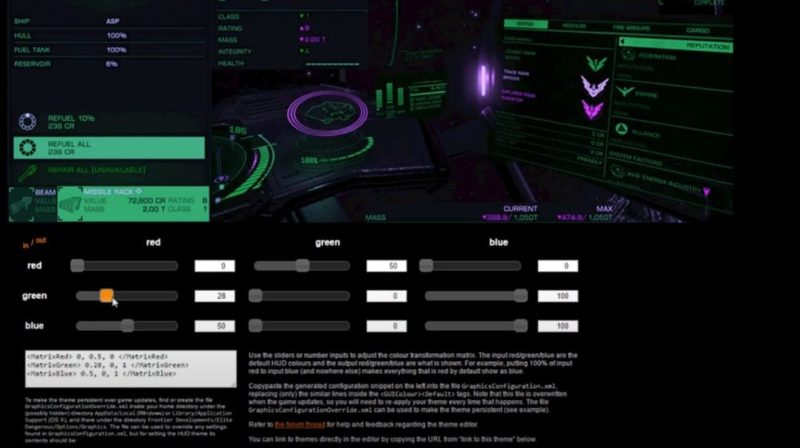
Hud Colors
Мод, исправляющий еще одну «серость» игры – интерфейс. После установки данного мода, можно будет редактировать цвета меню, и игрового интерфейса, добавляя в них больше цвета, и адаптируя под яркий сеттинг далекого будущего.
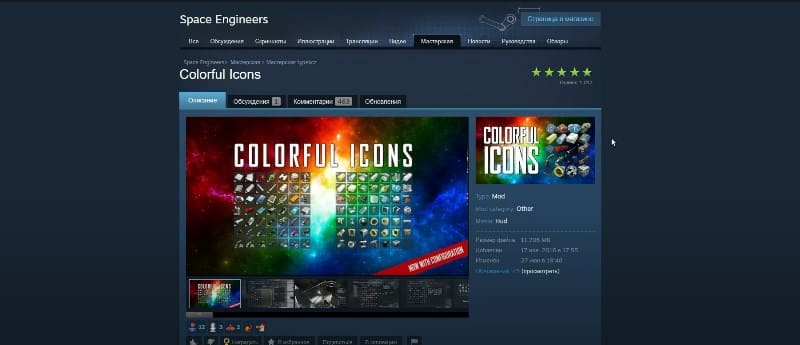
Colorful items
Мод, который исправляет иконки в инвентаре. Он делает их более приближенными к игровому формату, и предметы в инвентаре теперь выглядят так же, как и вне его. Это не только приятное улучшение интерфейса, но и полезная надстройка, ведь она экономит время на поиск предмета.
Power Cable block
Косметическое дополнение, которое добавляет возможность собирать, и устанавливать на корабли силовые блоки из аккумуляторов, кабелей, и прочей электроники. Практического применения силовые блоки не имеют, и предназначены только в качестве декоративного элемента.
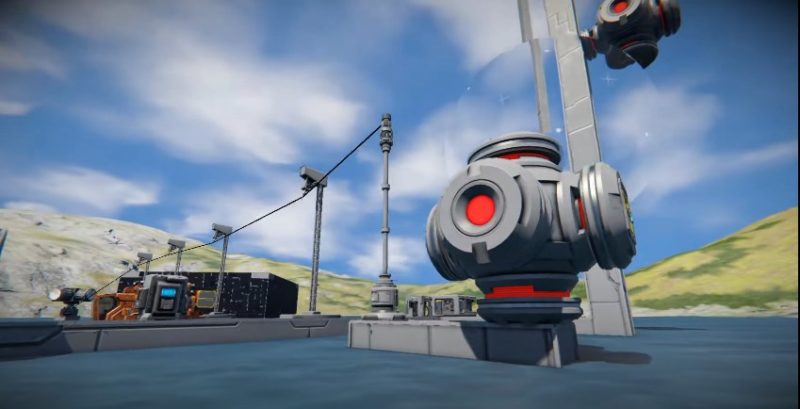
Мод особенно порадует игроков – конструкторов, так как позволяет кастомизировать корабли, и делать их более реалистичными.
Руководство моддинг
Содержание
Создание мода
Сохранять файлы / МИР ФАЙЛЫ
Каждый, сгенерированный вами, мир сохраняется в отдельной папке, которую можно найти в c:\Users\
Шейдеры
Файлы с FX и расширения FXH являются вершиной / пиксельные шейдеры для различных операций рендеринга и могут быть найдены в steamapps\common\SpaceEngineers\Content\Effects2\Каждый шейдерный файл запускается перекомпилирован при запуске игры. Если вы измените один, перезапустить игру. Если игра вылетает при запуске, это, вероятно, из-за ошибки компиляции, вызванного изменением.
Текстура
Почти все текстуры в формате DDS (сжатие DXT). Вам понадобится программа редактирования, которая может их редактировать. Если вы используете Adobe Photoshop, мы рекомендуем установить этот плагин: https://developer.nvidia.com/nvidia-texture-tools-adobe-photoshop и использовать эти настройки для экспорта:

Settings for exporting textures
Текстуры можно найти в: steamapps\common\SpaceEngineers\Content\Textures\ Есть несколько категорий файлов текстур: графический интерфейс, частицы, фонари, модели, воксели и т.д. модель текстуры с «_ns» в названии содержат «нормальную карту» в RGB каналов и «зеркальный» в альфа-канал. Математические модели текстуры с «_de» в их имени содержат «диффузных» в RGB каналов и «теплоотдачей» в альфа-канал.
3D МОДЕЛИ
Создание модов используя новый API с помощью языка C#
По видео мы повторяем все до момента когда придет пора писать код. Вот тут мы остановимся по подробнее. По первых: убедитесь что вы импортировали все необходимые пространства имен как указано в видео, начала вашего кода будет выглядеть как то так:
using System.Text; using System.Collections;
using System.Linq; using Sandbox.ModAPI;
Далее мы указываем пространство имен и имя нашего класса.
public class Bot : MySessionComponentBase
И тут разработчики предлагают нам на выбор несколько вариантов как можно активировать свой код.
There are several ways to this
You add handler on MyAPIGateway.Utils.MessageEntered and execute your code depending on player input to chat
You can subclass MySessionComponentBase, add Attribute and it will get loaded before world and then updated each frame.
public class Bot : MySessionComponentBase
public override void BeforeStart()
MyAPIGateway.Utilities.MessageEntered += new MessageEnteredDel((string messageText, ref bool sendToOthers) => onMessage(messageText));
private void onMessage(String messageText)
MyAPIGateway.Utilities.ShowMessage(«Bot», «player say: » + messageText);
Давайте теперь разберем более подробно.
Создаем папку Mods, если ее еще нет, в ней создаем папки Bot\Data\Scripts\BotScript\ сюда кладем наш bot.cs
Полный путь у меня выглядит так: ‘C:\Users\sudoroot\AppData\Roaming\Space Engineers\’Bot\Data\Scripts\BotScript\bot.cs
Документация по интерфейсам API
И так доступ к игровому миру и ее механике мы получаем через класс MyAPIGateway.
Который в себе содержит следующие интерфейсы:
По скольку все они объявлены через модификатор static нам не нужно создавать экземпляр данного класса, мы просто будем обращаться напрямую.
public interface IMyCubeBuilder
void ActivateShipCreationClipboard(MyObjectBuilder_CubeGrid grid, VRageMath.Vector3 centerDeltaDirection, float dragVectorLength);
void ActivateShipCreationClipboard(MyObjectBuilder_CubeGrid[] grids, VRageMath.Vector3 centerDeltaDirection, float dragVectorLength);
bool AddConstruction(IMyEntity buildingEntity);
void StartNewGridPlacement(MyCubeSize cubeSize, bool isStatic);
public interface IMyEntities
event Action OnCloseAll;
event Action OnEntityNameSet;
event Action OnEntityRemove;
void AddEntity(IMyEntity entity, bool insertIntoScene = true);
IMyEntity CreateFromObjectBuilder(MyObjectBuilder_EntityBase objectBuilder);
IMyEntity CreateFromObjectBuilderAndAdd(MyObjectBuilder_EntityBase objectBuilder);
IMyEntity CreateFromObjectBuilderNoinit(MyObjectBuilder_EntityBase objectBuilder);
void EnableEntityBoundingBoxDraw(IMyEntity entity, bool enable, VRageMath.Vector4? color = null, float lineWidth = 0.01f, VRageMath.Vector3? inflateAmount = null);
bool EntityExists(string name);
bool Exist(IMyEntity entity);
bool ExistsById(long entityId);
VRageMath.Vector3? FindFreePlace(VRageMath.Vector3 basePos, float radius, int maxTestCount = 20, int testsPerDistance = 5, float stepSize = 1f);
List GetElementsInBox(ref VRageMath.BoundingBox boundingBox);
void GetEntities(HashSet entities, Func collect = null);
List GetEntitiesInAABB(ref VRageMath.BoundingBox boundingBox);
List GetEntitiesInSphere(ref VRageMath.BoundingSphere boundingSphere);
IMyEntity GetEntity(Func match);
IMyEntity GetEntityById(long entityId);
IMyEntity GetEntityByName(string name);
void GetInflatedPlayerBoundingBox(ref VRageMath.BoundingBox playerBox, float inflation);
IMyEntity GetIntersectionWithSphere(ref VRageMath.BoundingSphere sphere);
IMyEntity GetIntersectionWithSphere(ref VRageMath.BoundingSphere sphere, IMyEntity ignoreEntity0, IMyEntity ignoreEntity1);
List GetIntersectionWithSphere(ref VRageMath.BoundingSphere sphere, IMyEntity ignoreEntity0, IMyEntity ignoreEntity1, bool ignoreVoxelMaps, bool volumetricTest);
IMyEntity GetIntersectionWithSphere(ref VRageMath.BoundingSphere sphere, IMyEntity ignoreEntity0, IMyEntity ignoreEntity1, bool ignoreVoxelMaps, bool volumetricTest, bool excludeEntitiesWithDisabledPhysics = false, bool ignoreFloatingObjects = true, bool ignoreHandWeapons = true);
bool IsInsideVoxel(VRageMath.Vector3 pos, VRageMath.Vector3 hintPosition, out VRageMath.Vector3 lastOutsidePos);
bool IsInsideWorld(VRageMath.Vector3 pos);
bool IsNameExists(IMyEntity entity, string name);
bool IsRaycastBlocked(VRageMath.Vector3 pos, VRageMath.Vector3 target);
bool IsSelectable(IMyEntity entity);
bool IsSpherePenetrating(ref VRageMath.BoundingSphere bs);
bool IsTypeHidden(Type type);
bool IsTypeSelectable(Type type);
bool IsVisible(IMyEntity entity);
void MarkForClose(IMyEntity entity);
void RegisterForDraw(IMyEntity entity);
void RegisterForUpdate(IMyEntity entity);
void RemapObjectBuilder(MyObjectBuilder_EntityBase objectBuilder);
void RemapObjectBuilderCollection(IEnumerable objectBuilders);
void RemoveEntity(IMyEntity entity);
void RemoveFromClosedEntities(IMyEntity entity);
void RemoveName(IMyEntity entity);
void SetEntityName(IMyEntity IMyEntity, bool possibleRename = true);
void SetTypeHidden(Type type, bool hidden);
void SetTypeSelectable(Type type, bool selectable);
bool TryGetEntityById(long id, out IMyEntity entity);
bool TryGetEntityByName(string name, out IMyEntity entity);
void UnregisterForDraw(IMyEntity entity);
void UnregisterForUpdate(IMyEntity entity, bool immediate = false);
public interface IMyMultiplayer
bool IsServerPlayer(IMyPlayer player);
public interface IMyPlayerCollection
IMyPlayer this[ulong steamUserId]
void Add(IMyPlayer player);
long AddNewNpc(string npcName);
bool Exists(ulong steamUserId);
void ExtendControl(IMyEntity entityWithControl, IMyEntity entityGettingControl);
IMyPlayer GetPlayerControllingEntity(IMyEntity entity);
void GetPlayers(List players, Func collect = null);
bool HasExtendedControl(IMyEntity firstEntity, IMyEntity secondEntity);
void KillPlayer(long playerId);
void ReduceControl(IMyEntity entityWhichKeepsControl, IMyEntity entityWhichLoosesControl);
void Remove(IMyPlayer player);
void Remove(ulong steamUserId);
void RemoveControlledEntity(IMyEntity entity);
void RevivePlayer(long playerId);
void SendControlledEntities(ulong sendTo);
void SetControlledEntity(ulong steamUserId, IMyEntity entity);
void TryExtendControl(IMyEntity entityWithControl, IMyEntity entityGettingControl);
bool TryGetPlayer(ulong steamUserId, out IMyPlayer player);
bool TryReduceControl(IMyEntity entityWhichKeepsControl, IMyEntity entityWhichLoosesControl);
bool TrySetControlledEntity(ulong steamUserId, IMyEntity entity);
void UpdateFromPlayer(long playerId);
void UpdateFromSession(List playersFromSession);