Building a Minecraft pixel art generator
I’d like to share a project of mine that is a personal favorite. The name of the project is PixelStacker (view project website).
What is it?
PixelStacker is a program that can generate pixel art mosaics from input images. The tiles come from the popular videogame, «Minecraft»- a game I’ve been playing off and on for about 10 years now. The goal is to make it easier (if not instant) for anyone to build high quality in-game pixel art. Although to be honest I’ve been thinking about hanging a high quality rendering on my wall for some time now. The output is its own kind of art.
There is an entire process to go from downsizing larger images to creating in-game pixel art. A lot of players like to build in-game pixel art by stacking in-game blocks on top of each other to create the patterns. Each art piece has a lot to consider. How big will it be? 16×16 or maybe 1024×1024? And to go further, how detailed would that be? If something is big but not detailed it is a waste of space. If something is too small, it is not impressive. You also consider the colors for the art as well. Does the art make use of color theory? It is best when colors compliment each other or go well together. Color blending and shading are also considered important in the process as well. (The server I most enjoy was a bit fanatical about producing quality pixel art). Finally, one of the most difficult aspects to consider is the use of materials in the build project. There are a lot of different materials to choose from. You can even stack translucent blocks on top of regular blocks to multiply your color palette. Figuring all of that out can be a big challenge and it can take a LOT of time! Unless. you build a tool to help with that.


I also tried a regular euclidean distance algorithm using the RGB color space, but noticed a problem where it does not work well with saturation or hue differences. Basically, a desaturated color could be picked instead of a saturated color when our human eye thinks the saturated color is a better match.
The «regular euclidean distance» formula:

Looking at the HSV color space the HUE aspect seems pretty valuable. A great visualization of how color works. So in the algorithm chosen you need to account for distance of HUE as well as distance for saturation and value. Somehow, saturation and value are accounted for by the RGB distance calculations. Conversion between RGB and HSV can be found here.
The adjusted equation becomes:
And then that works really well. You get awesome output that way. So. the program was still really slow. Here’s the thing. You have about 3000 (decent) different possible color combinations available for Minecraft. The RGB color space has 255^3 = 16,581,375 possible color values. We don’t need that much variety. No one is going to notice if a match is off by 5 points. So we divide each of the RGB values by 5, and truncate.
51^3 = 132,651 possible combinations. Still pretty good! And 125x faster. You can also apply a technique called color quantization. They have these algorithms to reduce the entire color palette of an image to a simple palette of 256 colors. They work fast, too. Take it a step further. throw in a KD-Tree. Basically rather than do 3000 color comparisons to find a best match, you do 3log(n) color comparisons instead. Or something like that. A KD tree basically allows you to binary search in 3D space, or color space.
Anyways. A lot of math goes into it. It’s been a fun experiment for the last year or so. I keep adding to it whenever I get new ideas and time. So far people have been really enjoying using the program. Let me know what you guys think.
Minecraft Mural Generator
This generator lets you import png, jpg and gif files and converts them into commands which create the image as a giant mural on your Minecraft map. All this can be done without MCEdit or mods. The generator scans every pixel in the image and chooses the closest color match from the available blocks. The only software you may need is an image editor like Photoshop to create images.
Import an Image
You need to consider how big the mural is going to be when it is placed in your map. This is important as a default Minecraft map has a maximum build height of 255. If you build an mural at sea level (62), this gives you about 193 blocks high to work with. You may need to scale(resize) your image first if it is too high. There is a feature that lets you scale the image. 1 is the original size. 0.5 halves the size and 2 would double the size. Simple!
This generator attempts to slice the mural into sections as efficiently as possible. Images with fewer colors such as a logo can be created in fewer commands when compared to a photograph.
If the image you have supplied exceeds the Command Block’s maximum character limit of 32,767, The commands will be split into many sections and you will have to copy them into the command block one at a time. This is explained later.
The alpha channel in an image is what controls the transparency. This tool will treat an alpha value of 0 as totally transparent and no blocks will be placed. An alpha value of 1 or higher will not be considered as transparent and will be color matched with the most appropriate block.

Scale:
Choose your Blocks
To choose your blocks click the checkboxes from each of the groups that you wish to include. If there are any blocks that you want to exclude, just click them. They can be chosen again if you reselect the groups.
After you have selected the blocks, you can click the ‘Show/Update Preview’ button to see a preview. You will see a large render of what the mural will look like with the chosen Minecraft blocks. You can zoom in and out get an idea about what the mural may look like from a distance. Tip: If selecting ‘All Blocks’ you may wish to deselect the individual stained glass blocks. They tend to spoil the picture due to their transparency. Blocks that fall (sand, gravel and concrete powder) are now included but murals are now drawn from the bottom up. Exclude falling blocks if the bottom row has no existing blocks under it.
All Blocks Grey Scale Wool Stained Glass Stained Clay Concrete Powder Concrete Show/Update Preview
Set the Placement
Set the placement of the mural. Here you just need to decide which direction the player faces when viewing the mural. The options are North, South, East and West. Murals on the ground are created on the layer directly under the command block. The bottom-left corner of the mural will be under the command block.
(OPTION A) Download the mcfunction file
With this option you can harness the awesome power of mcfunction files to create the mural. If you use this option, you can then skip all of the other steps below. Please read the Wiki on Function Files to find out how it works. There is a limitation of 65,536 commands per function file. For a large picture, you may need to divide the function file into smaller files.
(OPTION B) Place a Command Block (Create mural with minecarts)
 You will need to be in creative mode now and you will need to give yourself a command block with this command:
/give @p minecraft:command_block
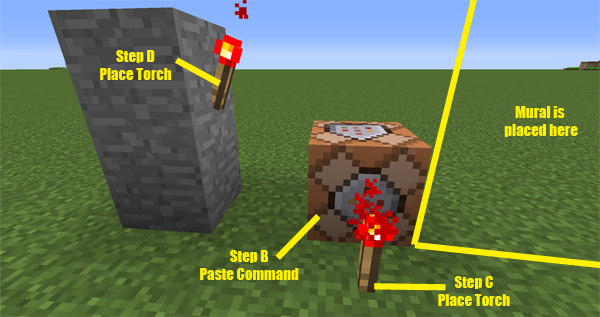
The mural is built relative to this command block so this will determine where you place the command block. The bottom of the mural will be at the same vertical position (y) as the command block. And it will be built one block to the right of the command block when facing the direction specified in step 3. Place some redstone blocks as shown here.
Command Length
In some situations, the commands that are generated may be too long and might cause errors when pasted into a command block. In normal situations, the value in the box can be left as is. As the number is reduced, it is likely that more command sets will be produced below. Do not set this value over 32000.
Maximum Command Length
Generate the Mural
You’re Finished
Hopefully it worked and the mural looks great. If so you can destroy the redstone blocks and command block.
Tutorial
If you get stuck and things aren’t working right, Check out this tutorial by mitchellcrazyeye.
Acknowledgements
This tool was make possible with what was learned from dandydrank’s how-to on Making Multiple Commands in One Command Block.
Генератор пиксель артов майнкрафт
This generator lets you import png, jpg and gif files and converts them into commands which create the image as a giant mural on your Minecraft map. All this can be done without MCEdit or mods. The generator scans every pixel in the image and chooses the closest color match from the available blocks. The only software you may need is an image editor like Photoshop to create images.
You need to consider how big the mural is going to be when it is placed in your map. This is important as a default Minecraft map has a maximum build height of 255. If you build an mural at sea level (62), this gives you about 193 blocks high to work with. You may need to scale(resize) your image first if it is too high. There is a feature that lets you scale the image. 1 is the original size. 0.5 halves the size and 2 would double the size. Simple! For best results and quicker processing times, you should upload low resolution images to start with which are around 200×200 pixels or less.
This generator attempts to slice the mural into sections as efficiently as possible. Images with fewer colors such as a logo can be created in fewer commands when compared to a photograph.
If the image you have supplied exceeds the Command Block’s maximum character limit of 32,767, The commands will be split into many sections and you will have to copy them into the command block one at a time. This is explained later.
The alpha channel in an image is what controls the transparency. This tool will treat an alpha value of 0 as totally transparent and no blocks will be placed. An alpha value of 1 or higher will not be considered as transparent and will be color matched with the most appropriate block.
Scale:
Set the placement of the mural. Here you just need to decide which direction the player faces when viewing the mural. Murals on the ground are created on the layer directly under the command block. The bottom-left corner of the mural will be under the command block. Some blocks have a different side and top texture. The placement you choose will affect the available textures and will reset the selections you make in step 3.
Choose the blocks you wish to exclude or include. By default all blocks are included but sometimes you may not want certain blocks in the image. To choose your blocks click the checkboxes from each of the groups that you wish to include. If there are any blocks that you want to exclude, just click them. They can be chosen again if you reselect the groups. Tip: If selecting ‘All Blocks’ you may wish to deselect the individual stained glass blocks. They tend to spoil the picture due to their transparency. Blocks that fall (sand, gravel and concrete powder) are now included but murals are now drawn from the bottom up. Exclude falling blocks if the bottom row has no existing blocks under it.
After you have selected the blocks, you can click the ‘Show/Update Preview’ button to see a preview. You will see a large render of what the mural will look like with the chosen Minecraft blocks. You can zoom in and out get an idea about what the mural may look like from a distance.
With this option you can use a datapack containing one or more functions which make the mural. If you use this option, you can then skip all of the other steps below. This is the best option to use if the picture is going to be huge. The commands that create the picture will be divided accross many mcfunction files if required.
This is caused by the picture being too large. The picture cannot be created in unloaded chunks that are too far away. So there is a easy work-around for this:
It works because you are standing in a chunk. The picture wont be created in chunks where there are no active players. Repeat the command until all parts are completed.
This method is only going to work if you are using the Datapack method (Option A) or mcfunction method (Option B).
With this option you can use mcfunction files to create the mural. If you use this option, you can then skip all of the other steps below. Please read the Wiki on Function Files to find out how it works. There is a limitation of 65,536 commands per function file. For a large picture, you may need to divide the function file into smaller files.
Maybe your playing on a server where commands blocks are not allowed. Perhaps you’d like to build the mural manually. Click the button below to view the materials you’ll need.
 You will need to be in creative mode now and you will need to give yourself a command block with this command:
/give @p minecraft:command_block
The mural is built relative to this command block so this will determine where you place the command block. The bottom of the mural will be at the same vertical position (y) as the command block. And it will be built one block to the right of the command block when facing the direction specified in step 3. Place some redstone blocks as shown here.
In some situations, the commands that are generated may be too long and might cause errors when pasted into a command block. In normal situations, the value in the box can be left as is. As the number is reduced, it is likely that more command sets will be produced below. Do not set this value over 32000.
Maximum Command Length
Below you will see the generated commands that you will need to paste into the command block. Large and complex images will have the commands split into many parts while less complex images will have fewer parts.
To generate the image you will need to repeat these steps.
Hopefully it worked and the mural looks great. If so you can destroy the redstone blocks and command block.
Acknowledgements
This tool was make possible with what was learned from dandydrank’s how-to on Making Multiple Commands in One Command Block.
Инструкция как рисовать Pixel-art(пиксель-арт) для Minecraft в программе MinecraftStructurePlanner
Недавно я с трудом нашел эту чудную программу MinecraftStructurePlanner, которая позволяет быстро, легко, и, главное, качественно нарисовать пиксель-арт в Minecraft.
В программе есть и другие функции: постройка мостов и зданий, но их я не трогал, речь идет только о Pixel-art.
Как я уже сказал, я давно искал программу для планирования пиксель-арта для майнкрафт, или хотя бы программу для перевода картинок в пиксель-арт.
Несколько слов о дополнительных функциях программы, в ней можно задать блоки из Minecraft с помощью которых программа и выполнить рисунок.
Можно выбрать разрешение картинки в игре, например высота 100, ширину она подберет сама.
Программа покажет, сколько понадобится ресурсов для постройки данного пиксель-арта.
Программа импортирует рисунок схему в специальный файл, который вы позже другой программой такой как MCEdit, вставить в мир Minecraft, то есть даже строить ничего не придется, изготовили, залили, наслаждаетесь.
Саму программу качайте на этой странице MinecraftStructurePlanner
Теперь по самой технологии изготовления пиксель-арта:
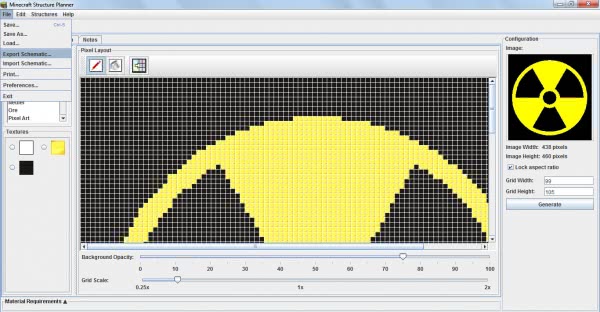
•1. Находим не сложный рисунок, допустим такой:
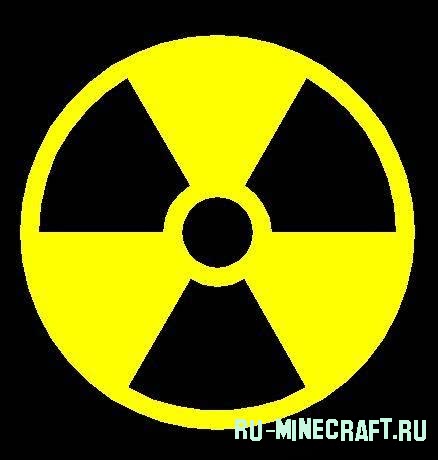
Простой рисунок, цвета черный и желтый, самое то для начала.
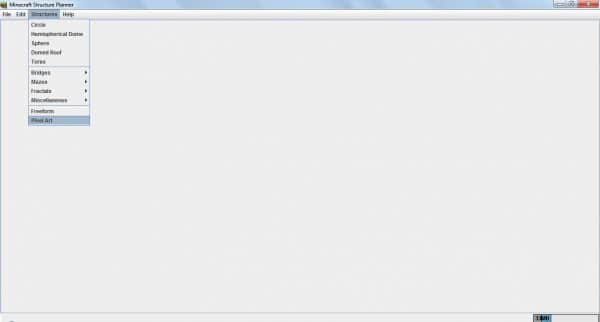
•2. Открываем программу (она между прочим написана на джаве и вы не запустите ее если у вас не стоит джава машина).
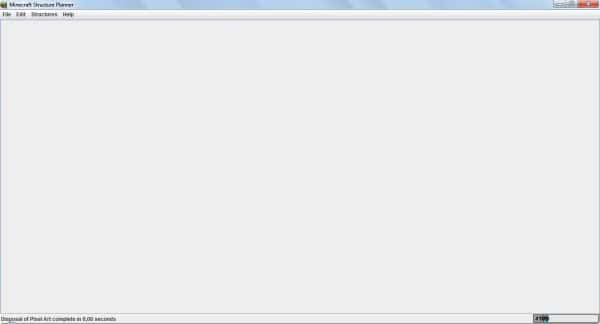
•3. Первым делом нам надо отредактировать палитру, в нашей картинке используется всего 2 цвета, черный и желтый, поэтому разумно сделать палитру и черной шерсти и кубов золота (оно ярче).
Важно отобрать только нужные блоки, так как программа не идеальна, и картинка тоже, в итоге много где могут вылезти ненужные блоки, например, земля или прочее, вы сами в этом убедитесь, когда выберете полную палитру.
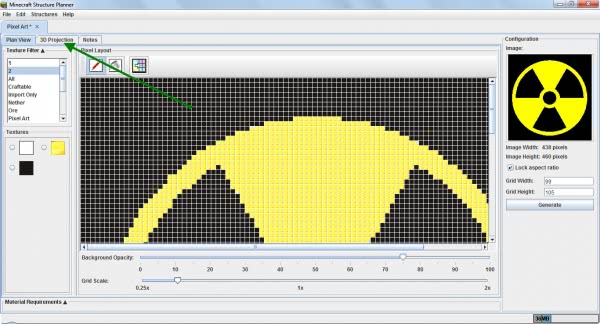
Для этого открываем эту вкладку и выбираем выделенный пункт:
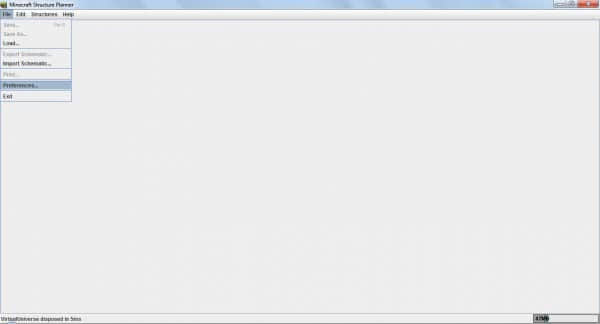
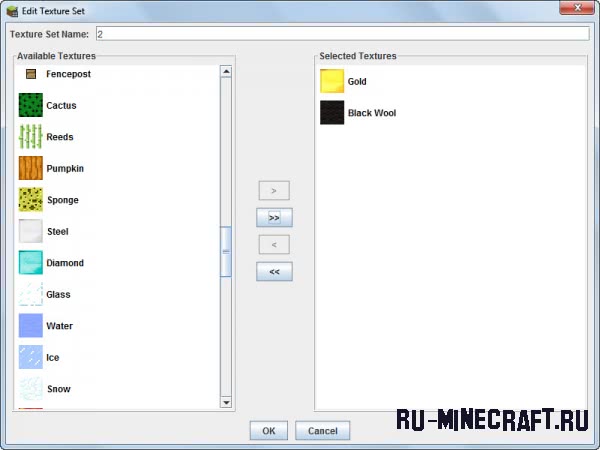
•4. Видим данную картину:
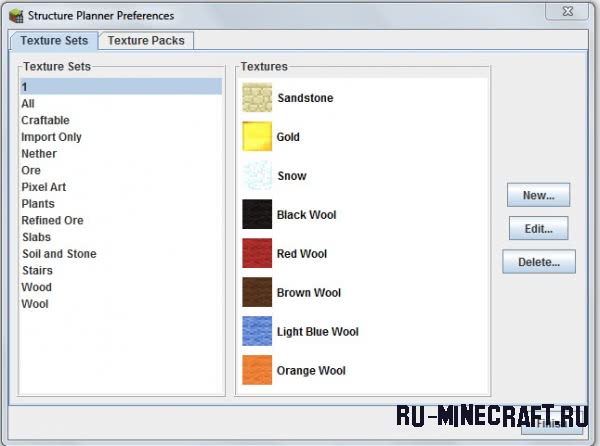
Жмем New и называем его например 2, и добавляем туда блоки золота и черную шерсть.
•5. Палитра готова, теперь заходим в раздел для пиксель-арта

•6. Готово, теперь справа добавляем необходимую картинку и выбираем необходимую высоту рисунка в игре (я выбрал 100, ширина выставилась автоматически).
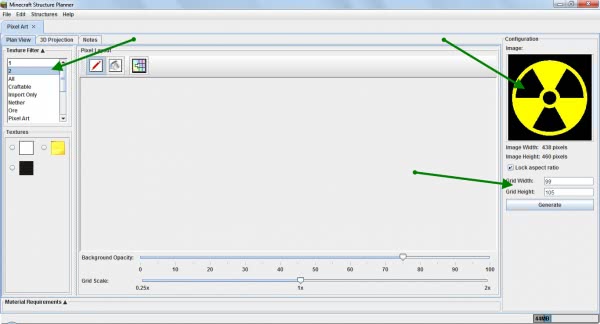
•7. Все готово, теперь жмем кнопку Generate (под картинкой, где выставляли размер) и получаем картинку в пиксель-арте, но она еще не в блоках игры.

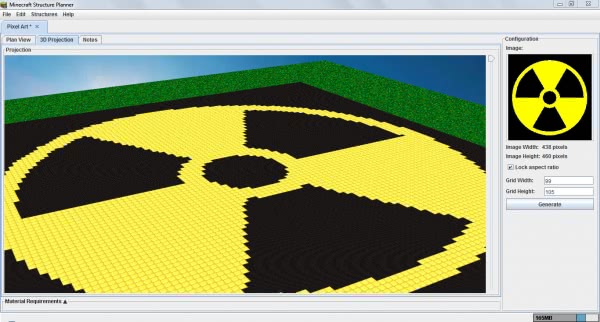
•8. Далее жмем кнопку перевода картинки в пиксель-арт из блоков Minecraft:
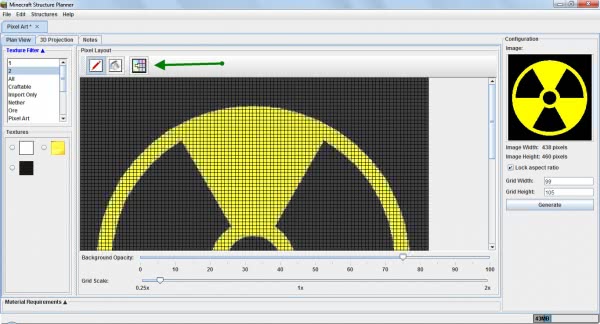
•9. Вот и все, пиксель-арт готов:
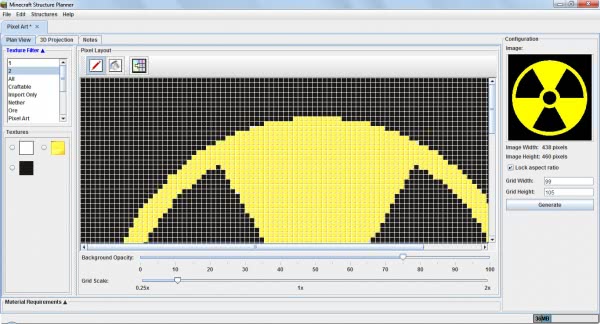
•10. Если вас что то не устраивает, вы можете вручную изменить каждый блок на любой другой, выберете его на палитре и ткните в нужный блок.
•11. Можно посмотреть 3D модель картинки, как она будет выглядеть в игре, для этого нажмите 3D Projection:
•12. Смотрим на результат.
•13. Сколько нужно ресурсов для постройки?
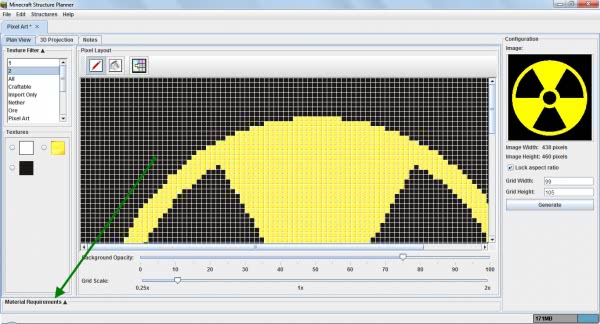
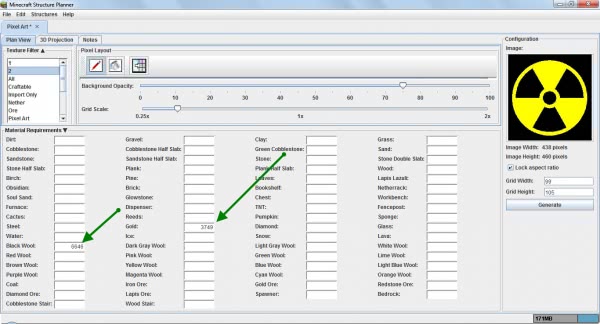
Всё видно, понадобится 6646 блоков черной шерсти и 3749 золотых блоков.
•14. Сохраняем готовую картинку
•15. Выбираем, формат готового выходного файла

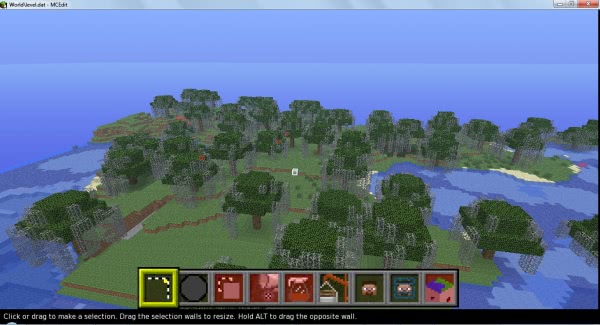
Дальше я расскажу как вставить готовый файл в мир при помощи McEdit.
Тут я не буду расписывать все очень подробно, открываем программу, и открываем нужный мир.
Управление происходит кнопками W, A, S, D ( движение вперед, назад, вправо, влево соответственно).
Так же правая кнопка мыши позволяет крутить камеру.
Теперь жмете импорт (в меню снизу картинка крана) и добавляете готовый файл (разрешением schematic).
Как видите картинка уже есть в мире, ее необходимо развернуть и вставить.
Кнопки управления написаны левее, методом тыка разберетесь.
Картинка у меня вышла очень большая, и она наполовину ушла в землю.
Pixel Papercraft
The Generator Builder will help you make your own generators that may be featured on the site.
Generators are an advanced topic and require some basic JavaScript programming skills.
See the Quick Start below to get started, then read the Generator Programming Guide for more details.
Get in touch via the Contact page for help.
Generator Developers
If you’d like to create a generator (even if it’s not in this list) then let us know.
| Pig | aaronhawksley |
| Pig (Advanced) | TepigMC |
| Pig Character | aaronhawksley |
| Sheep | Not Made |
| Sheep Character | Not Made |
| Spider | Not Made |
| Spider Character | Not Made |
| Squid | Not Made |
| Squid Character | frownieman |
| Villager | Not Made |
| Villager Character | Boe6Eod7Nty |
| Wither | Not Made |
| Wolf | Not Made |
| Wolf Character | dodecaphon |
1. Choose the Generator Images
Select all of the images that your generator will need (you can select multiple at a time).
This may include a background, folds and maybe a labels image. You might also include several textures that users can choose from.
2. Write the Generator Script
Now you can write your generator script.
Quick Start
Here’s a quick tutorial to get you started.
Step 1
Download the following files
Step 2
In the Generator Images section, select the Background.png and Folds.png files.
Step 3
Enter the following Generator Script:
Next, we need to identify the rectange on the page.

It needs to draw onto the page as a bigger rectangle with the following coordinates and size:
x = 138
y = 89
width = 64
height = 64
In JavaScript we write this as:
Notice this is made up of several parts:
Tip: If you’re using Gimp then if you select the rectangular region on the skin or the rectangular region on the template then Gimp will show you the x and y position plus the width and height.

In this example we have:
x: 138
y: 89
w: 64
h: 64
Rotating and Flipping Textures
Textures can be rotated and flipped when you use Generator.drawImage().
Example: Rotate a texture 90 degrees.
Notice that we added
Example: Flipping a texture horizontally or vertically.
You add either
Example: Flipping and rotating a texture.
You can put both flipping and rotating together
Drawing Text
Text can be added to your page using Generator.drawText().
Example: Write the text Pixel Papercraft on the page at coordinates x = 100 and y = 150;
Generator.drawText( ‘Pixel Papercraft’, 100, 150 );
Example: Different font styles.
Generator.drawText( ‘Pixel Papercraft’, 10, 20,
Example: Different sizes.
Generator.drawText( ‘Pixel Papercraft’, 10, 80,
Example: Different fonts.
Generator.drawText( ‘Pixel Papercraft’, 10, 140,
Example: Different alignments.
Generator.drawText( ‘Pixel Papercraft’, 10, 180,
Example: You can combine any of the above:
Adding Comments to your Program
Comments are lines that start with //
They are just notes to yourself and help you to remember what’s going on it parts of the program. You can put anything after the // and it will be ignored.
Adding Variables to your Program
So far your programs look something like this.
One of the challenges is that if you wanted to move the head to a new position on the page then you would need to update the target x and y coordinates for all six of those lines. That’s 12 numbers to change.
This program can be improved by using variables.
// Define the variables we need to use // This only gets written at the very top of your program var ox; // ox means ‘origin x’ var oy; // oy means ‘origin y’ // Head ox = 74; // The head starts at 74 pixels across oy = 25; // The head starts at 25 pixels down Generator.drawImage( ‘Skin’,
Now if we wanted to move the position of our head we only need to change 2 numbers instead of 12.
The complete program looks like this:
// Define variables var ox; var oy; // Background Generator.drawImage(‘Background’); // Head ox = 74; oy = 25; Generator.drawImage( ‘Skin’,
Using Multiple Pages
By default the builder gives you one blank page to work with, however some designs may require more than one page.
To specify additional pages you can use the Generator.usePage() function. You just have to choose a name for each page, which can be any name you like.
If each page doesn’t have a specific purpose, just call them Page 1, Page 2, etc.
Handling Transparent areas
If a texture has transparent parts then they will draw correctly. Unfortunately for some textures (especially Minecraft character skins) the transparent areas, such as the hat/helmet, are not actually transparent. Instead they are just a solid colour like black or white.
To handle this there is an extra option can set in your script. To make a section that’s all one colour become transparent:
// Make solid colours transparent Generator.setImageOption(‘Skin’, ‘solidColorIsTransparent’, true);
And to go back to drawing the solid colours again:
// Make solid colours non-transparent Generator.setImageOption(‘Skin’, ‘solidColorIsTransparent’, false);
Getting User Input
It’s sometimes useful to give your user some choices in your generator.
For example, some people want the fold lines, and others don’t. Your generator might have a saddle to turn on or off, or a list of weapons they can choose from.
Boolean Variables
Boolean variables are a true or false choice. They may be used to show or hide certain parts of your generator.
// Define user variables Generator.defineBooleanVariable(‘Show Folds’, true); Generator.defineBooleanVariable(‘Show Labels’, true);
These should be written at the top of your script.
This will create two variables that will show up as a check box options when you run your generator script.
The first argument is the name of the variable.
The second argument is the inital value of the variable. It must be either true or false
To make use of these variables we need some extra code:
// Get user variables var showFolds = Generator.getVariable(‘Show Folds’); var showLabels = Generator.getVariable(‘Show Labels’); // Folds if (showFolds) < Generator.drawImage('Folds'); >// Labels if (showLabels)
Here we first get the current values of the variables, and then later in the program we use them to decide if we should show the Folds and Labels images.
Range Variables
Range variables let your user choose a value between two numbers.
// Define user variables Generator.defineRangeVariable(‘Head Width’,
This should be written at the top of your script.
This will create two variables that will appear as sliders on most browsers (in older browsers it will be an input box).
The first argument is the name of the variable.
The second argument defines the range of values:
To make use of these variables we need the following code:
// Get user variables var headHeight = Generator.getVariable(‘Head Height’); var headWidth = Generator.getVariable(‘Head Width’); // Show the width and height Generator.drawText(headWidth, 10, 10); Generator.drawText(headHeight, 10, 30);
Here we first get the current values of the variables, and then later in the program just print them as text on the page but you can use those numbers for any purpose.
Select Variables
Select variables let your user choose from a list of values that you provide.
// Define user variables Generator.defineSelectVariable(‘Armor Style’, [‘Diamond’, ‘Gold’, ‘Bronze’]);
This should be written at the top of your script.
This will create a variable that will appear as select list.
The first argument is the name of the variable.
The second argument is an array of values the user can choose from. The first item in the array is the default value.
To make use of these variables we need the following code:
// Get user variables var armorStyle = Generator.getVariable(‘Armor ‘Style); // Show the selected style Generator.drawText(armorStyle, 10, 10);
Here we first get the current values of the variable, and then later in the program just print them as text on the page but you can the selected value for any purpose.
Providing Texture Choices
It’s sometimes useful to let your user choose from a set of available textures rather than finding their own.
For example, you might provide a set of armour textures or weapon textures and the user can choose which one they want to use. can choose one.
1. Select the textures you want to use
In the Generator Images section above, add and name all of the images you want to use.
Suppose you added images named Diamond Armour, Gold Armour and Bronze Armour.
2. Add the choices to your input textures
Add a choices property to you input definition which just lists all of the texture choices.
© 2020 Pixel Papercraft. Read our Privacy Policy.